


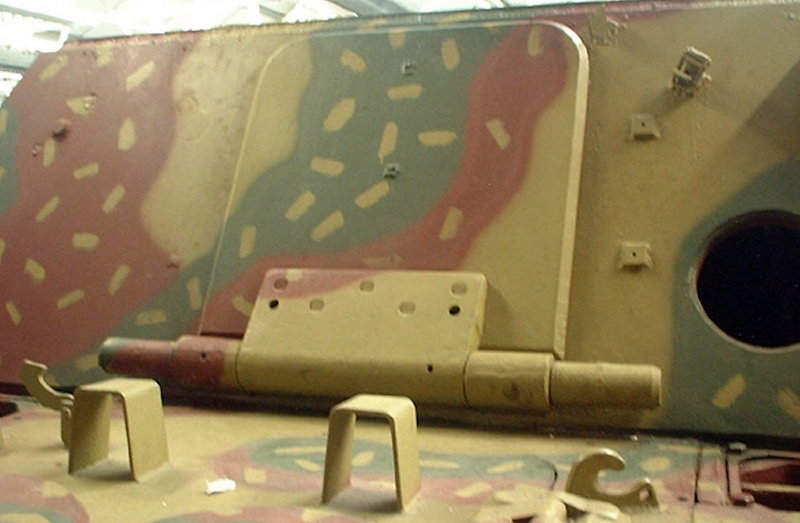
Tamiya Jagdpanther
 01-03-2021, 12:53 PM
#26
Panther F thanks for looking . I like to solder on wire fixings when using brass, drill thro hull bend the wire and blob of thick superglue to stop bits falling off .Usually the only damage is stuff getting bent over .A little damage adds character .

The following users liked this post:
Panther F (01-03-2021)
01-06-2021, 10:36 AM
#27
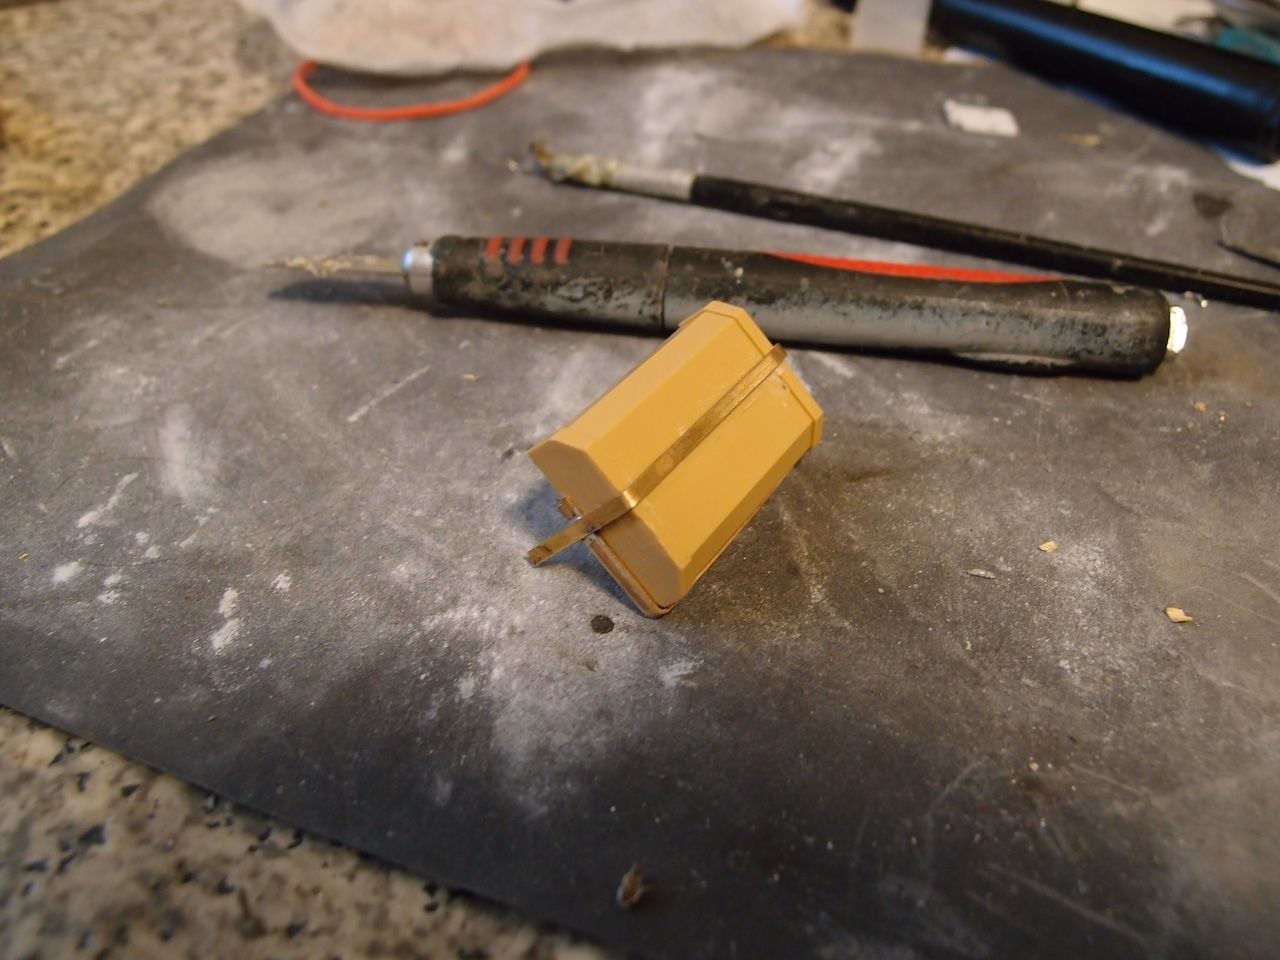
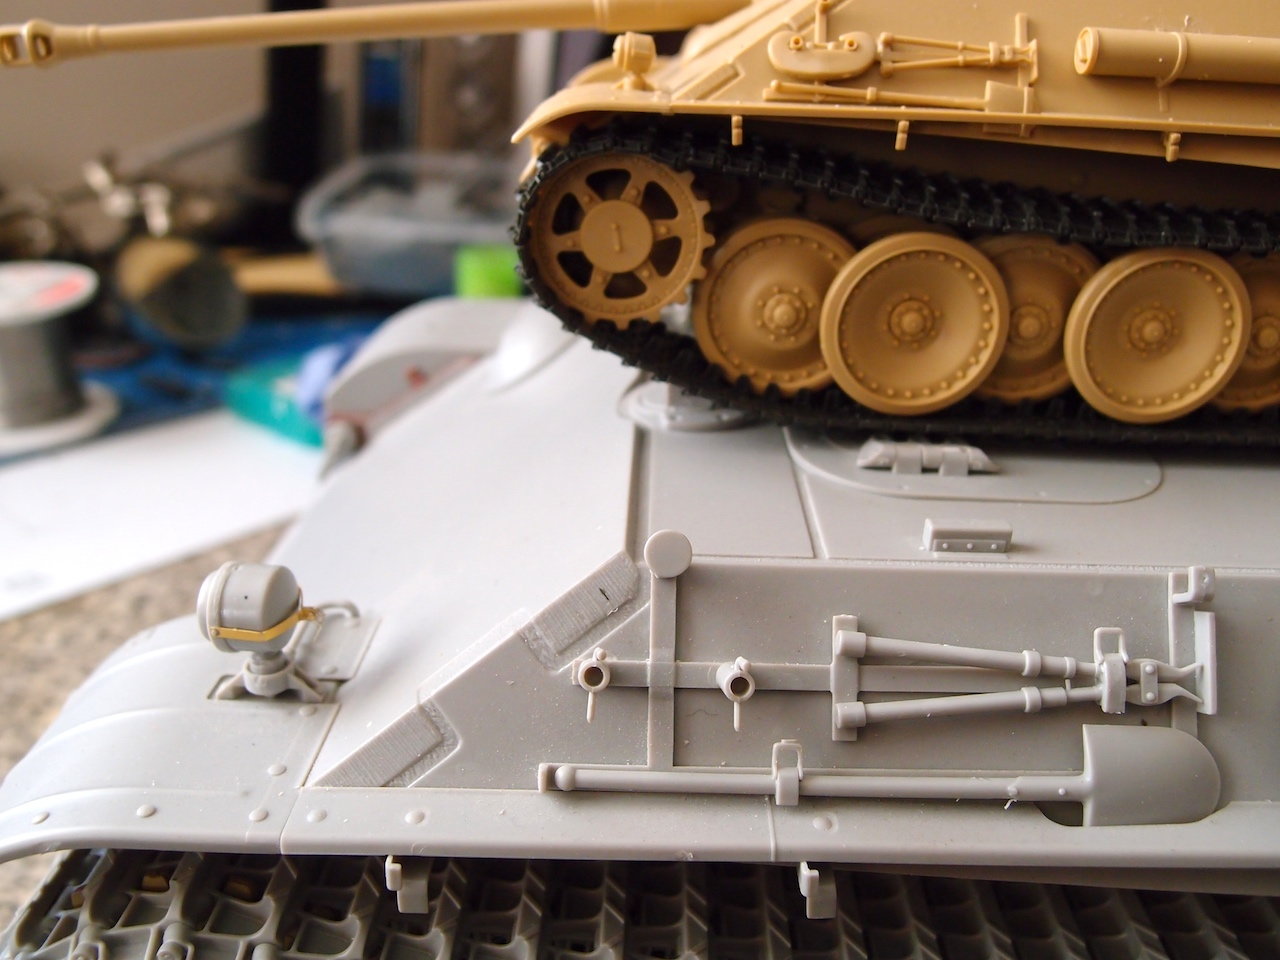
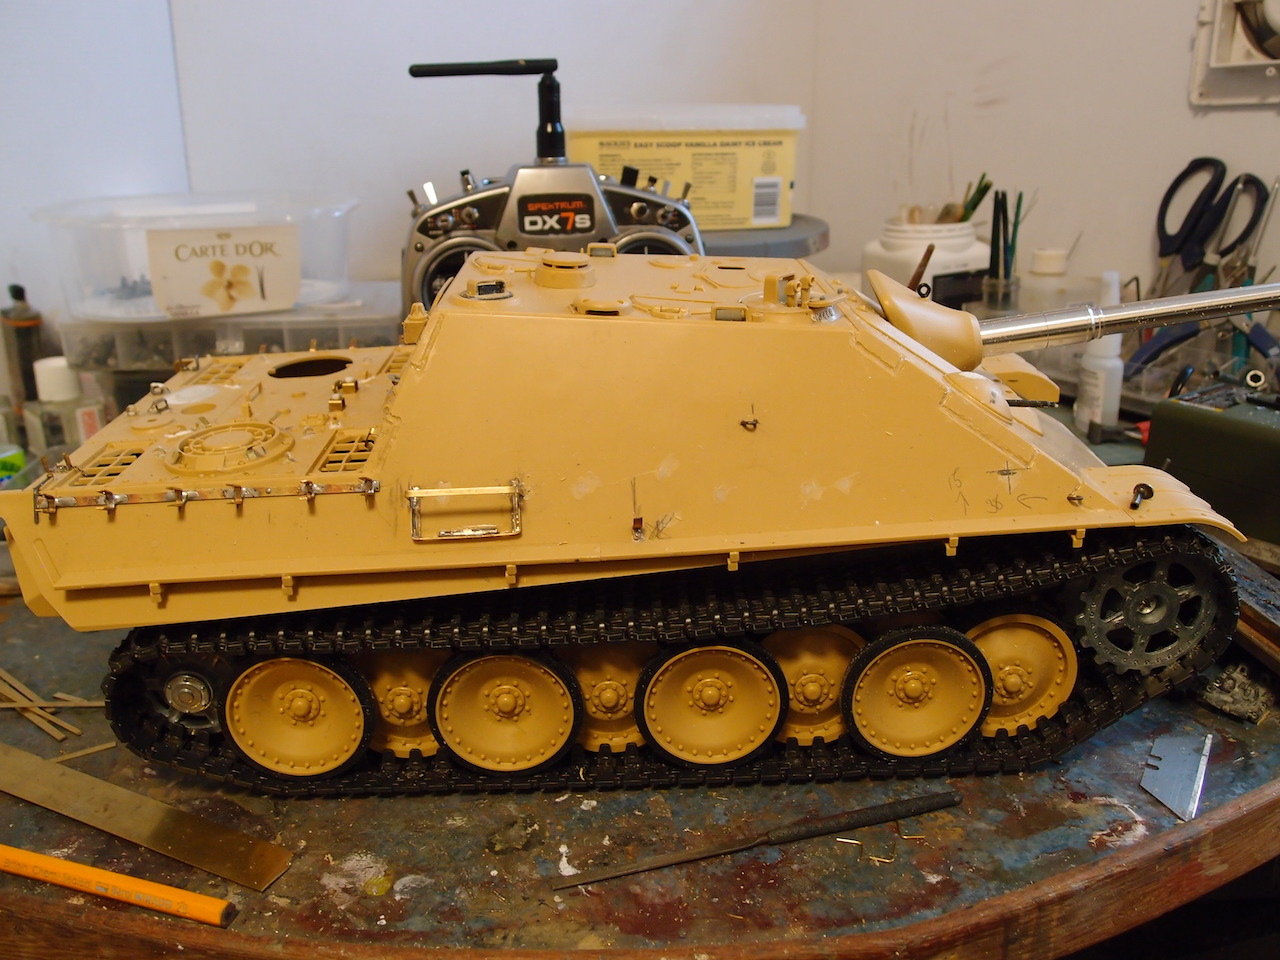
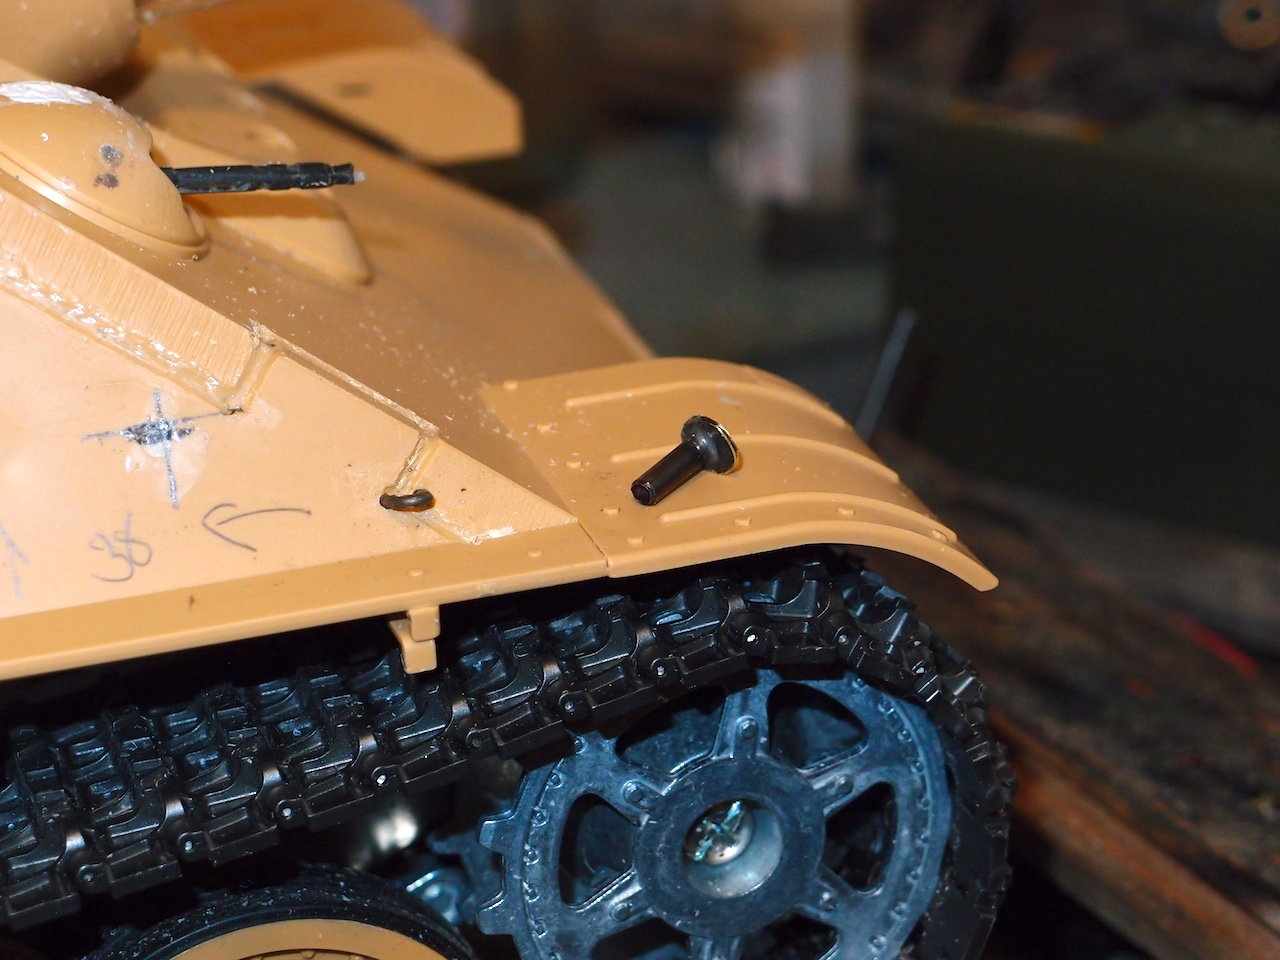
Working on the engine deck, removing the blobs and replacing with brass and some sprue glue. I think Tamiya missed a trick by not updating the kits or providing upgrade sprues to improve the detail or change a version of the tanks. Removed the blobs for the lifting hooks, the tow brackets at rear and the standoffs for the hatch. Made new tow cable brackets.
Lifting hooks, why did Tamiya not include them. Going to make the rear hatch standoffs with the rubber bump stops.
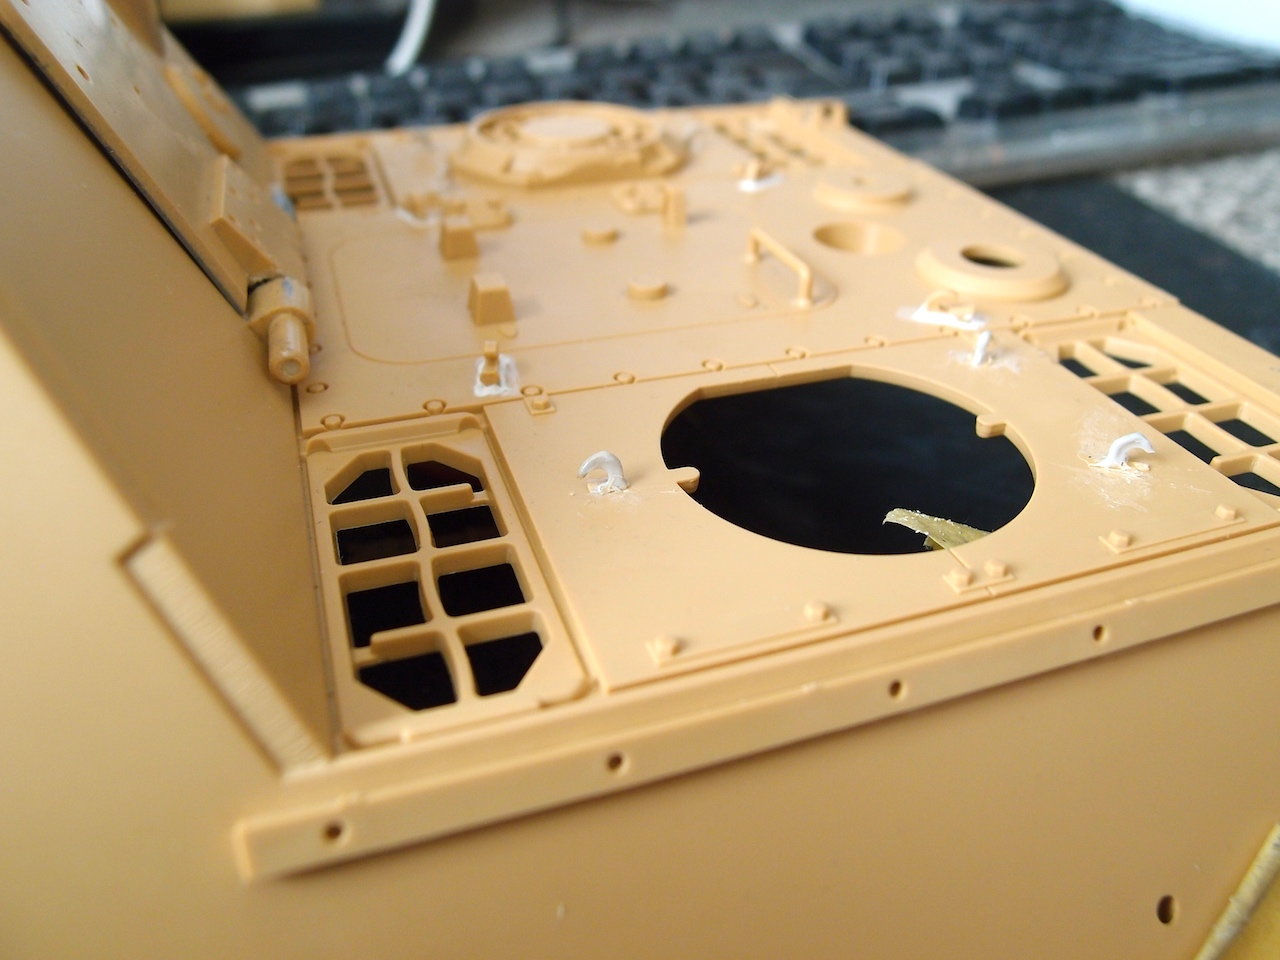
Lifting hooks made with brass wire bent into shape and built up with sprue glue.

The hatch standoffs should not be solid.
Ready for the brass, cut 2 slots to secure the part.
One done with styrene tube to represent the rubber bump stop
Another tank with taller brackets no rubber bump stop

The plastic part was not to scale
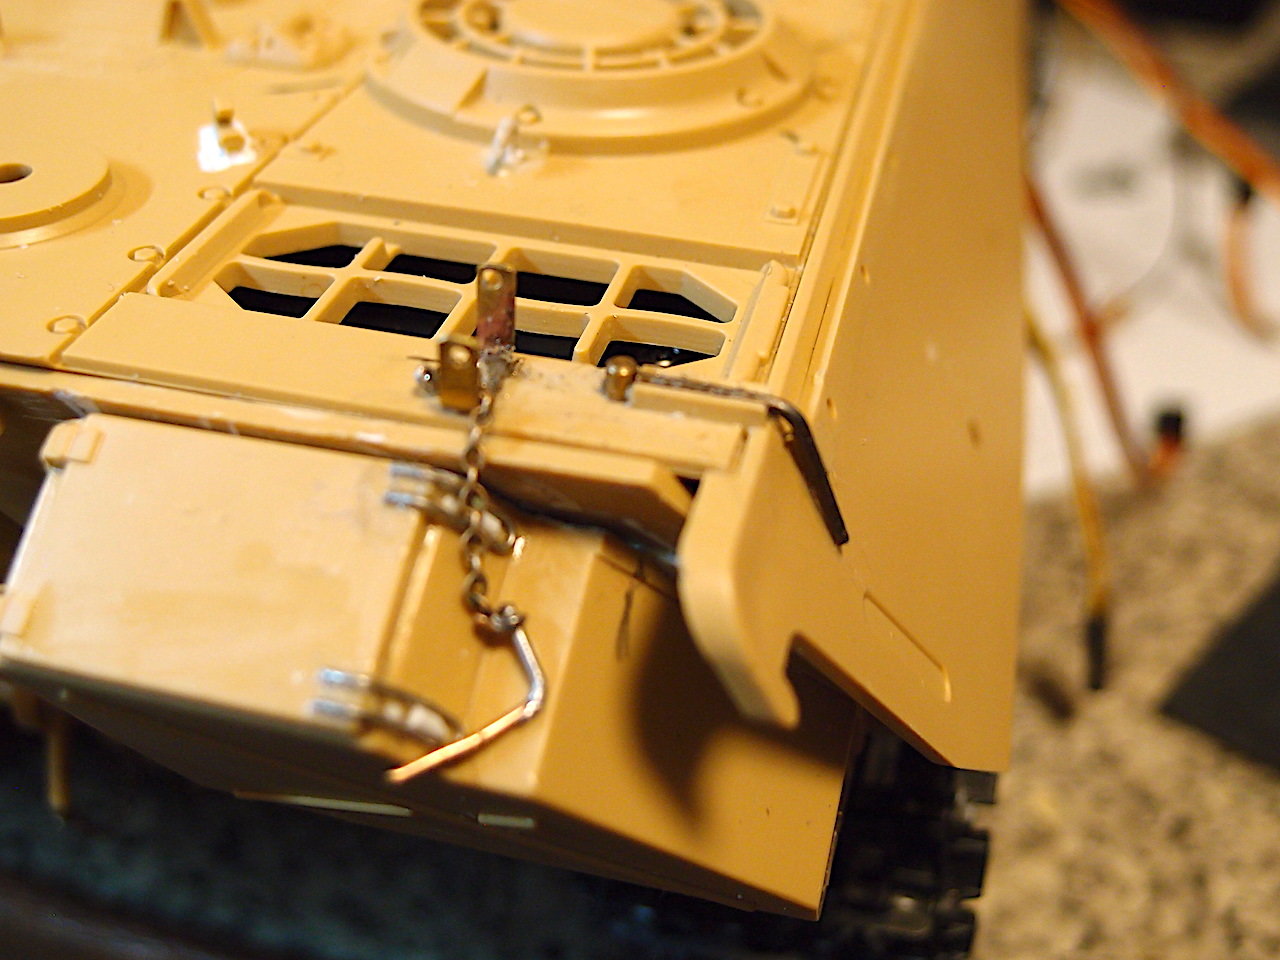
The breather tube in brass, extended it as the late Kingtigers had 4 long fuel breather tubes to reduce the chance of a fire.
Lifting hooks, why did Tamiya not include them. Going to make the rear hatch standoffs with the rubber bump stops.
Lifting hooks made with brass wire bent into shape and built up with sprue glue.
The hatch standoffs should not be solid.
Ready for the brass, cut 2 slots to secure the part.
One done with styrene tube to represent the rubber bump stop
Another tank with taller brackets no rubber bump stop
The plastic part was not to scale
The breather tube in brass, extended it as the late Kingtigers had 4 long fuel breather tubes to reduce the chance of a fire.
The following users liked this post:
Panther F (01-06-2021)
01-07-2021, 03:20 AM
#28
We are back in lockdown , time to catch up with building. The Tamiya jack block has issues, they have only moulded the cross piece and missed out the side and bottom parts of the rack. Tamiya has one advantage that as you have to build them you can fix issues during the build rather than pull apart and fix. Have had a look at late Jagdpanther jack block positions some had them moved back beside the track hangers or on the rear deck.
The brass strip i will use for the track hangers looks fine for the rack.

Removed the moulded bar across the centre of the block.
Rack made up , the brass is thinner so nearer scale for the sheet metal rack.
Block fits and extended cross bar for a fixing onto the tank.
The brass strip i will use for the track hangers looks fine for the rack.
Removed the moulded bar across the centre of the block.
Rack made up , the brass is thinner so nearer scale for the sheet metal rack.
Block fits and extended cross bar for a fixing onto the tank.
 01-20-2021, 02:56 PM
#30
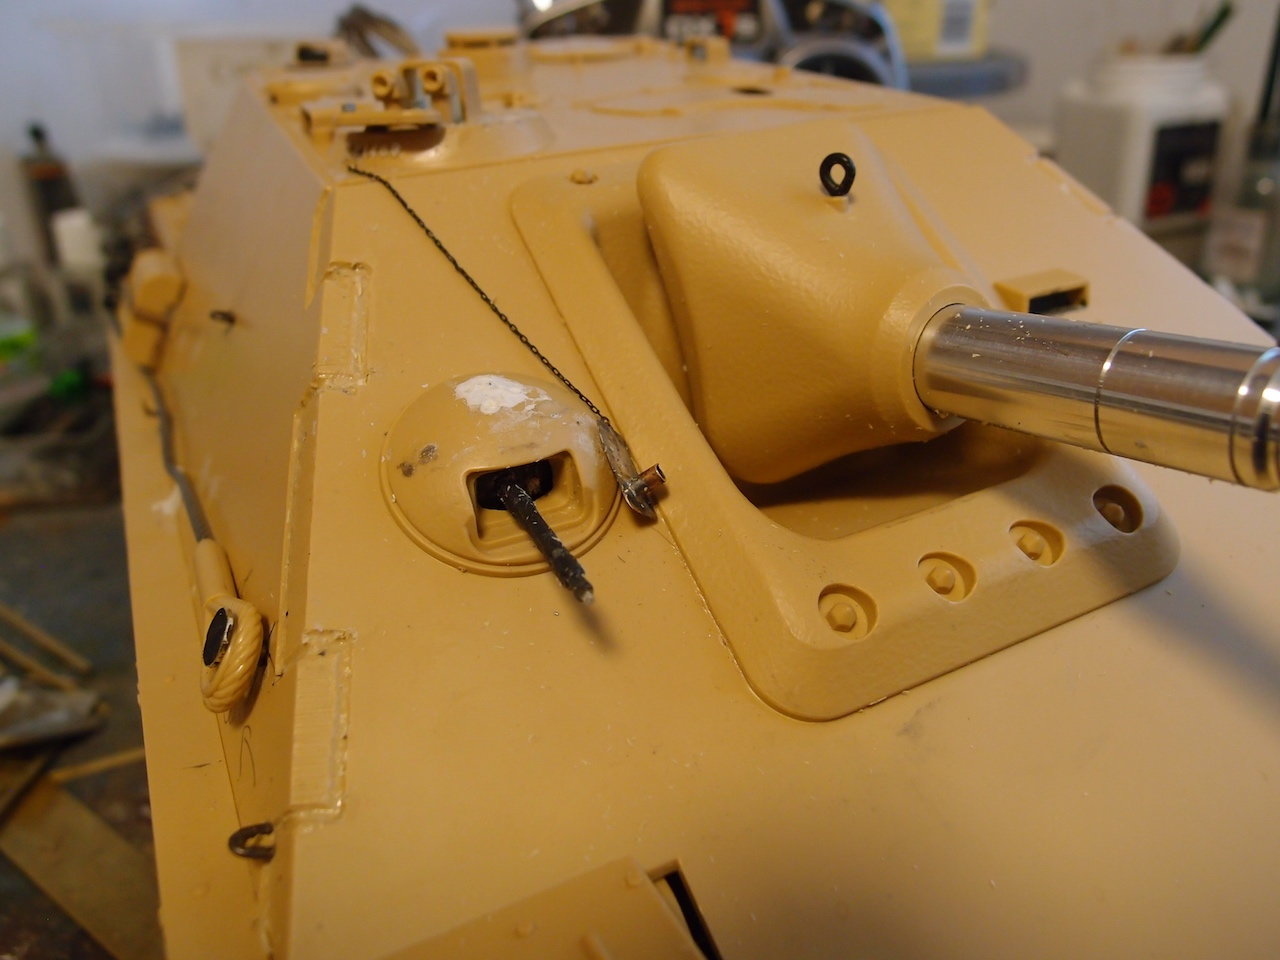
Started on the rear upper hull, antenna cut down and moved up . Was wondering why the shovel would not fit antenna should be level with top of rear hatch and square not rectangular.Using thin brass strip instead of the Aber stuff, it too fragile , wish they made a thicker etched sheet for the 1/16. Shortened the shovel fitted clamp and bar, made up the fire extinguisher bracket bolts on the antenna box look big but may look better when painted.

Bolts look big , once painted they may look better

Fire extinguisher will be held on with magnets, shovel can be removed means i can tools on or off.
Block is a good fit, have the pe to add to the block
Bolts look big , once painted they may look better
Fire extinguisher will be held on with magnets, shovel can be removed means i can tools on or off.
Block is a good fit, have the pe to add to the block

The following users liked this post:
ronnie42 (01-22-2021)
01-22-2021, 04:48 AM
#32
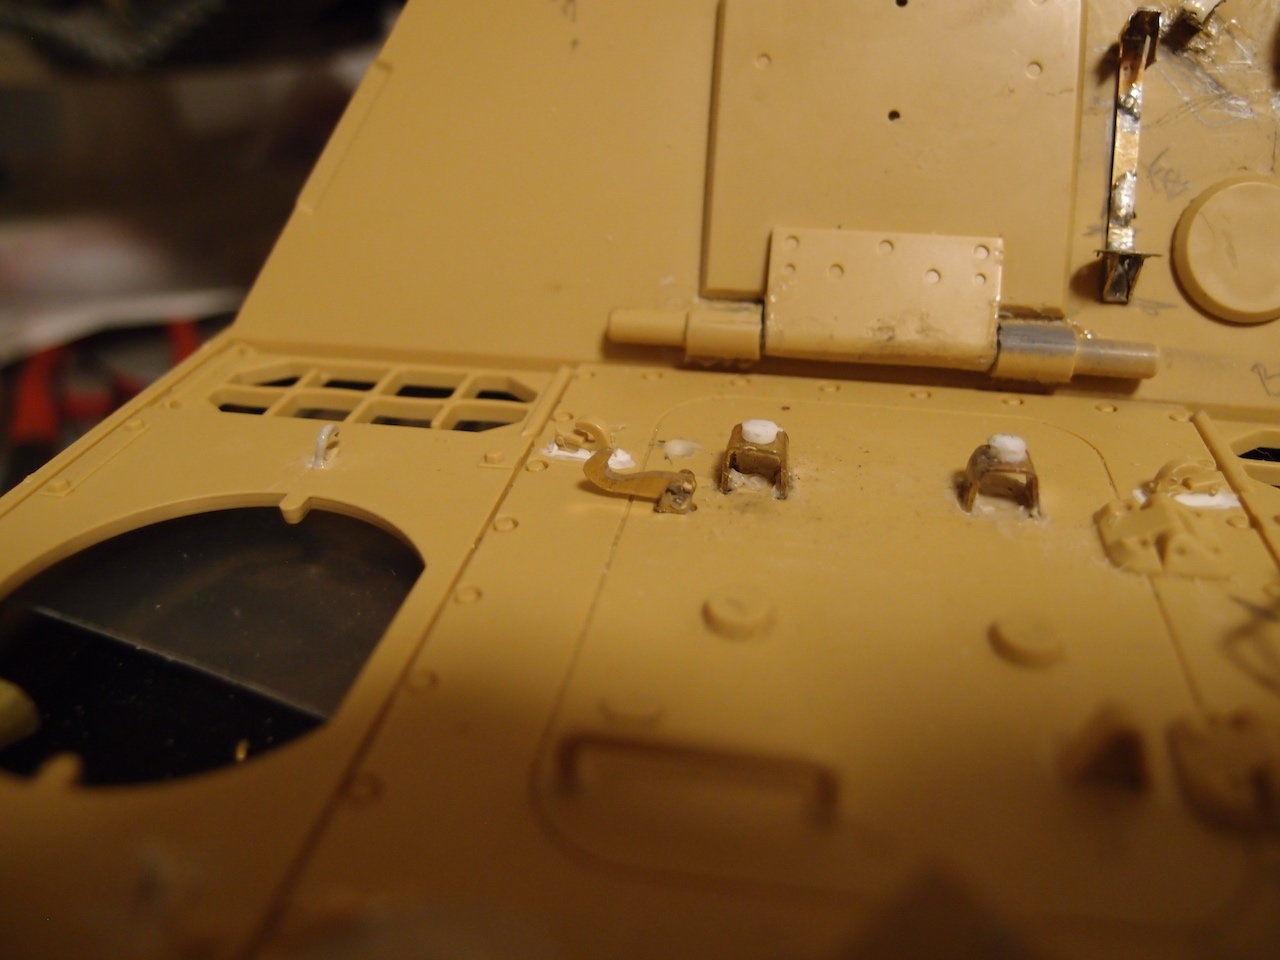
The hatch clip is an ace detail, going to copy. Have looked everywhere for the schumo small lifting hooks, all i can find are the styrene ones . Think the 3d stuff has taken over but its too thick for most 1/16 detail stuff. Have been looking at resin printers as the finish is supposed to be much better.
01-22-2021, 04:57 AM
#33
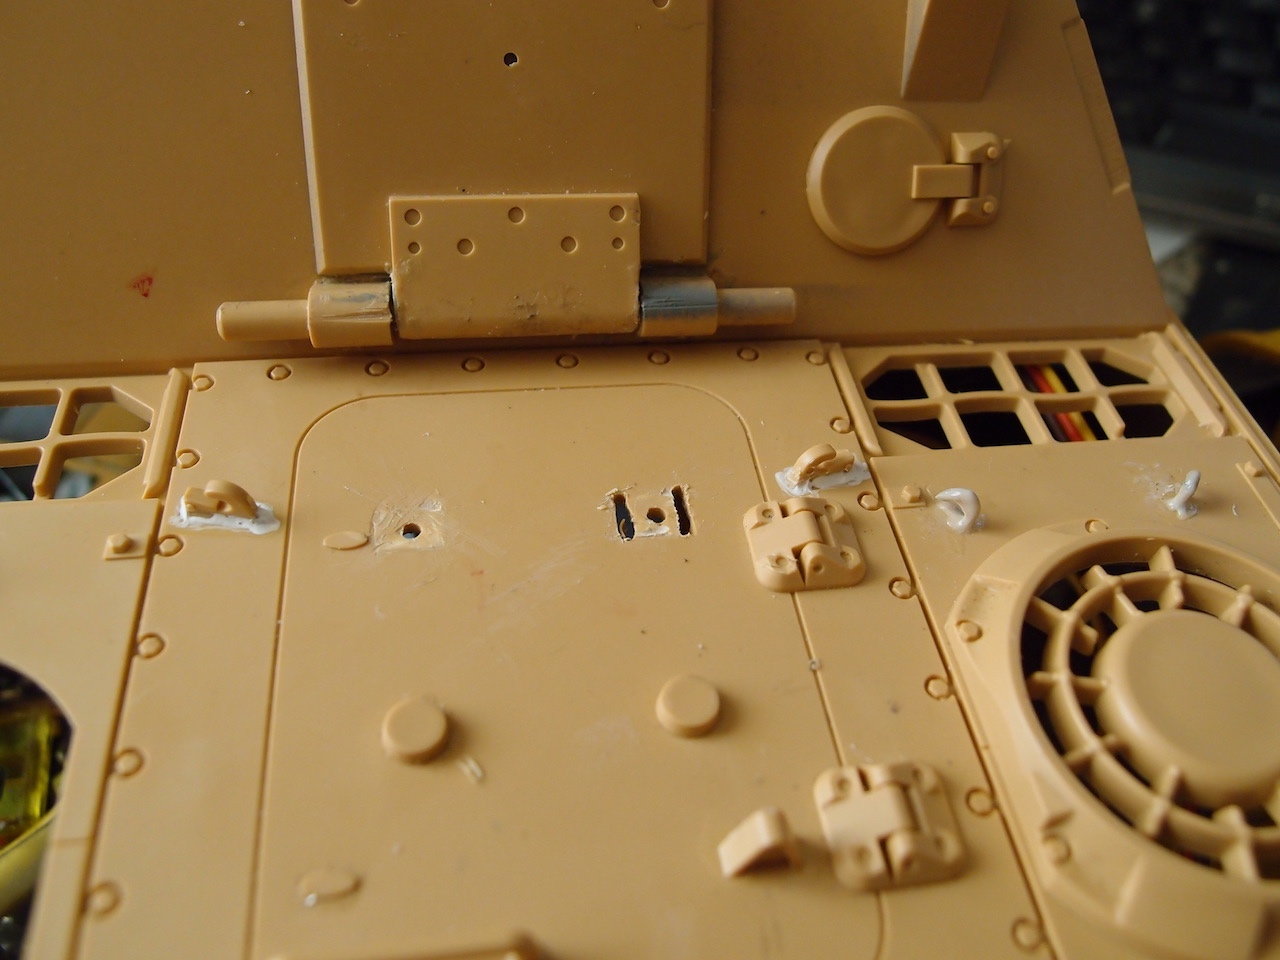
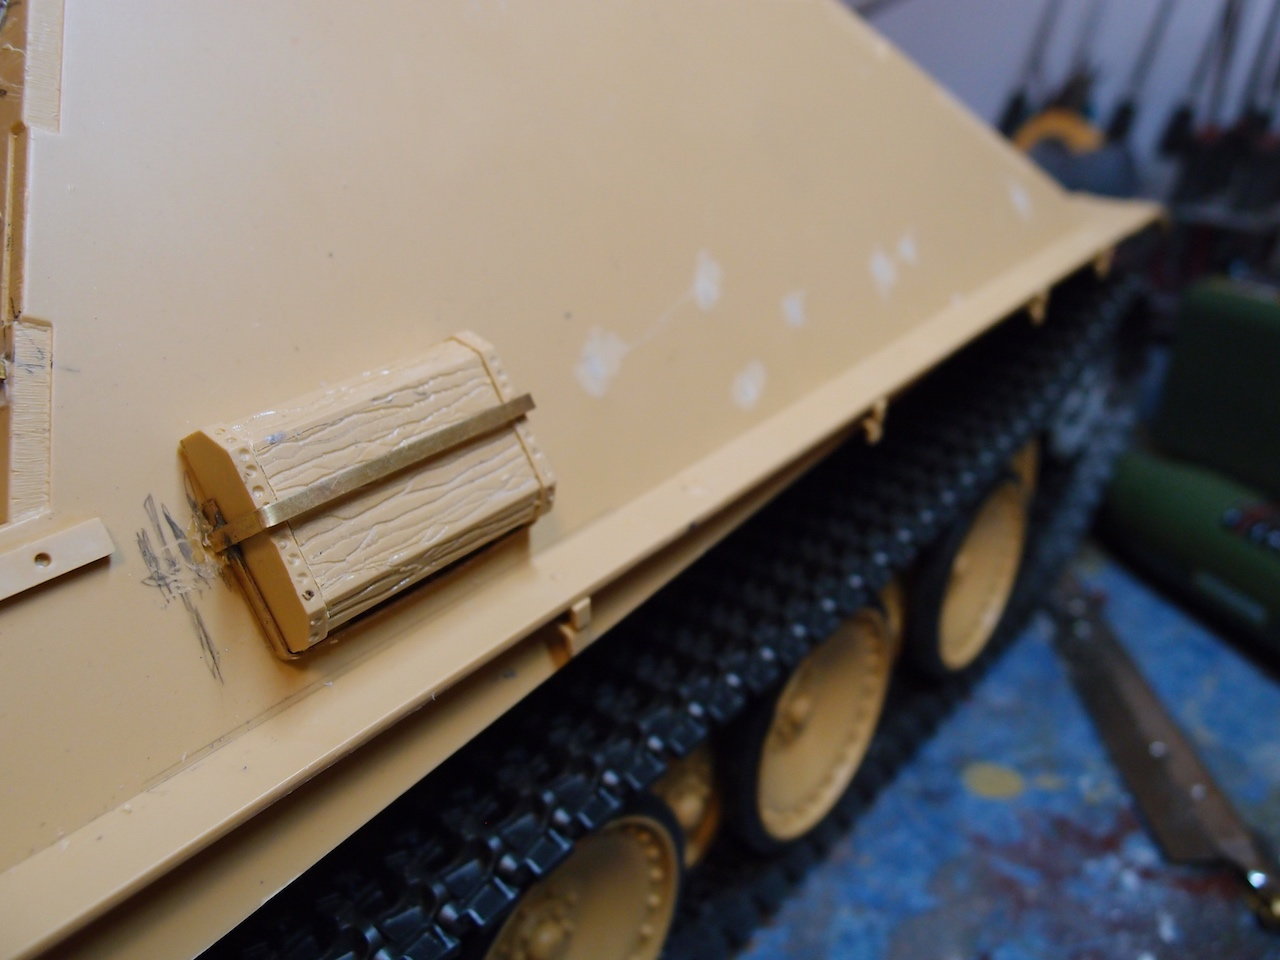
The last of the tools are on the rear deck , just the plates round the fan for the track cable to do. Cut off all the bolt heads on the engine air vent, i had better order up a packs of bolts as they were my last ones and are big.
Tool clamps for the hammer and axe , the late bolt version of the vent and late filler base.
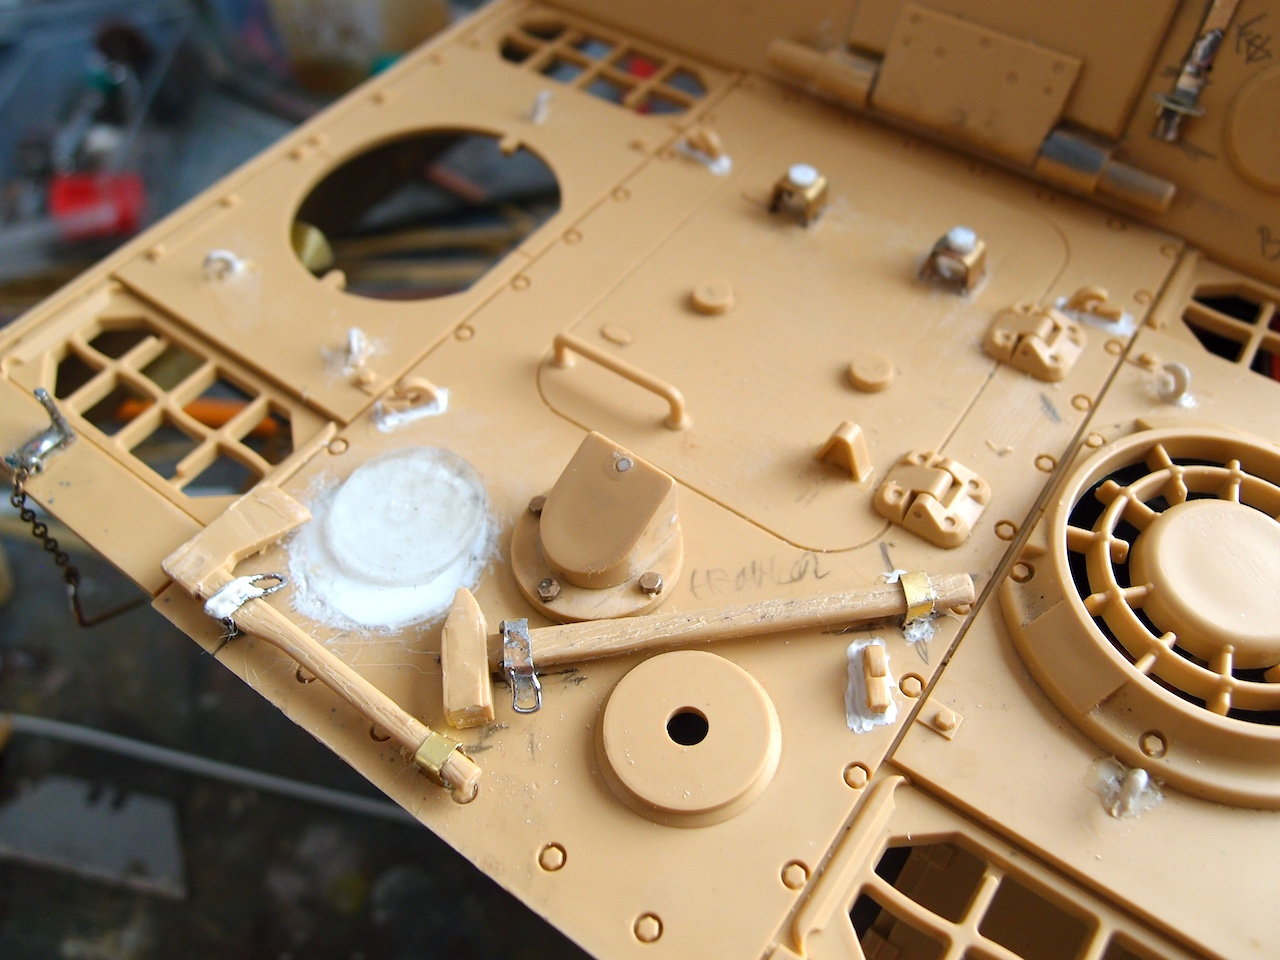
Tools fitted
Tool clamps for the hammer and axe , the late bolt version of the vent and late filler base.
Tools fitted
Last edited by ronnie42; 01-22-2021 at 05:37 AM.
01-22-2021, 02:12 PM
#35
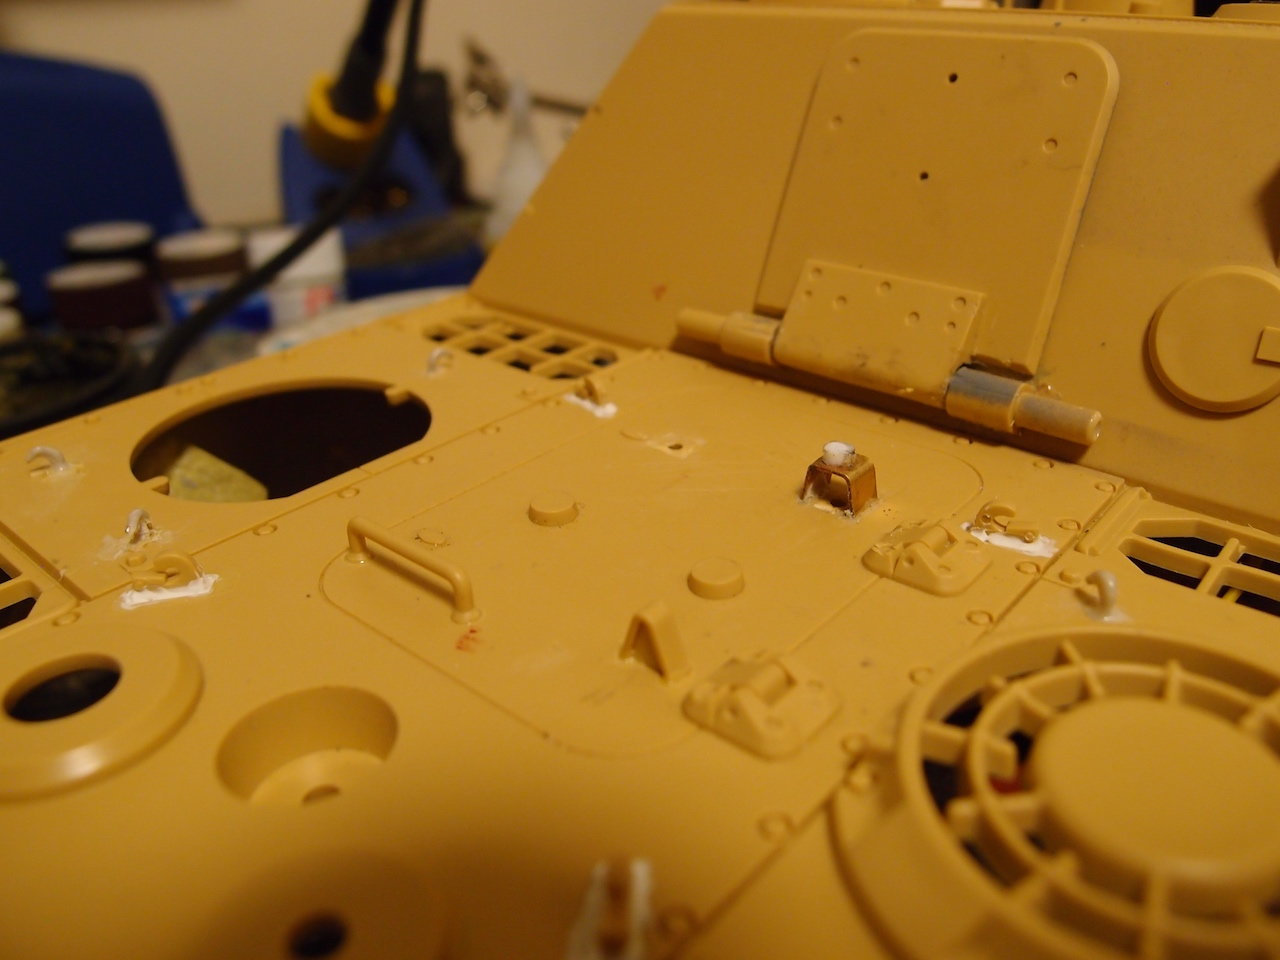
Some more work on the rear deck, just had to do Buckeyes latch detail .Metal strips on the fan cover and made up the track cable
Latch in brass this one is 3rd time lucky, tip drill the hole in latch before making the shape.
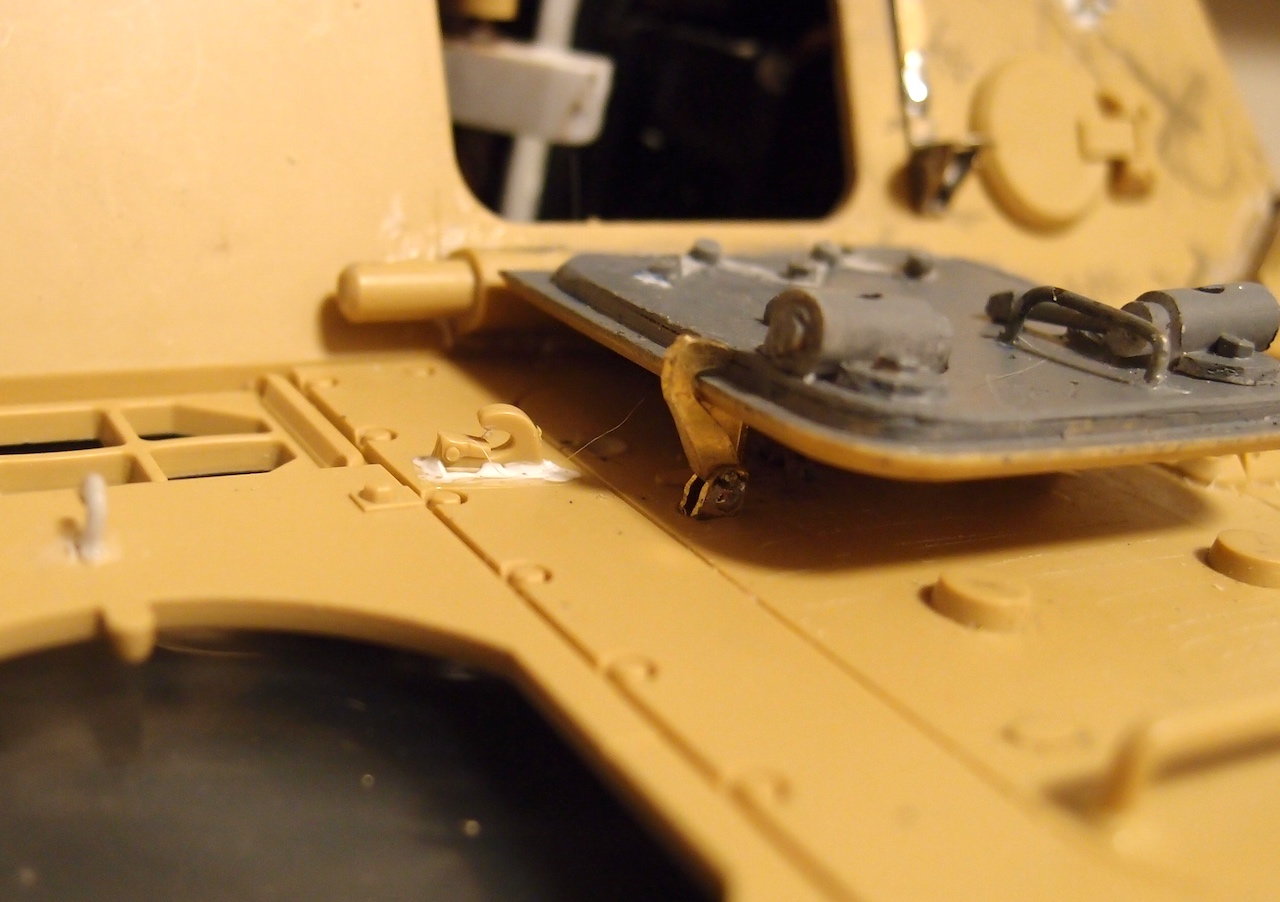
Locking down the rear hatch.
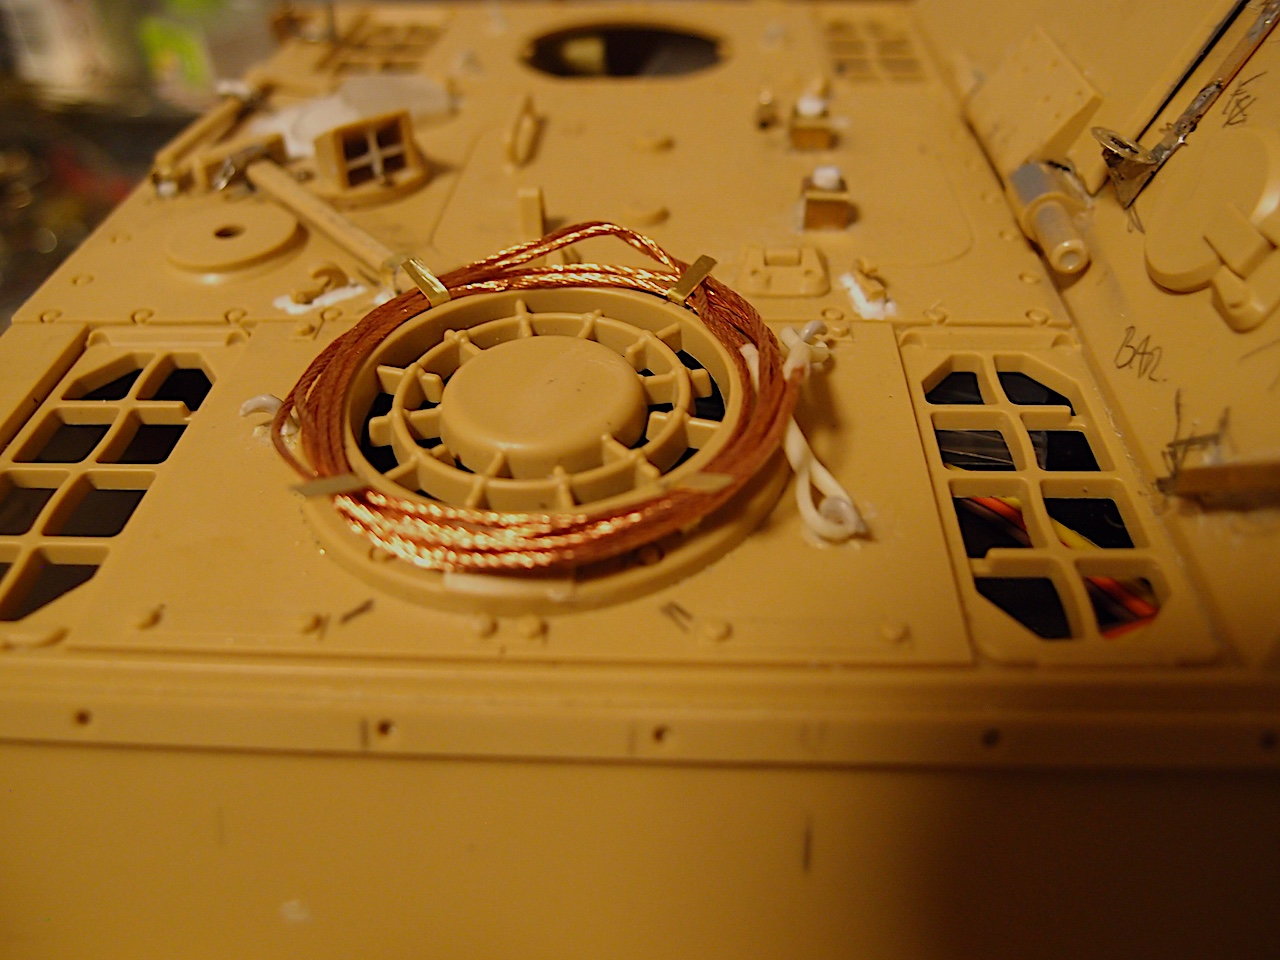
The late / G2 track cable position, Voyager Tiger 1 PE set includes track cable and eyes
Latch in brass this one is 3rd time lucky, tip drill the hole in latch before making the shape.
Locking down the rear hatch.
The late / G2 track cable position, Voyager Tiger 1 PE set includes track cable and eyes
The following users liked this post:
Buckeye36 (01-22-2021)
01-22-2021, 04:24 PM
#37
Nice detail work!!!
01-24-2021, 07:44 AM
#38
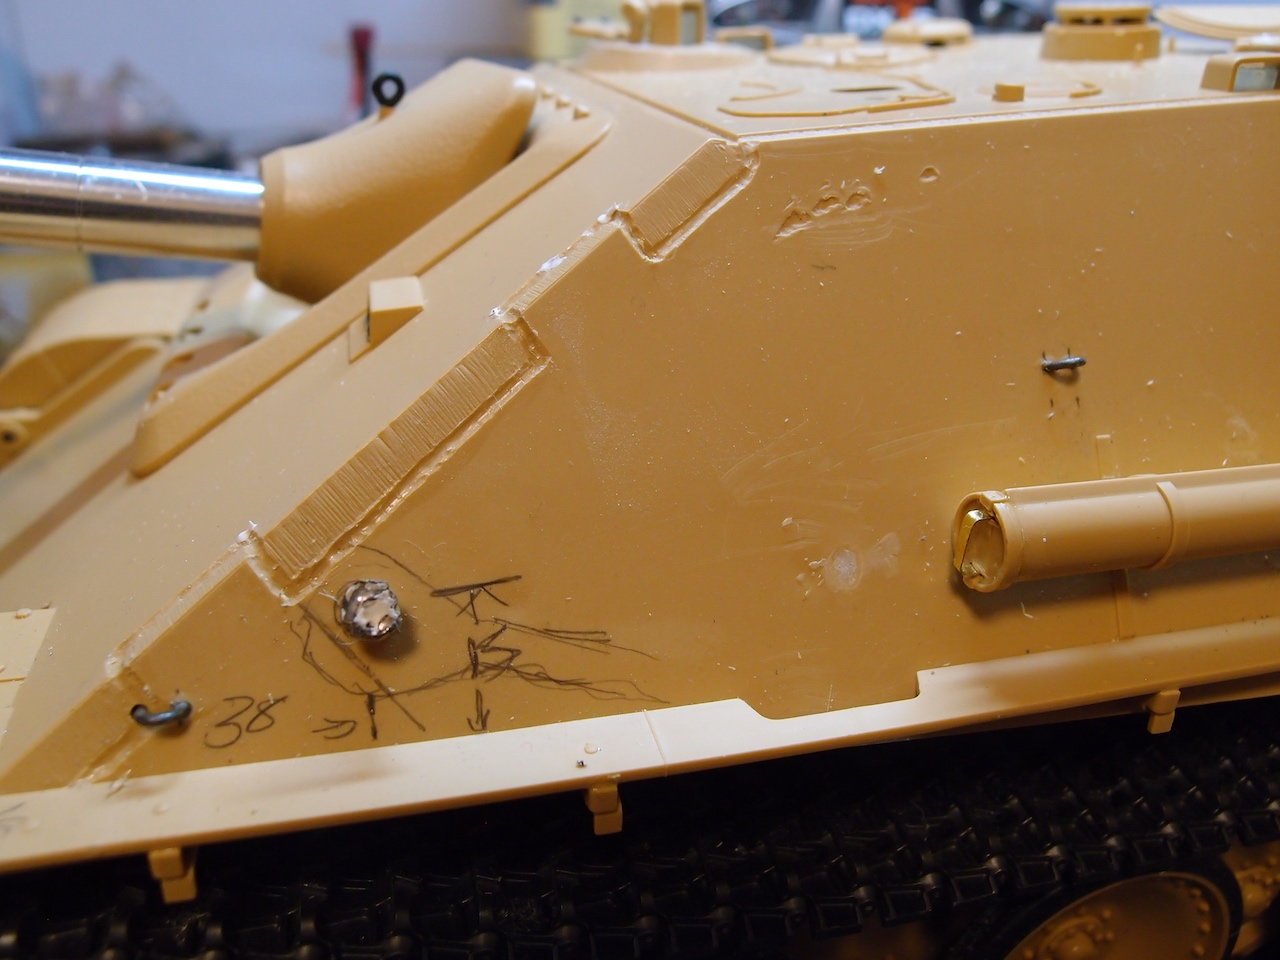
Started to do the side, removed the blobs that represent the handles on the gun cleaning /antenna tube and thinking about the welds.

Will use PE for the handles
Weld lines on the Trumpeter 1/16 Panther, very fine detail almost smooth.
Will use PE for the handles
Weld lines on the Trumpeter 1/16 Panther, very fine detail almost smooth.
01-25-2021, 03:05 PM
#39
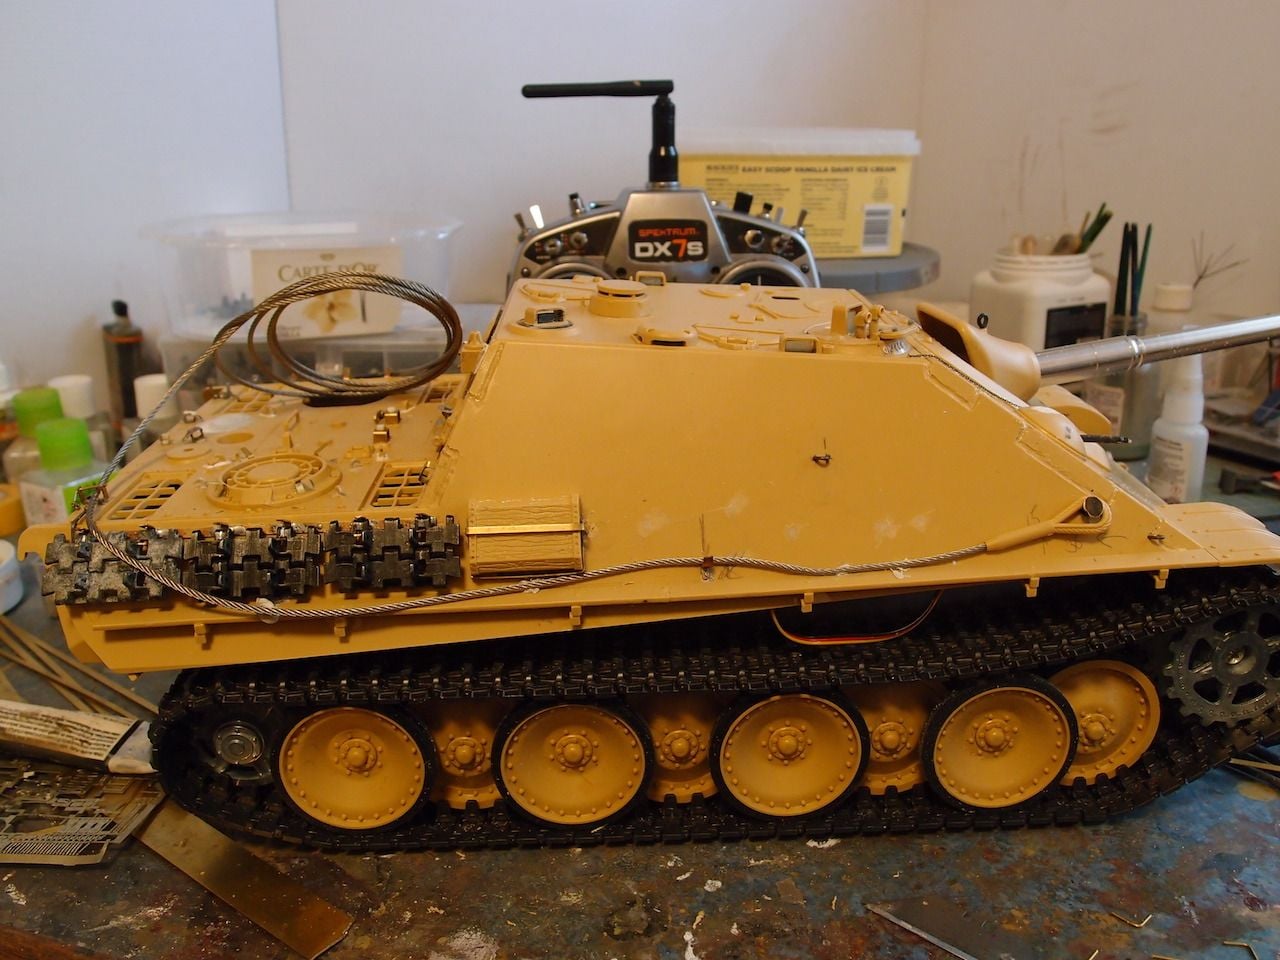
The Rye Field Model G2 is my go to for checking up on detail. Made up the brass stuff, post for the towing eye , bracket for the cable, handles and the track hangers. Used a little Proxxon with a burr to give an impression of the weld beads. Fitted tracks and cable to check for fit.
Loops , post for the tow cable ,handle on the gun cleaning tube and used a burr to enhance the welds/armour plates. Used a small copper washer for the post end and filled with filler over the solder to smooth it out.
Track hangers in brass , better than the tracks with the kit .
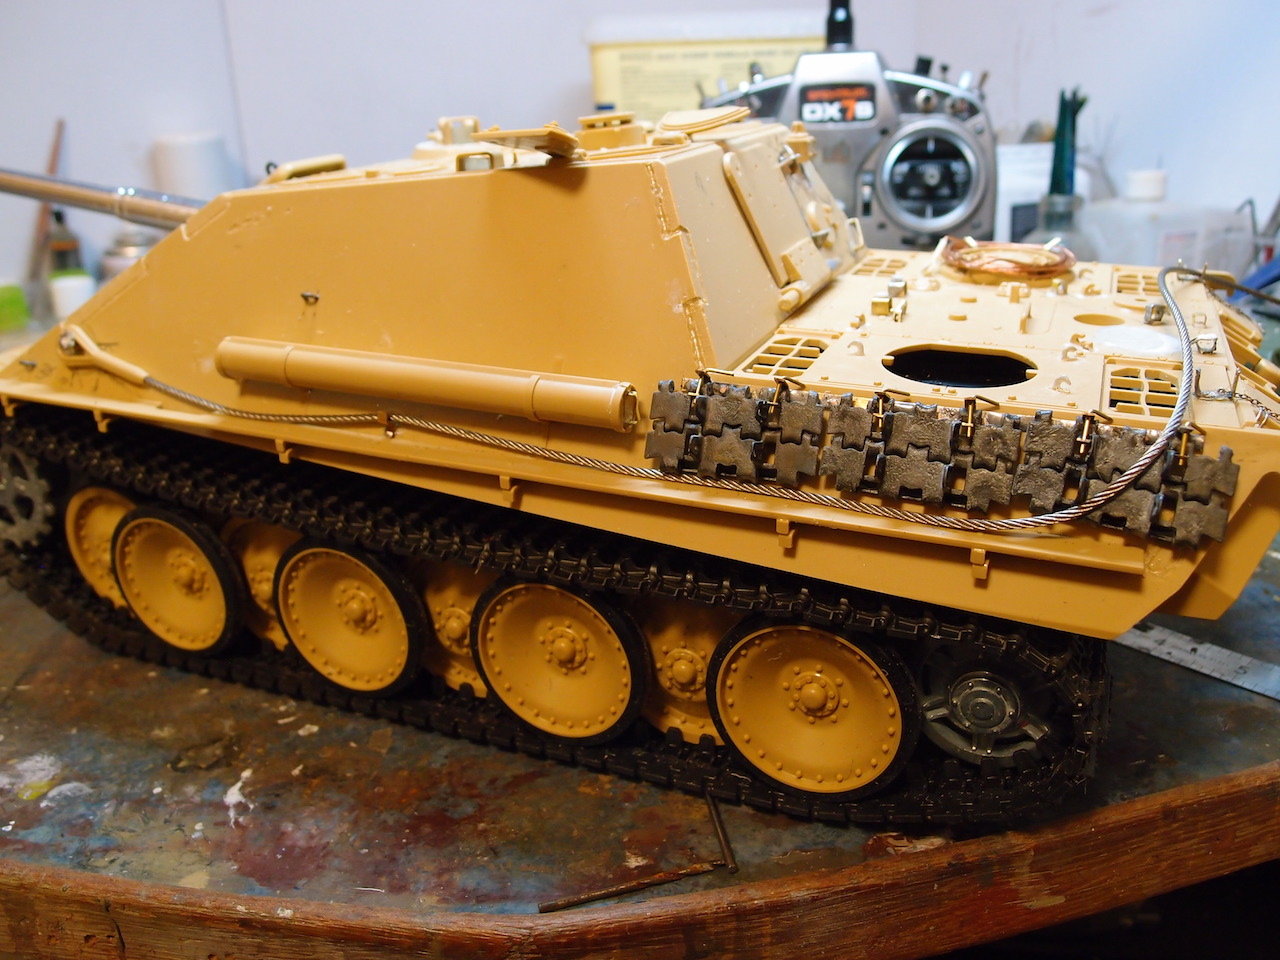
Tow cable and tracks fitted , need some more small chain for the track hanger pins. A few issues with the weld lines nothing some filler won't fix.
Loops , post for the tow cable ,handle on the gun cleaning tube and used a burr to enhance the welds/armour plates. Used a small copper washer for the post end and filled with filler over the solder to smooth it out.
Track hangers in brass , better than the tracks with the kit .
Tow cable and tracks fitted , need some more small chain for the track hanger pins. A few issues with the weld lines nothing some filler won't fix.
01-27-2021, 04:37 AM
#40
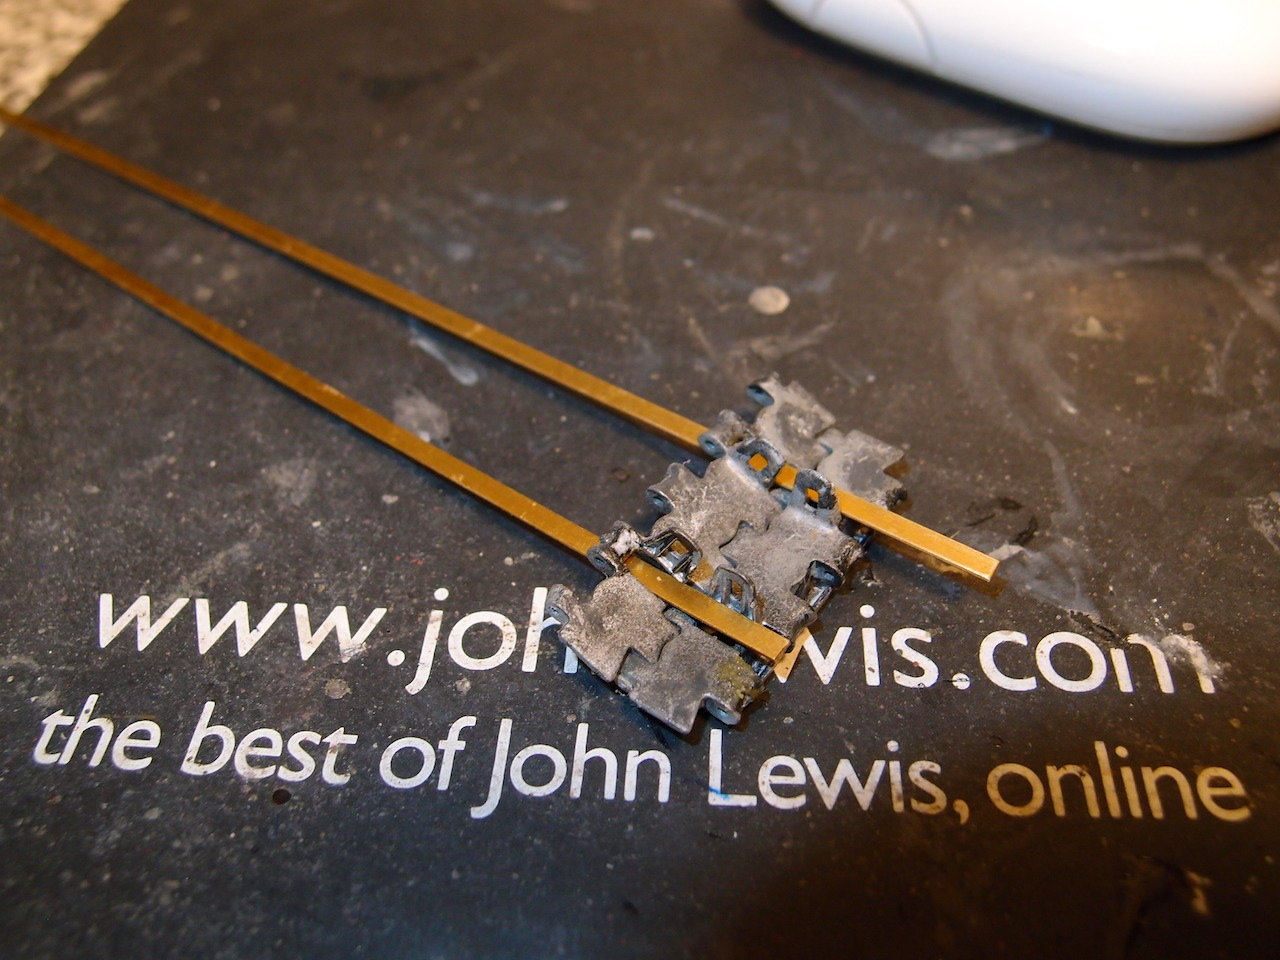
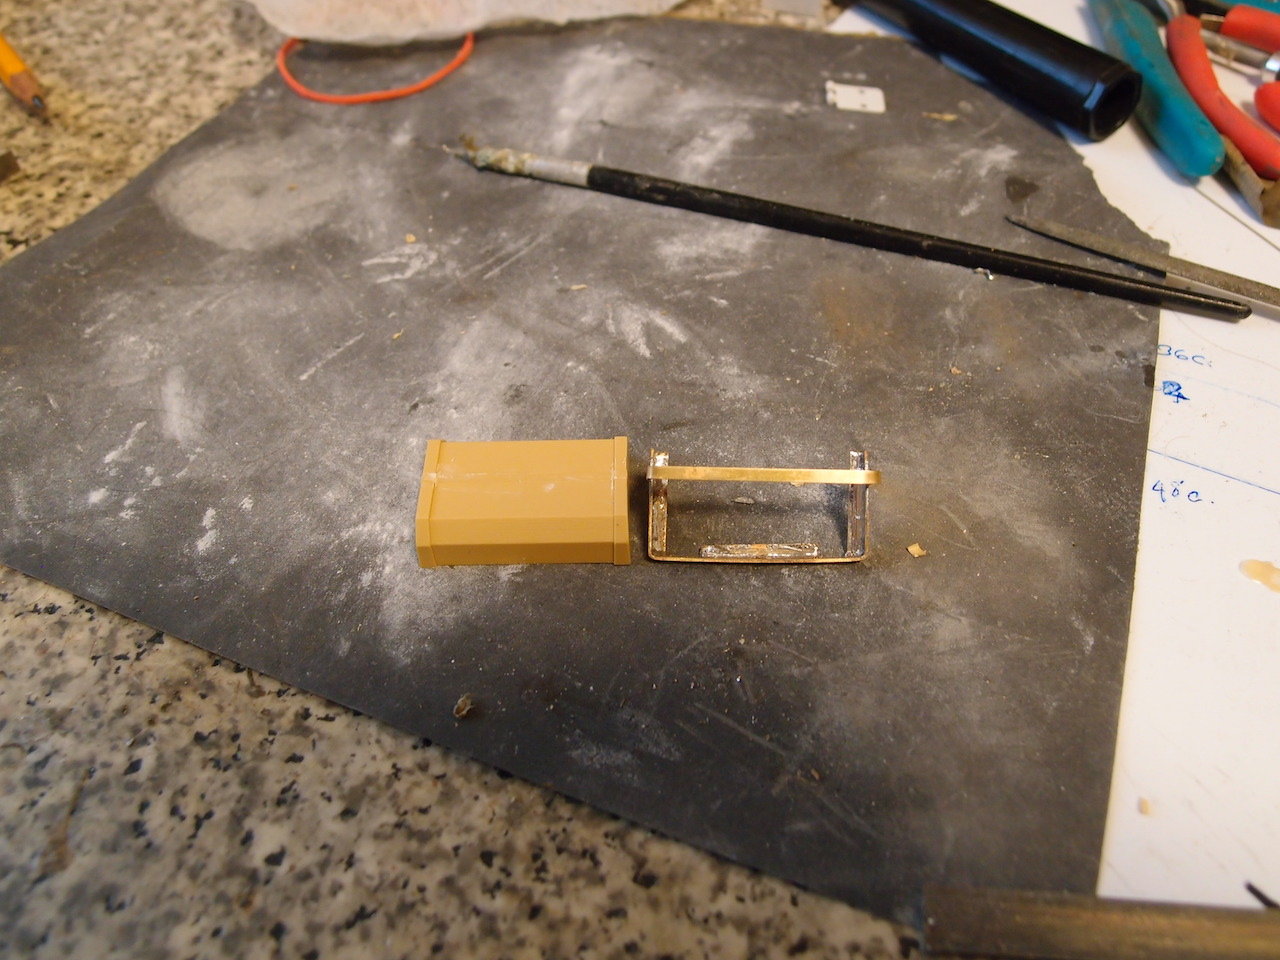
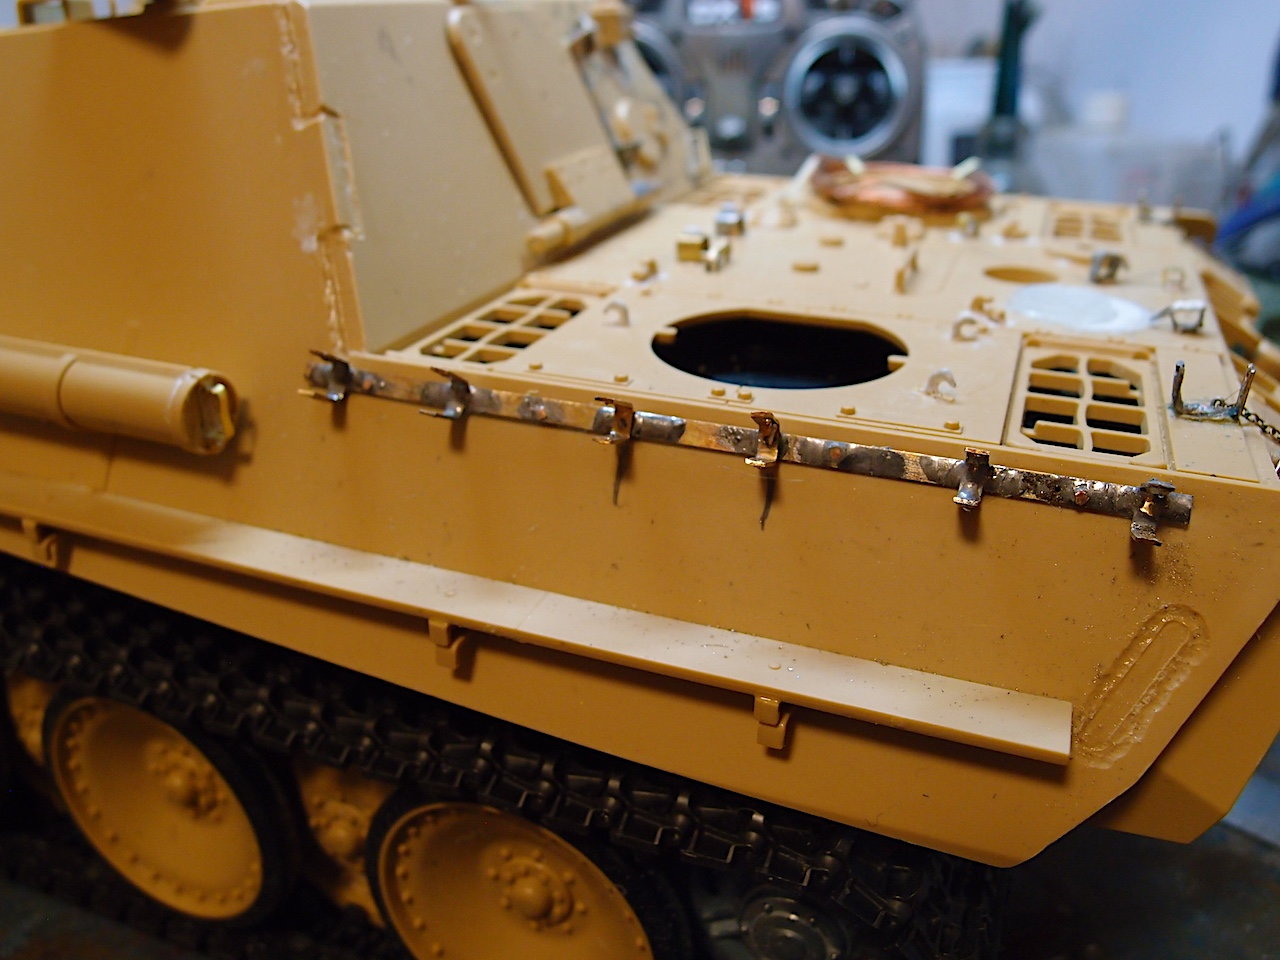
Almost done the detail work , another side done and the mg cover . Found some very fine chain will use whats left for the gun tube lids. Made up a jig for the track hangers never liked the way they were butted together.
Just had enough brass strip 0.5 by 2.5 mm to complete the hangers. Every time i looked for Schumo hangers they were out of stock.
Forgot to fish the tow post out of white vinegar ,turned black overnight.
Found an Aber mg cover from the KT set and very fine chain.
The tow wire needs to be set to shape , very stiff wire from chandlers
The jig for the track hangers compared to the Tamiya setup.
01-27-2021, 05:01 PM
#42
Thanks for sharing your progress. The detail work is really nice.
01-30-2021, 03:32 PM
#44
Thanks for looking, Had a look at the excellent ABRAMS build by Servus decided my jagdpanther needed a crew member. First trial run , need some more travel on the rack and gear to have more of the crew member showing and the neck will be a tricky one to get right. Everything needs to move forward slightly , using the posts for the battle unit . Want a removable unit that can be replaced if using the battle head unit.
The following users liked this post:
Panther F (01-31-2021)
01-31-2021, 03:20 PM
#46
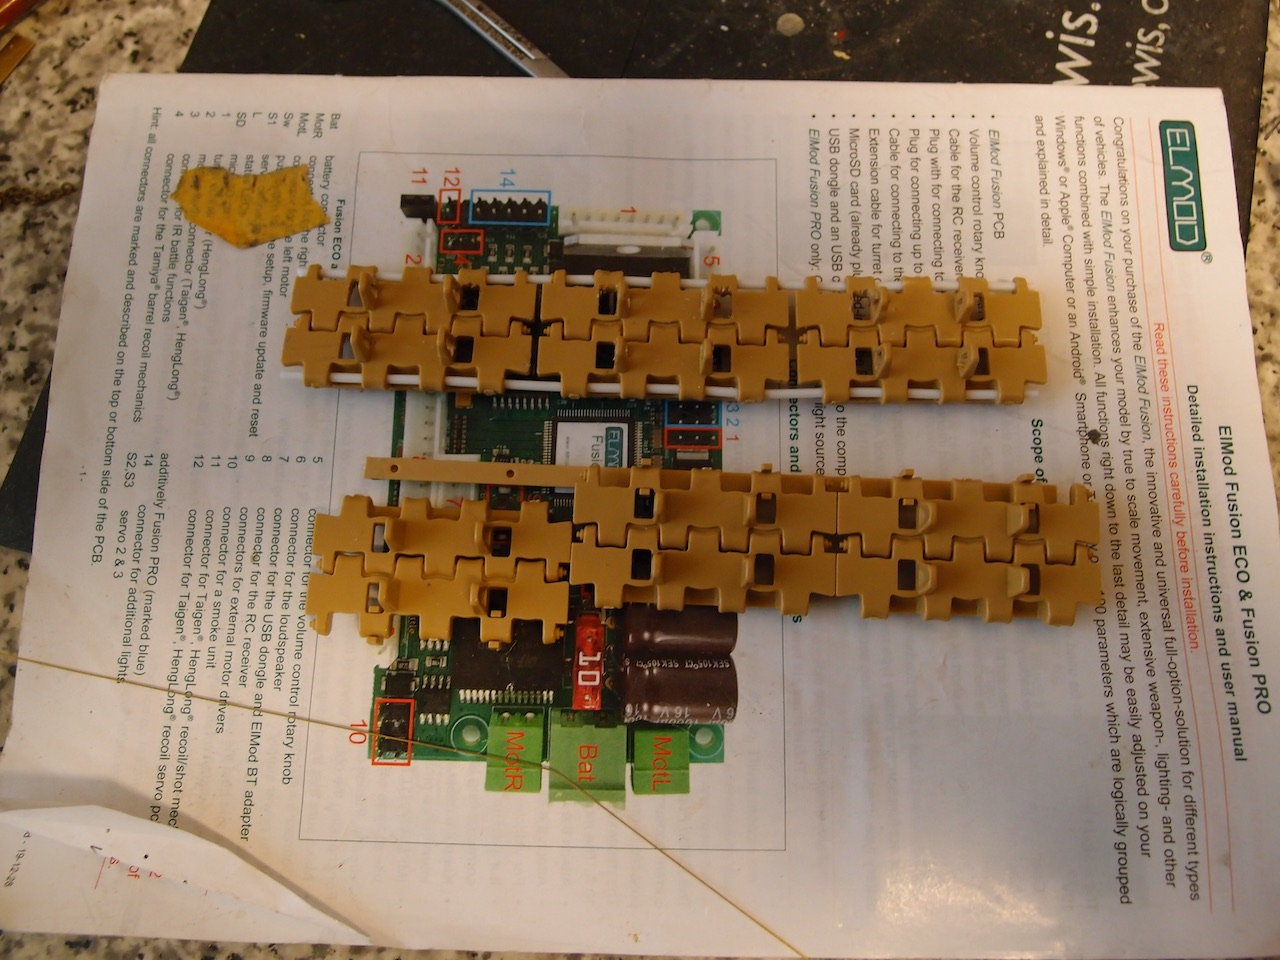
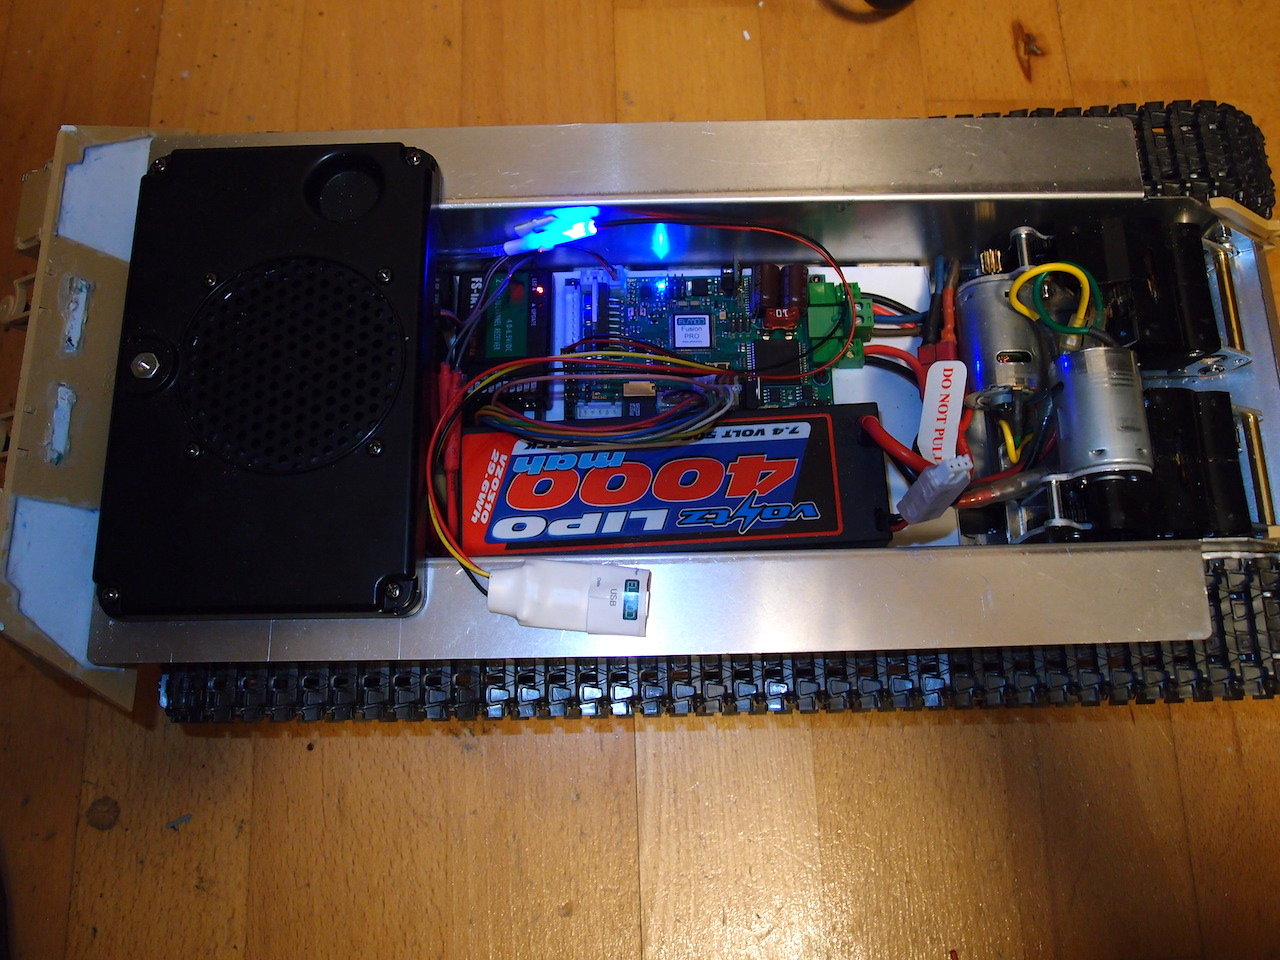
The jagdpanther has servos for the elevation, traverse and a few more servos. Going to replace the Tamiya boards with an Elmod fusion pro ,easier to program and takes up less space. The fusion board has a socket for the Tamiya recoil, can change to a servo if i don't like the recoil action. Wired up the lights, might fit a red led instead of just painting the reflector . Bundled up the fibre optic cables for the convoy light, saves pulling out the speaker if i have a busted wire. Better order up a remote switch , will fit it just inside the rear hatch and fit a fuse .
02-01-2021, 05:42 AM
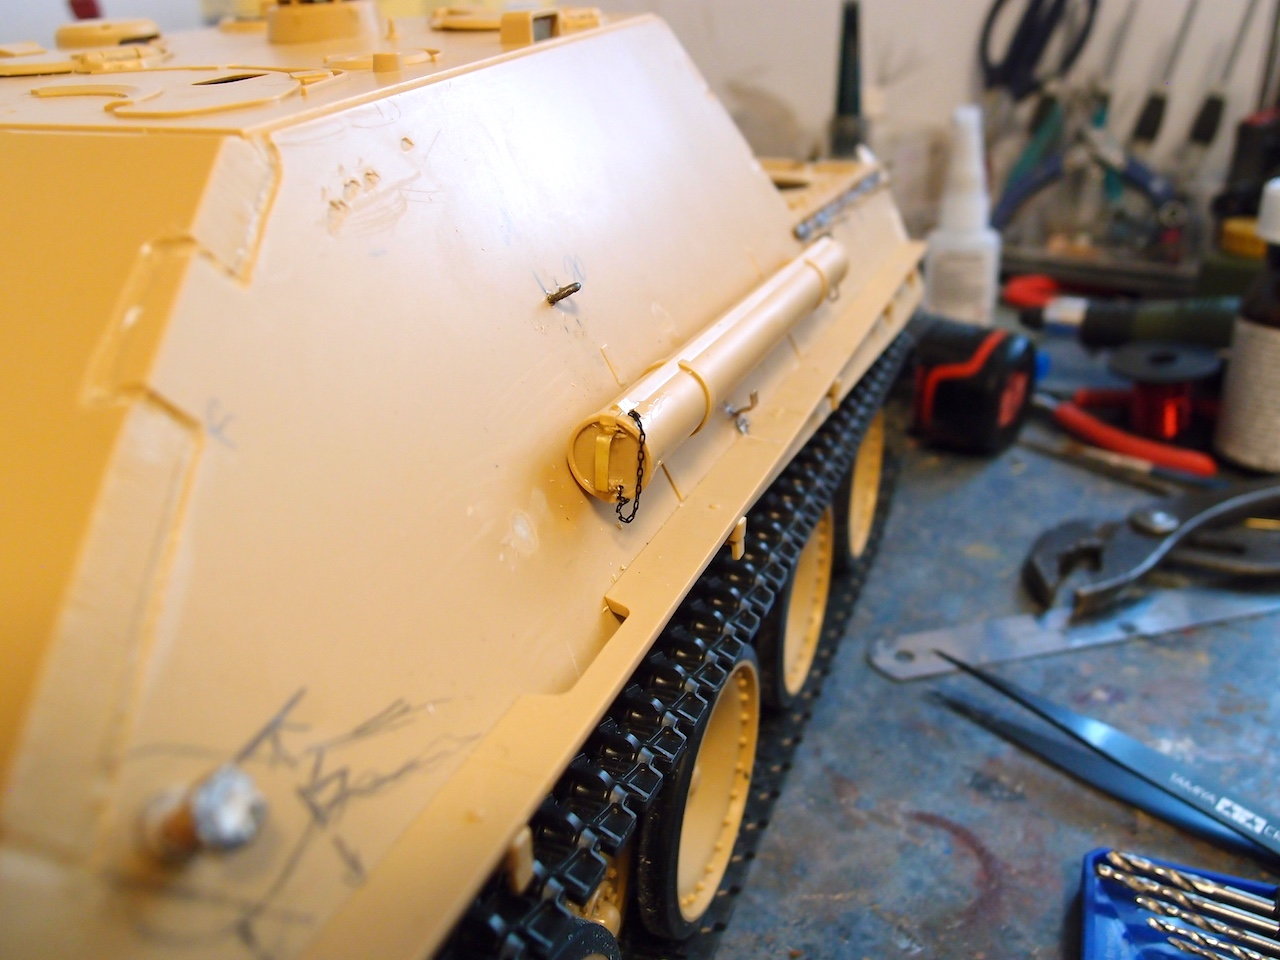
#47
Adding detail to the hull. 1st up fixing the difference between the front and rear armour thickness with styrene , The cable for front light cut a notch in the mudguard and chain for the tube covers.
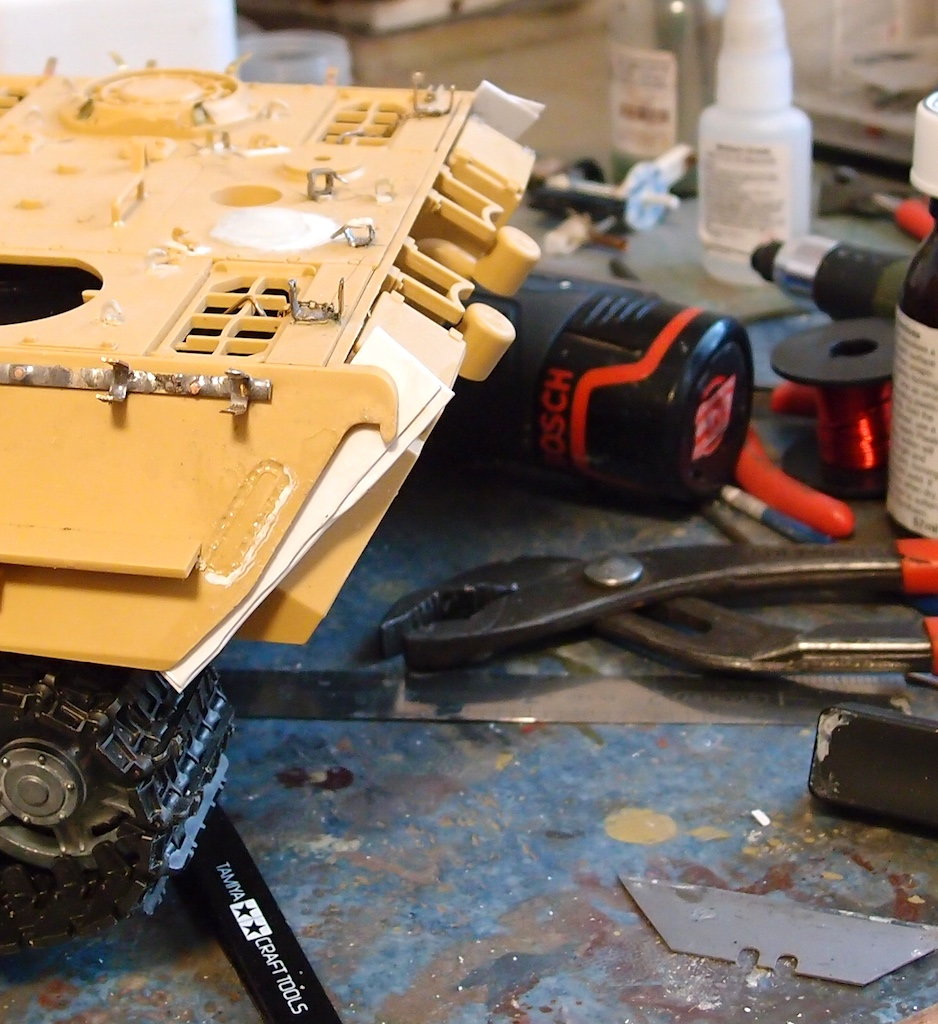
Styrene card to make plate at rear same width as the armour interlock on front.
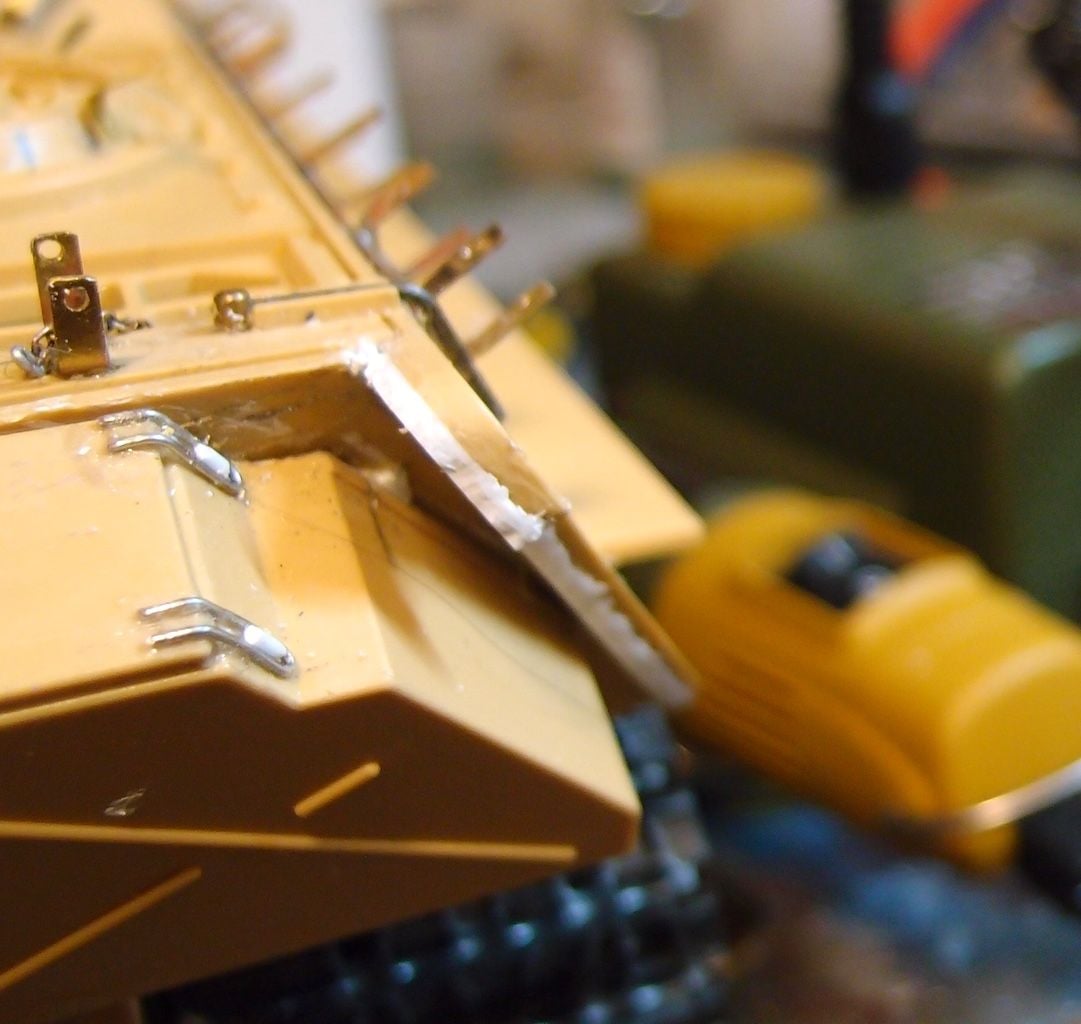
Cut to shape , a plus is that the rear plate is held tight against the engine deck without using the Tamiya screw fitting.
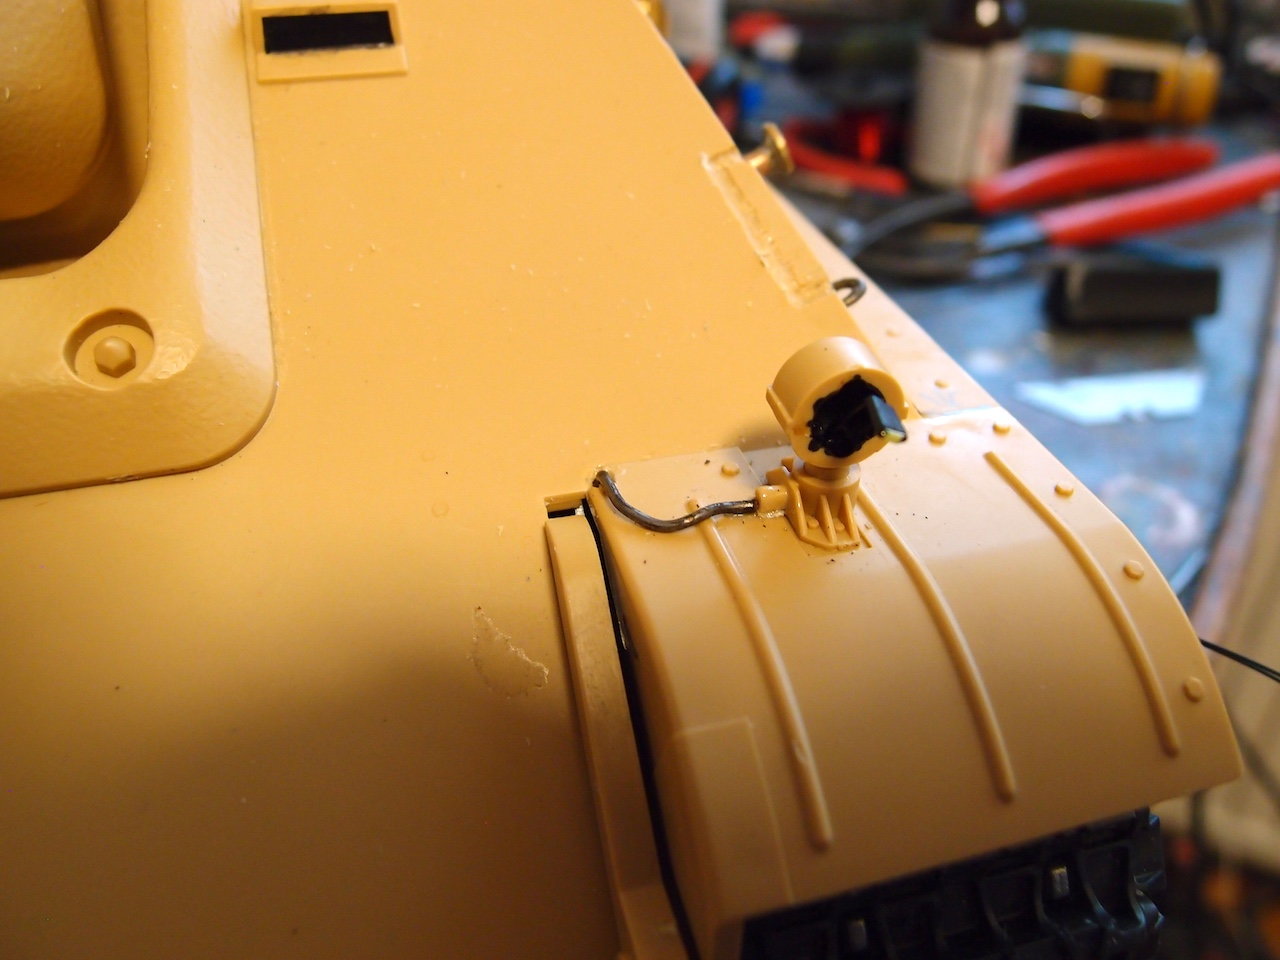
Front light , need to centre the wire against the light fitting . Used a pre wired smd led as they have fine wires
Chain retainer for the covers.
Styrene card to make plate at rear same width as the armour interlock on front.
Cut to shape , a plus is that the rear plate is held tight against the engine deck without using the Tamiya screw fitting.
Front light , need to centre the wire against the light fitting . Used a pre wired smd led as they have fine wires
Chain retainer for the covers.
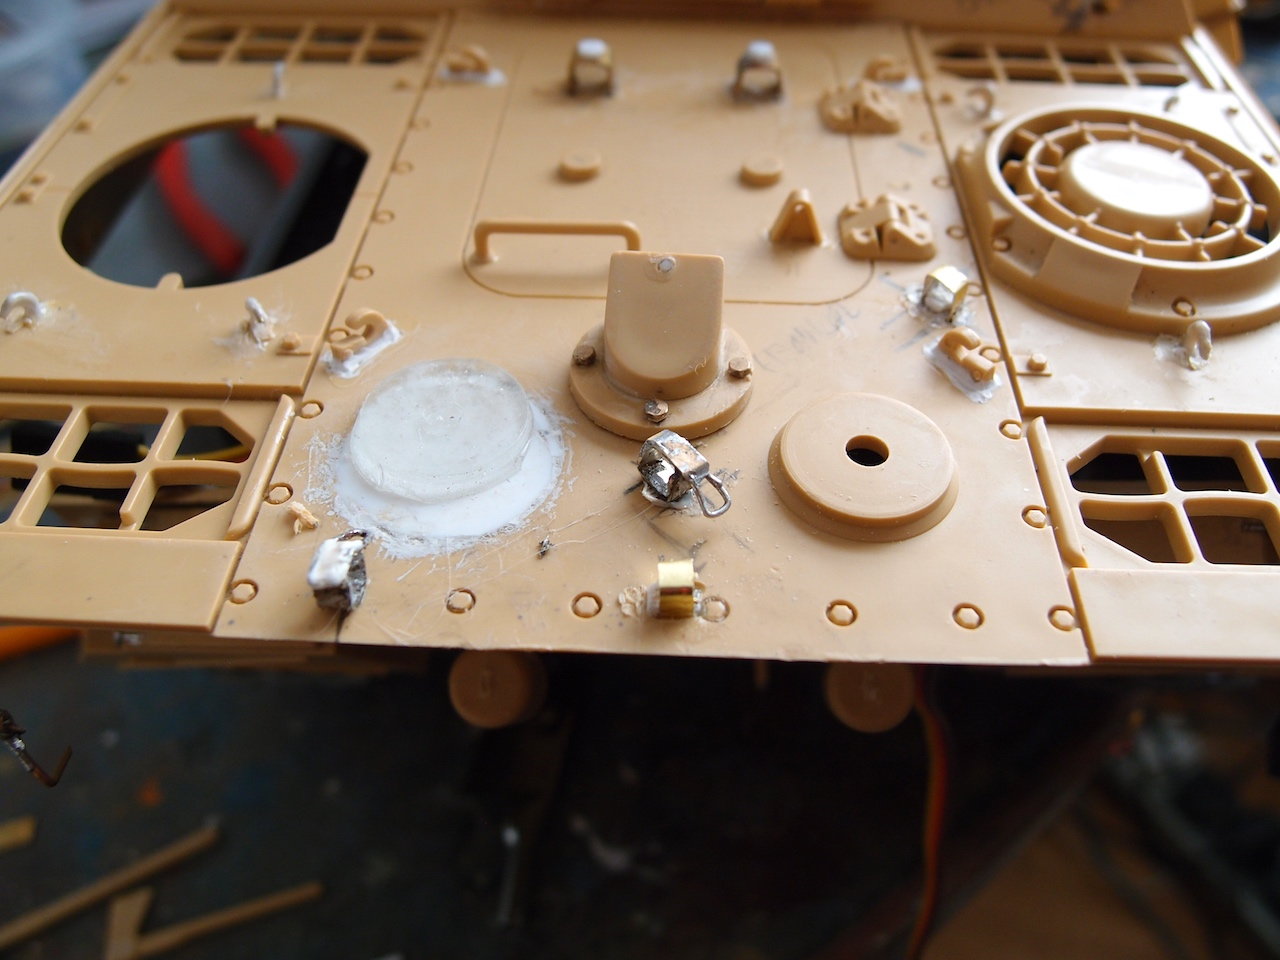
02-02-2021, 10:14 AM
#49
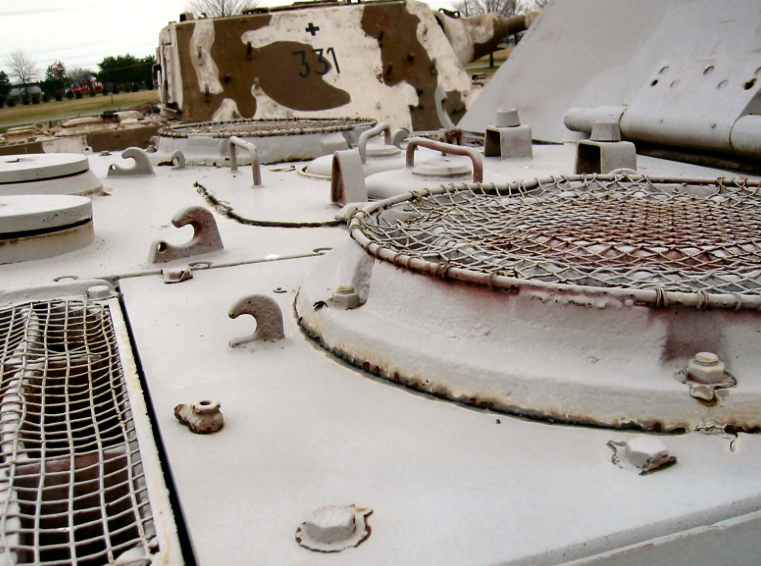
Ordered up some mesh for the fan screens, looks better than the 2D etched mesh . Its woven need to be careful when cutting the circle out , but as its 3D it looks the part.
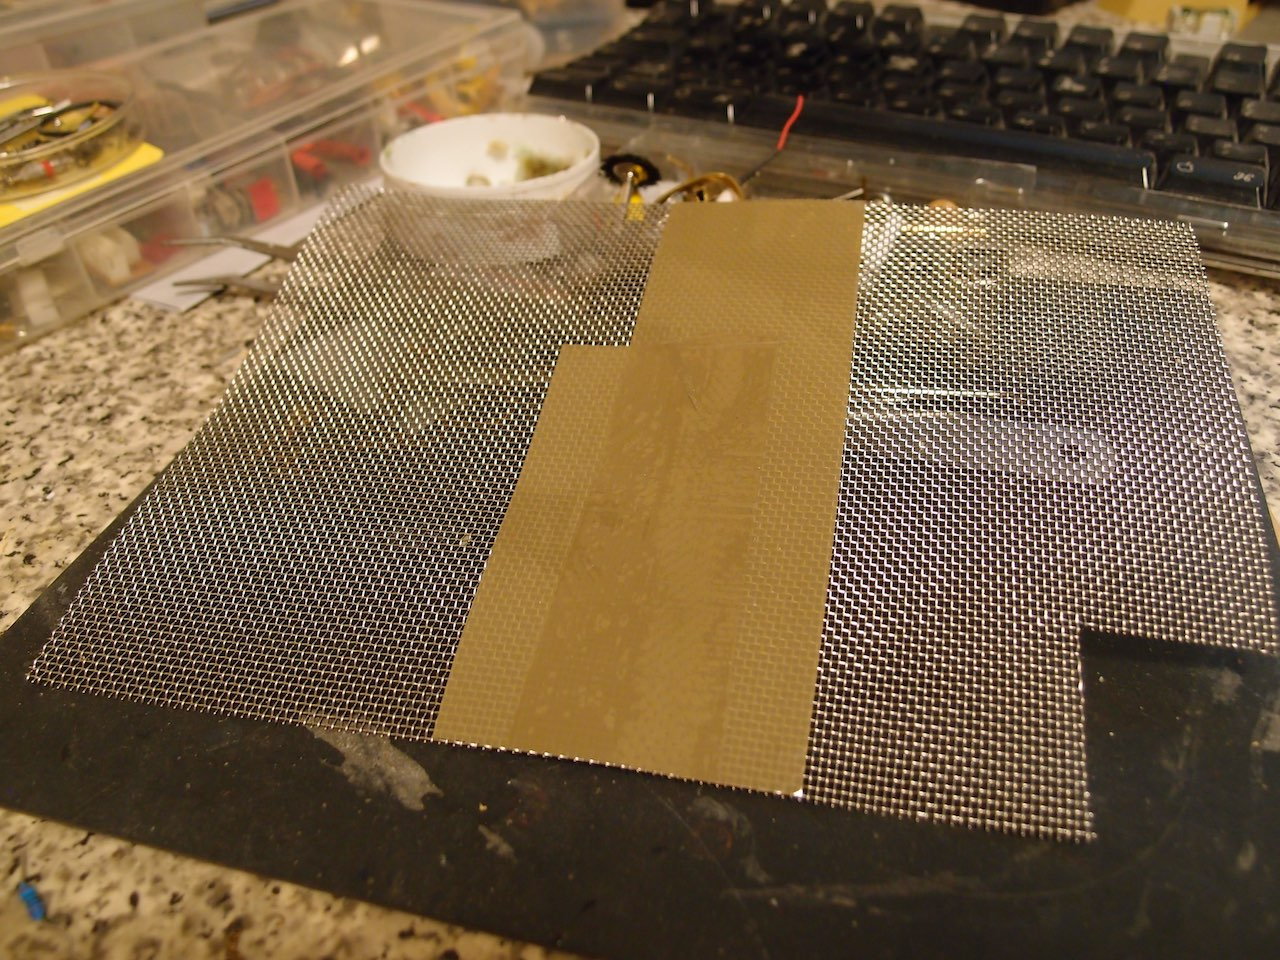
Steel mesh.
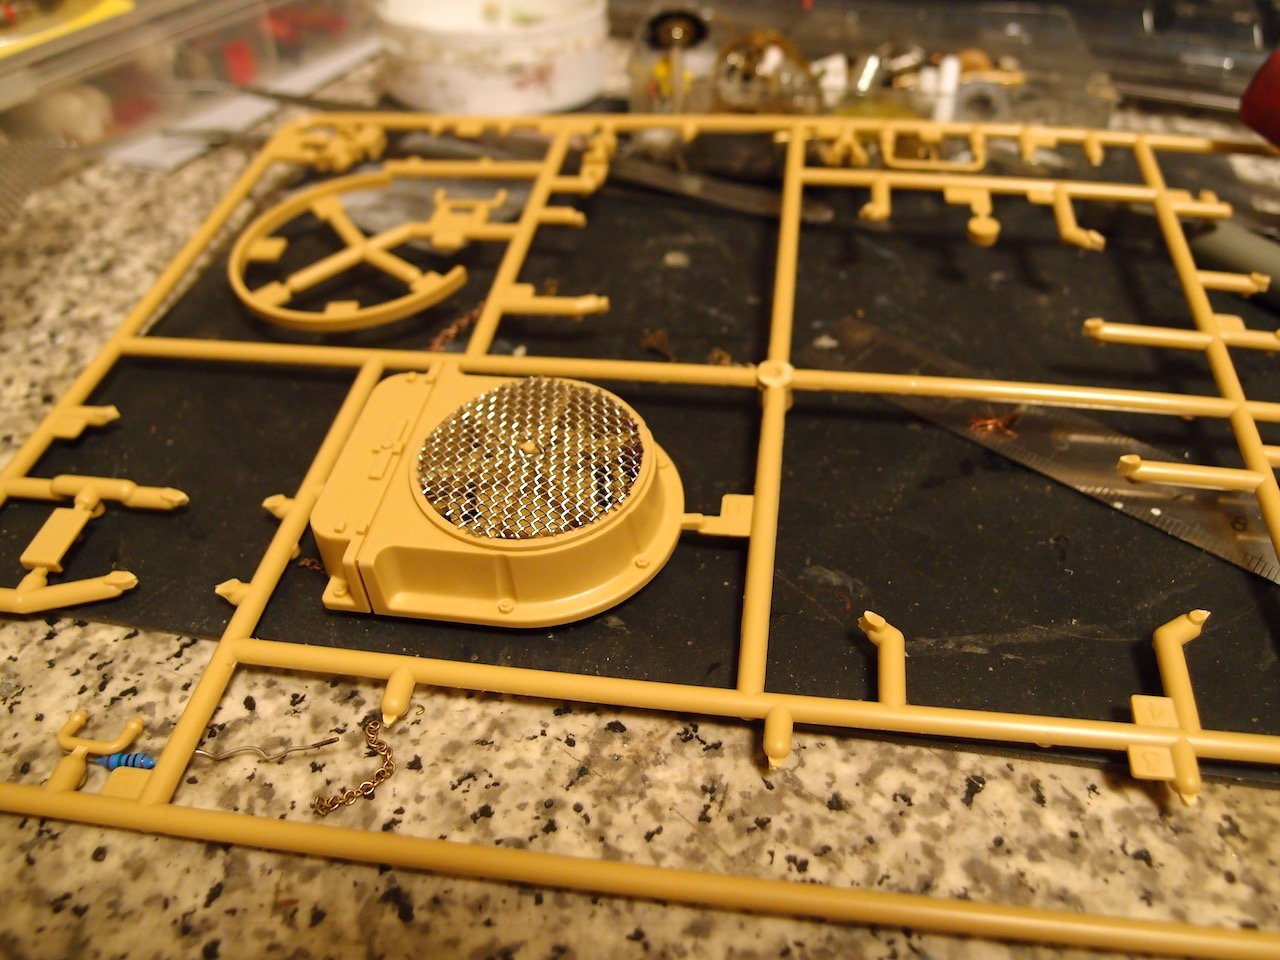
Cut and fitted.
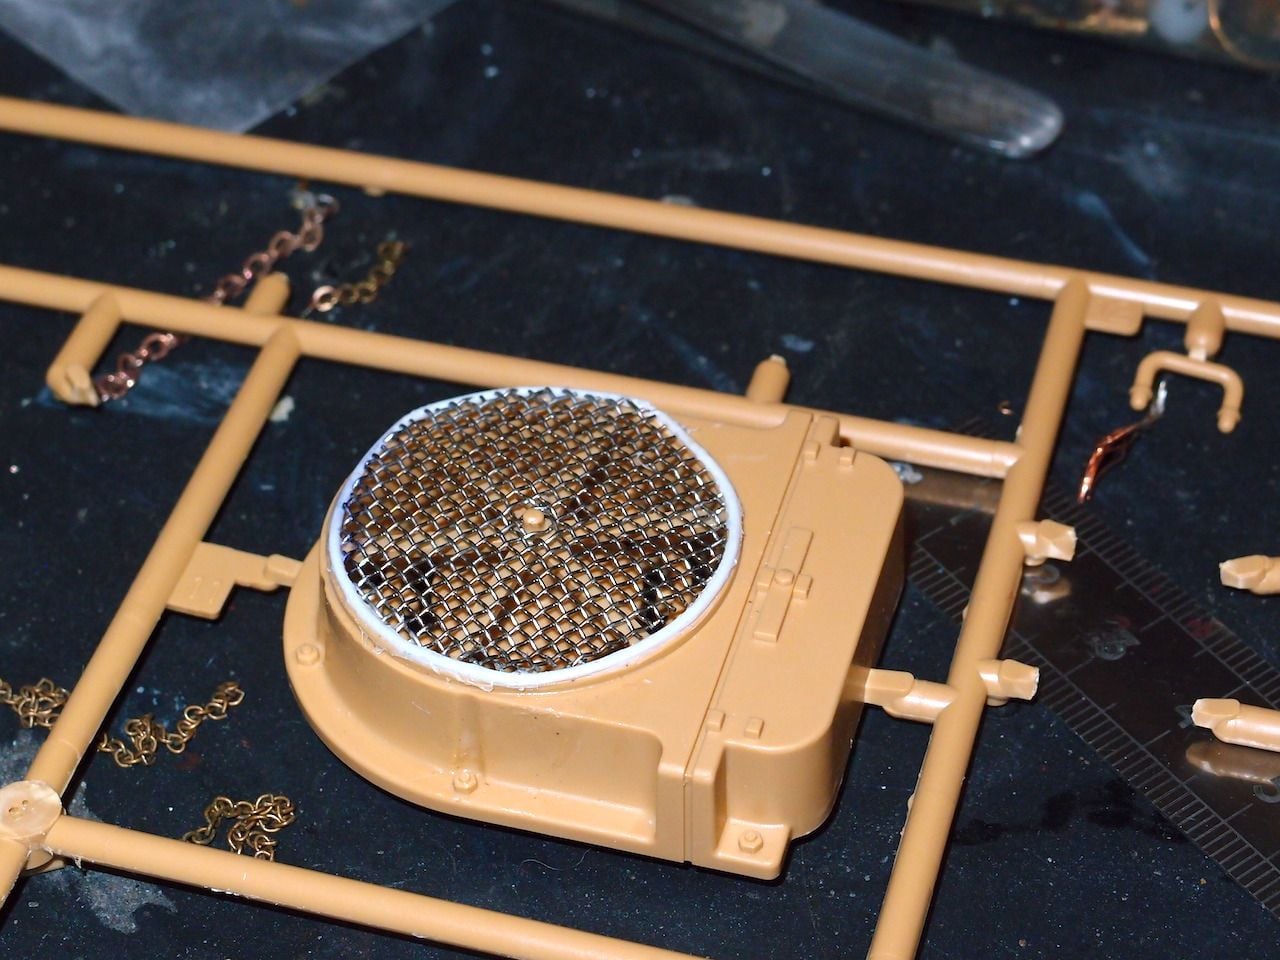
The ring round the mesh to Finnish off.
Steel mesh.
Cut and fitted.
The ring round the mesh to Finnish off.