


Mibo A-10 Gen 6


 04-14-2020, 09:49 PM
#229
Thanks Edgar!
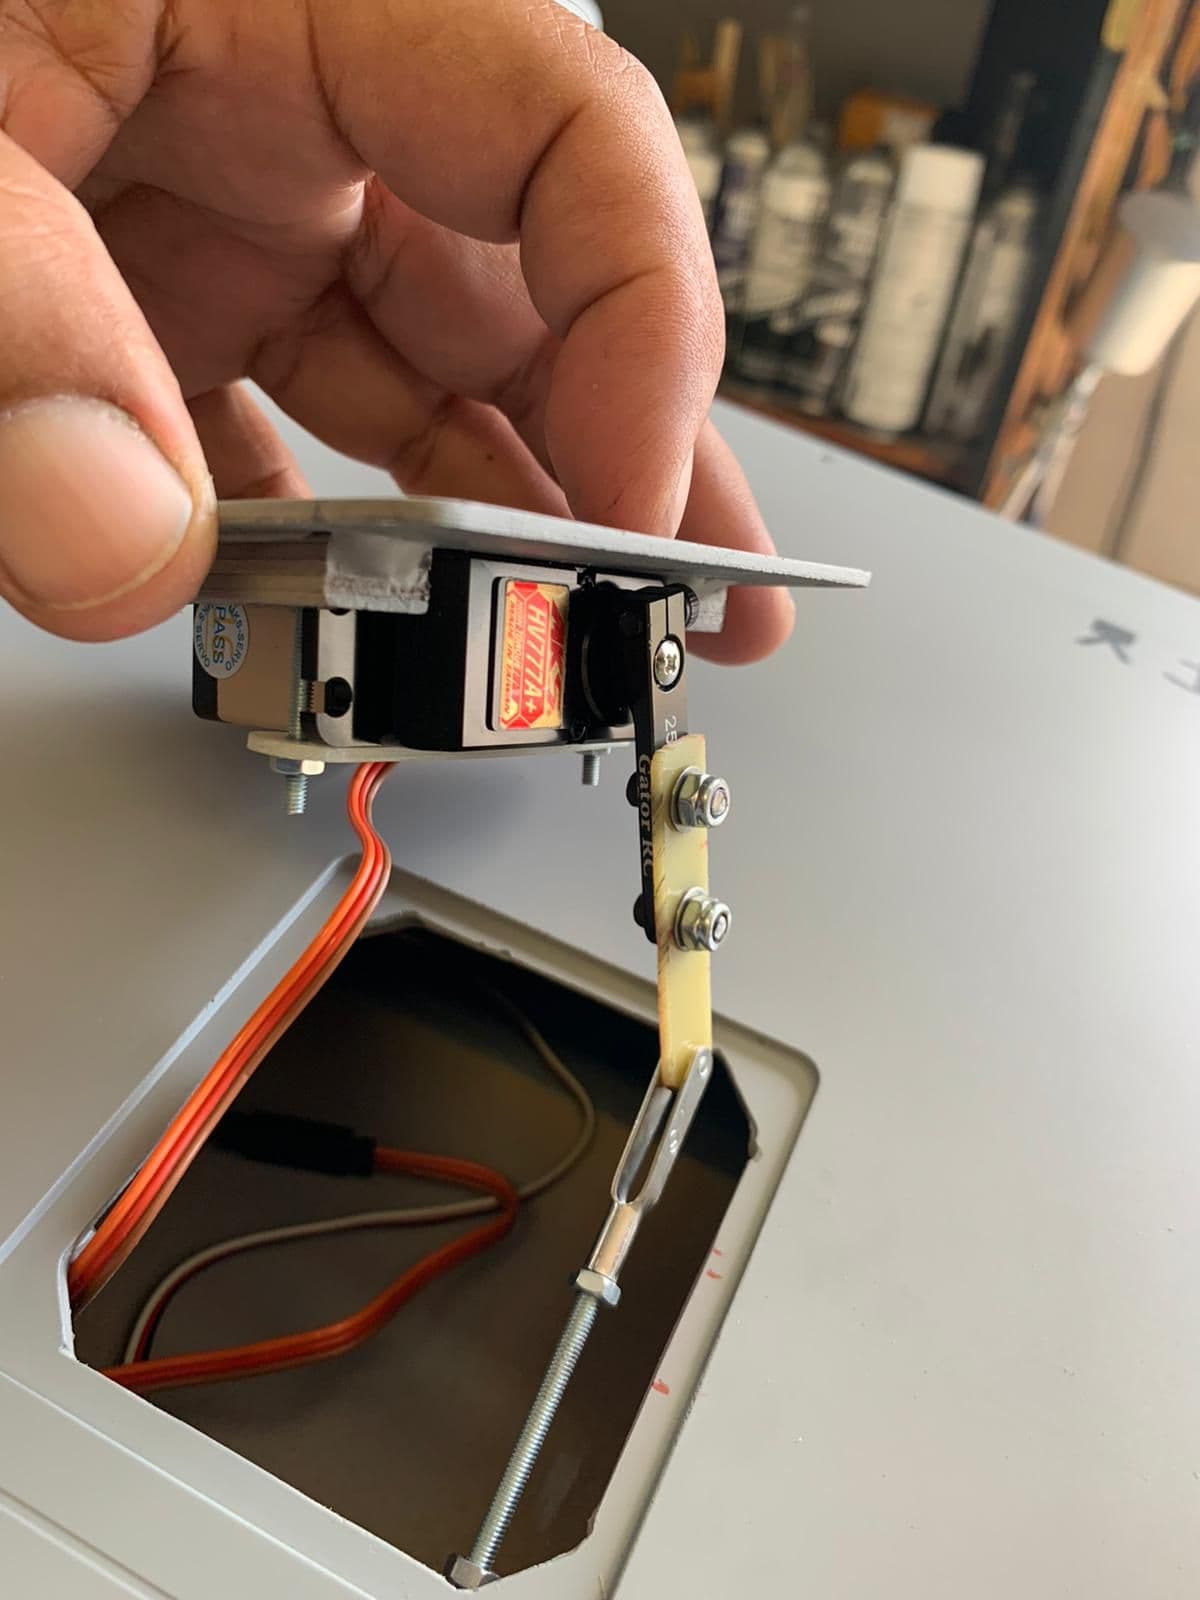
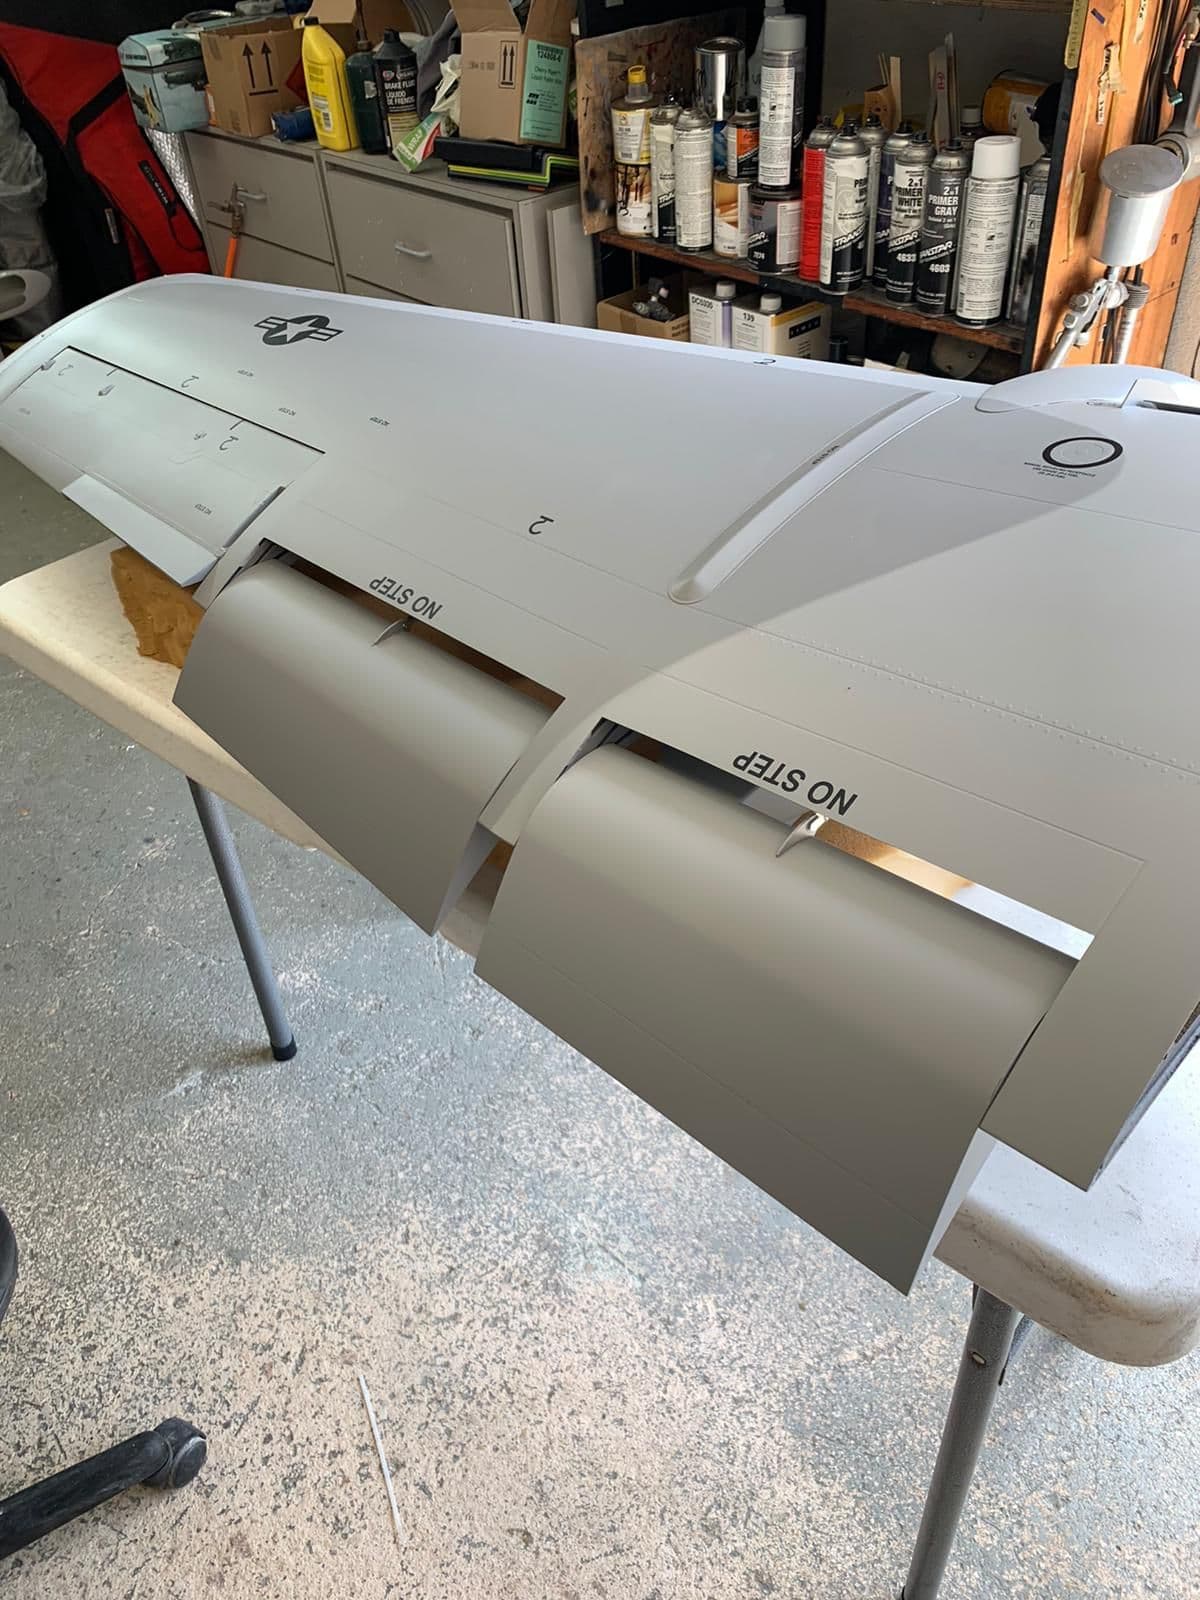
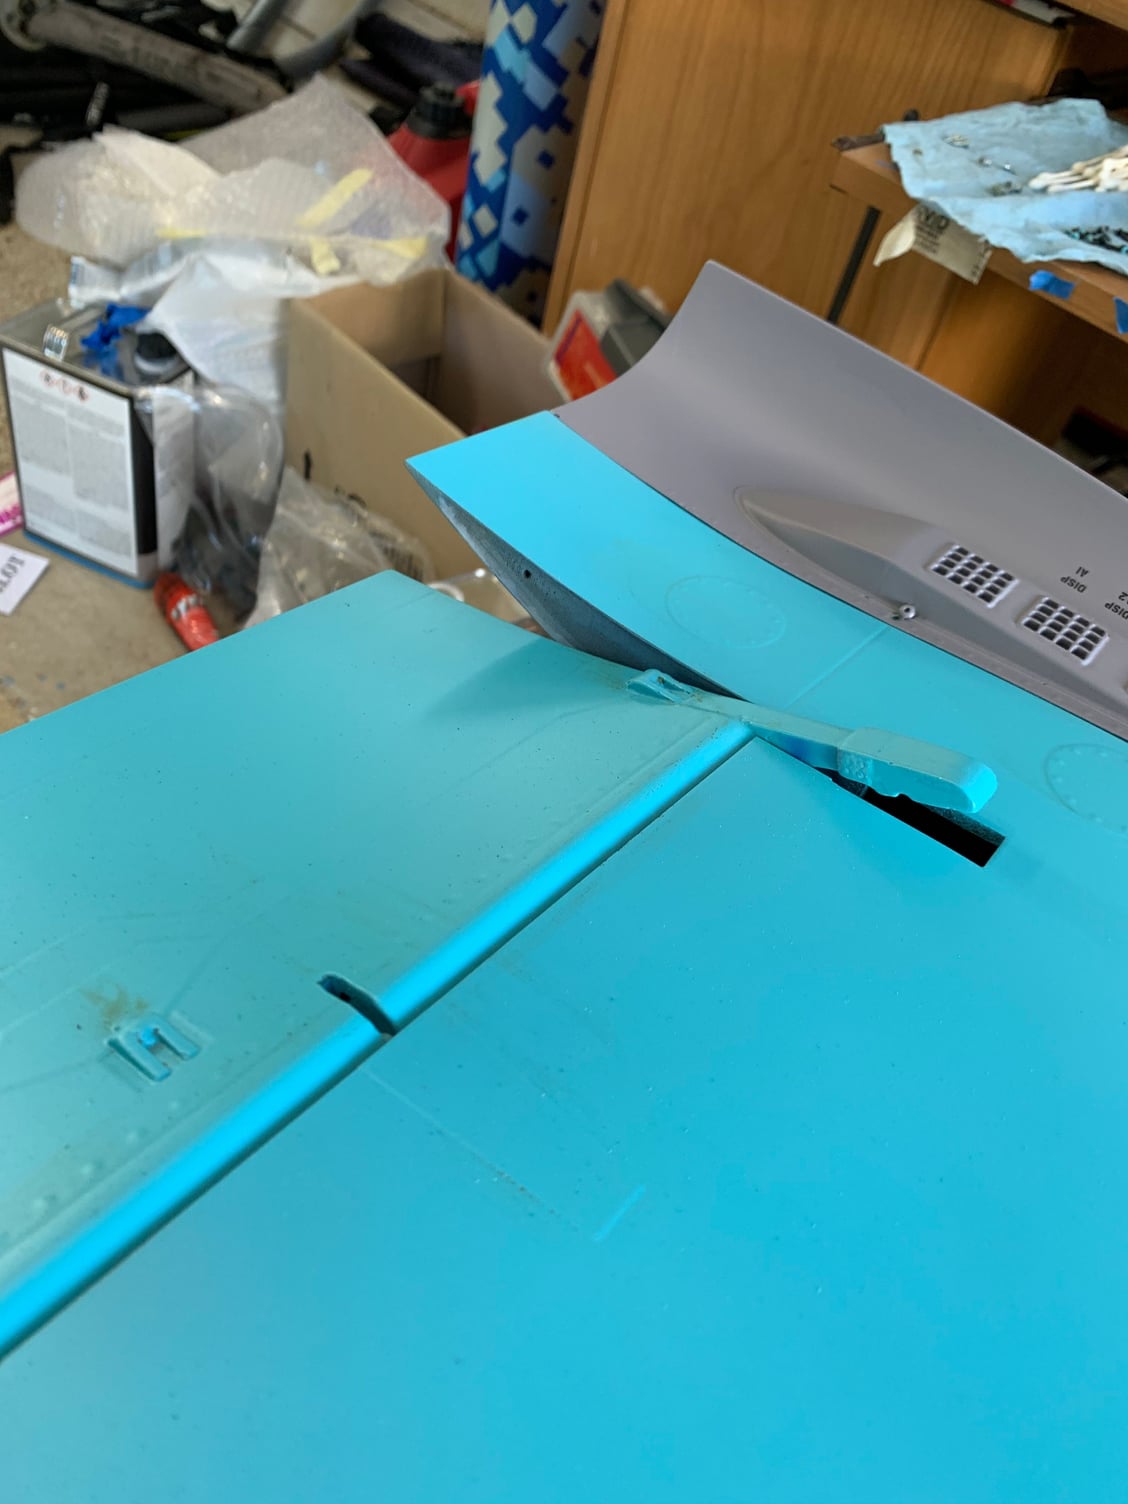
I will have to drive the servos over 90 degrees to get the throw needed for flap deflection.
When I measured 2 inches, it was just a touch too long (like you also saw), so I went with 1.5 inches.
It was also on my radar to make my own servo arms.
I will have to drive the servos over 90 degrees to get the throw needed for flap deflection.
When I measured 2 inches, it was just a touch too long (like you also saw), so I went with 1.5 inches.
It was also on my radar to make my own servo arms.
Last edited by ravill; 04-15-2020 at 06:02 AM.


 04-16-2020, 12:35 AM
#235

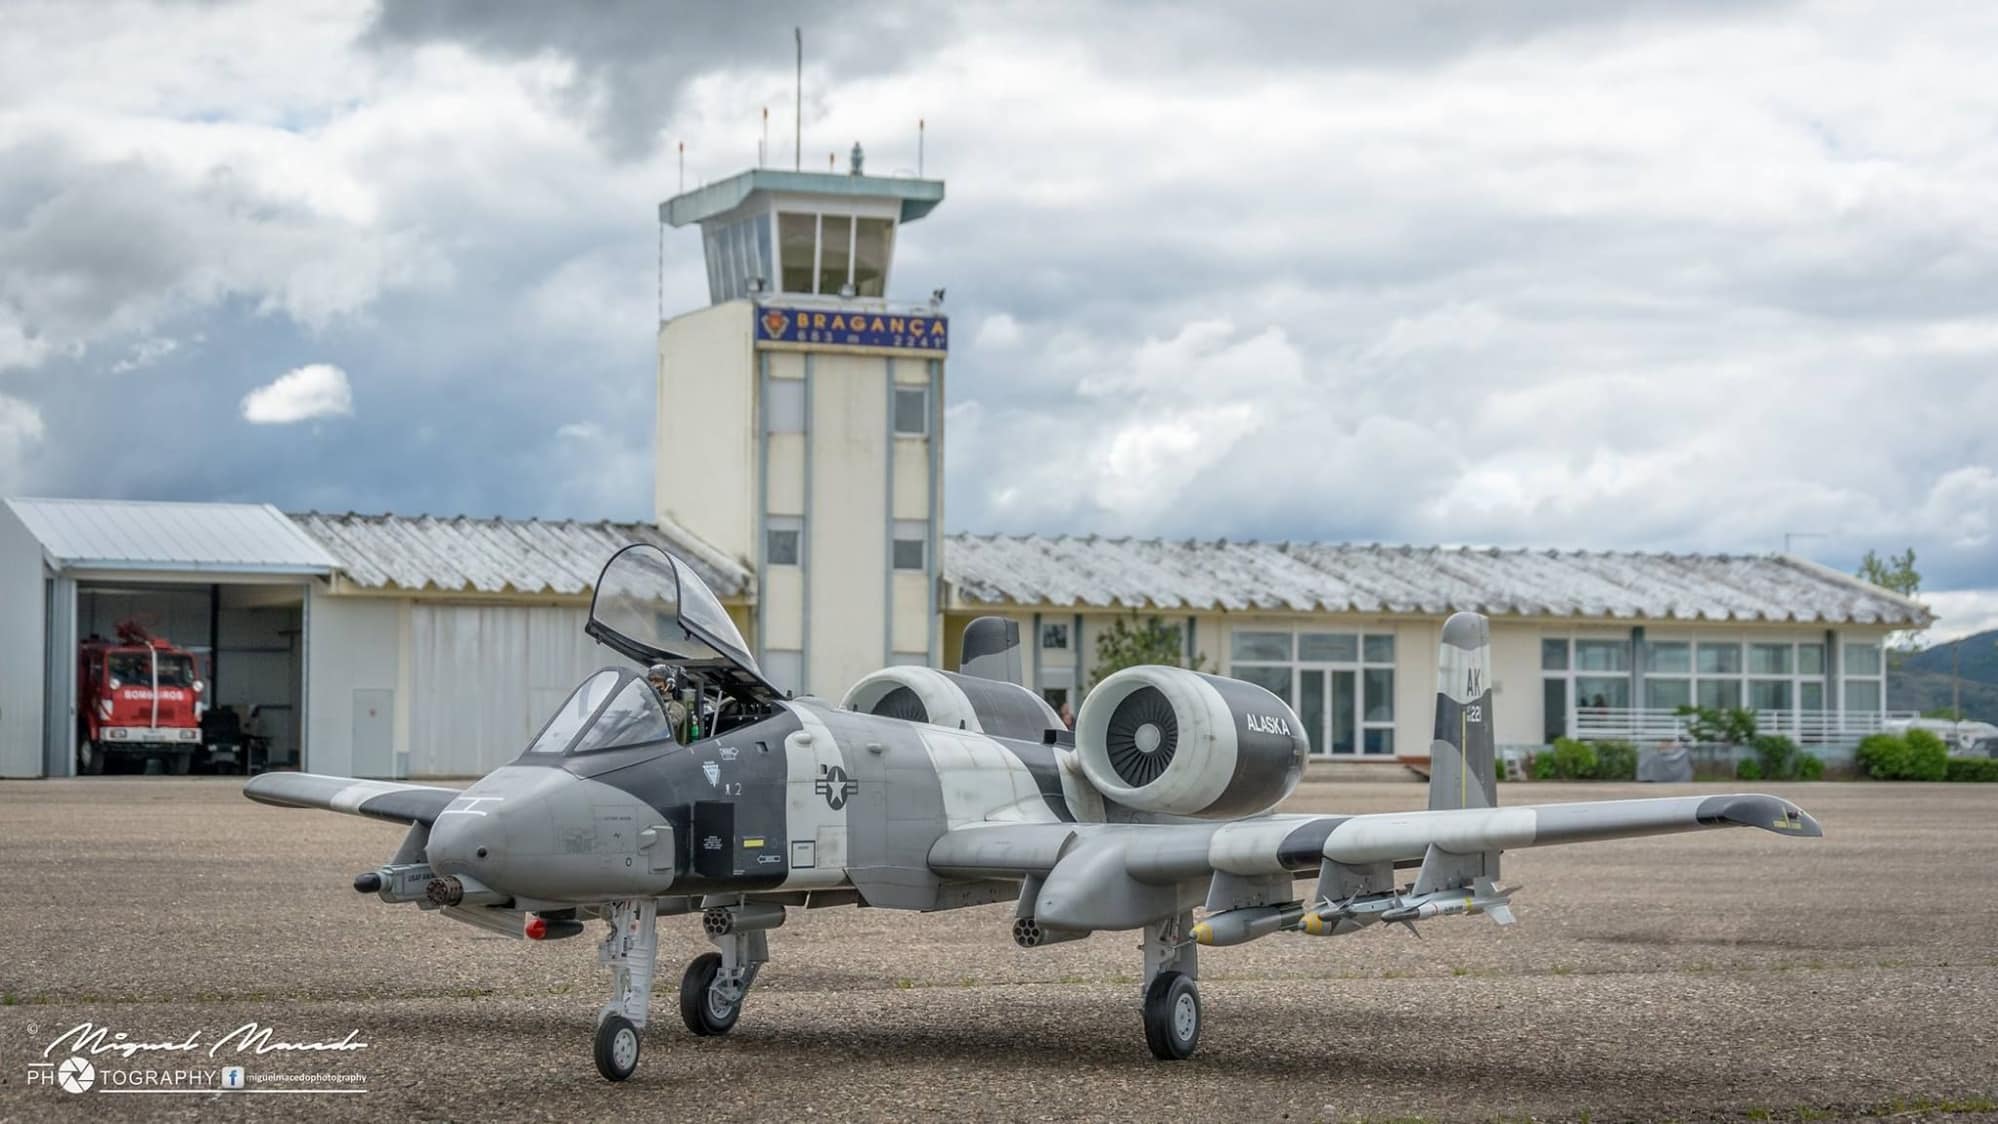
I'm back working on my A10 after more than 3 years without doing anything.
A friend did the basic paint job and kept the plane in his garage for 3 years ... I was busy with other things but now plane is back in my workshop !
Still some issues to fix on the paint, waiting for the rub on decals from Tailormadedecals and then weathering !
Ravill, I'm in the exact same situation as you, I never did a paint job and this is my first one where I really do have to use a paintgun and an airbrush and I'm having fun !
For your weathering, I can recommand looking some videos on youtube of guys showing weathering techniques on plastic models, it is really instructive ! Plasmo, Panzermeister are good names.
I'm also back on printing ordnance !
I'll post pictures later on but I'm happy to be back working on that plane.
04-16-2020, 04:50 AM
#237
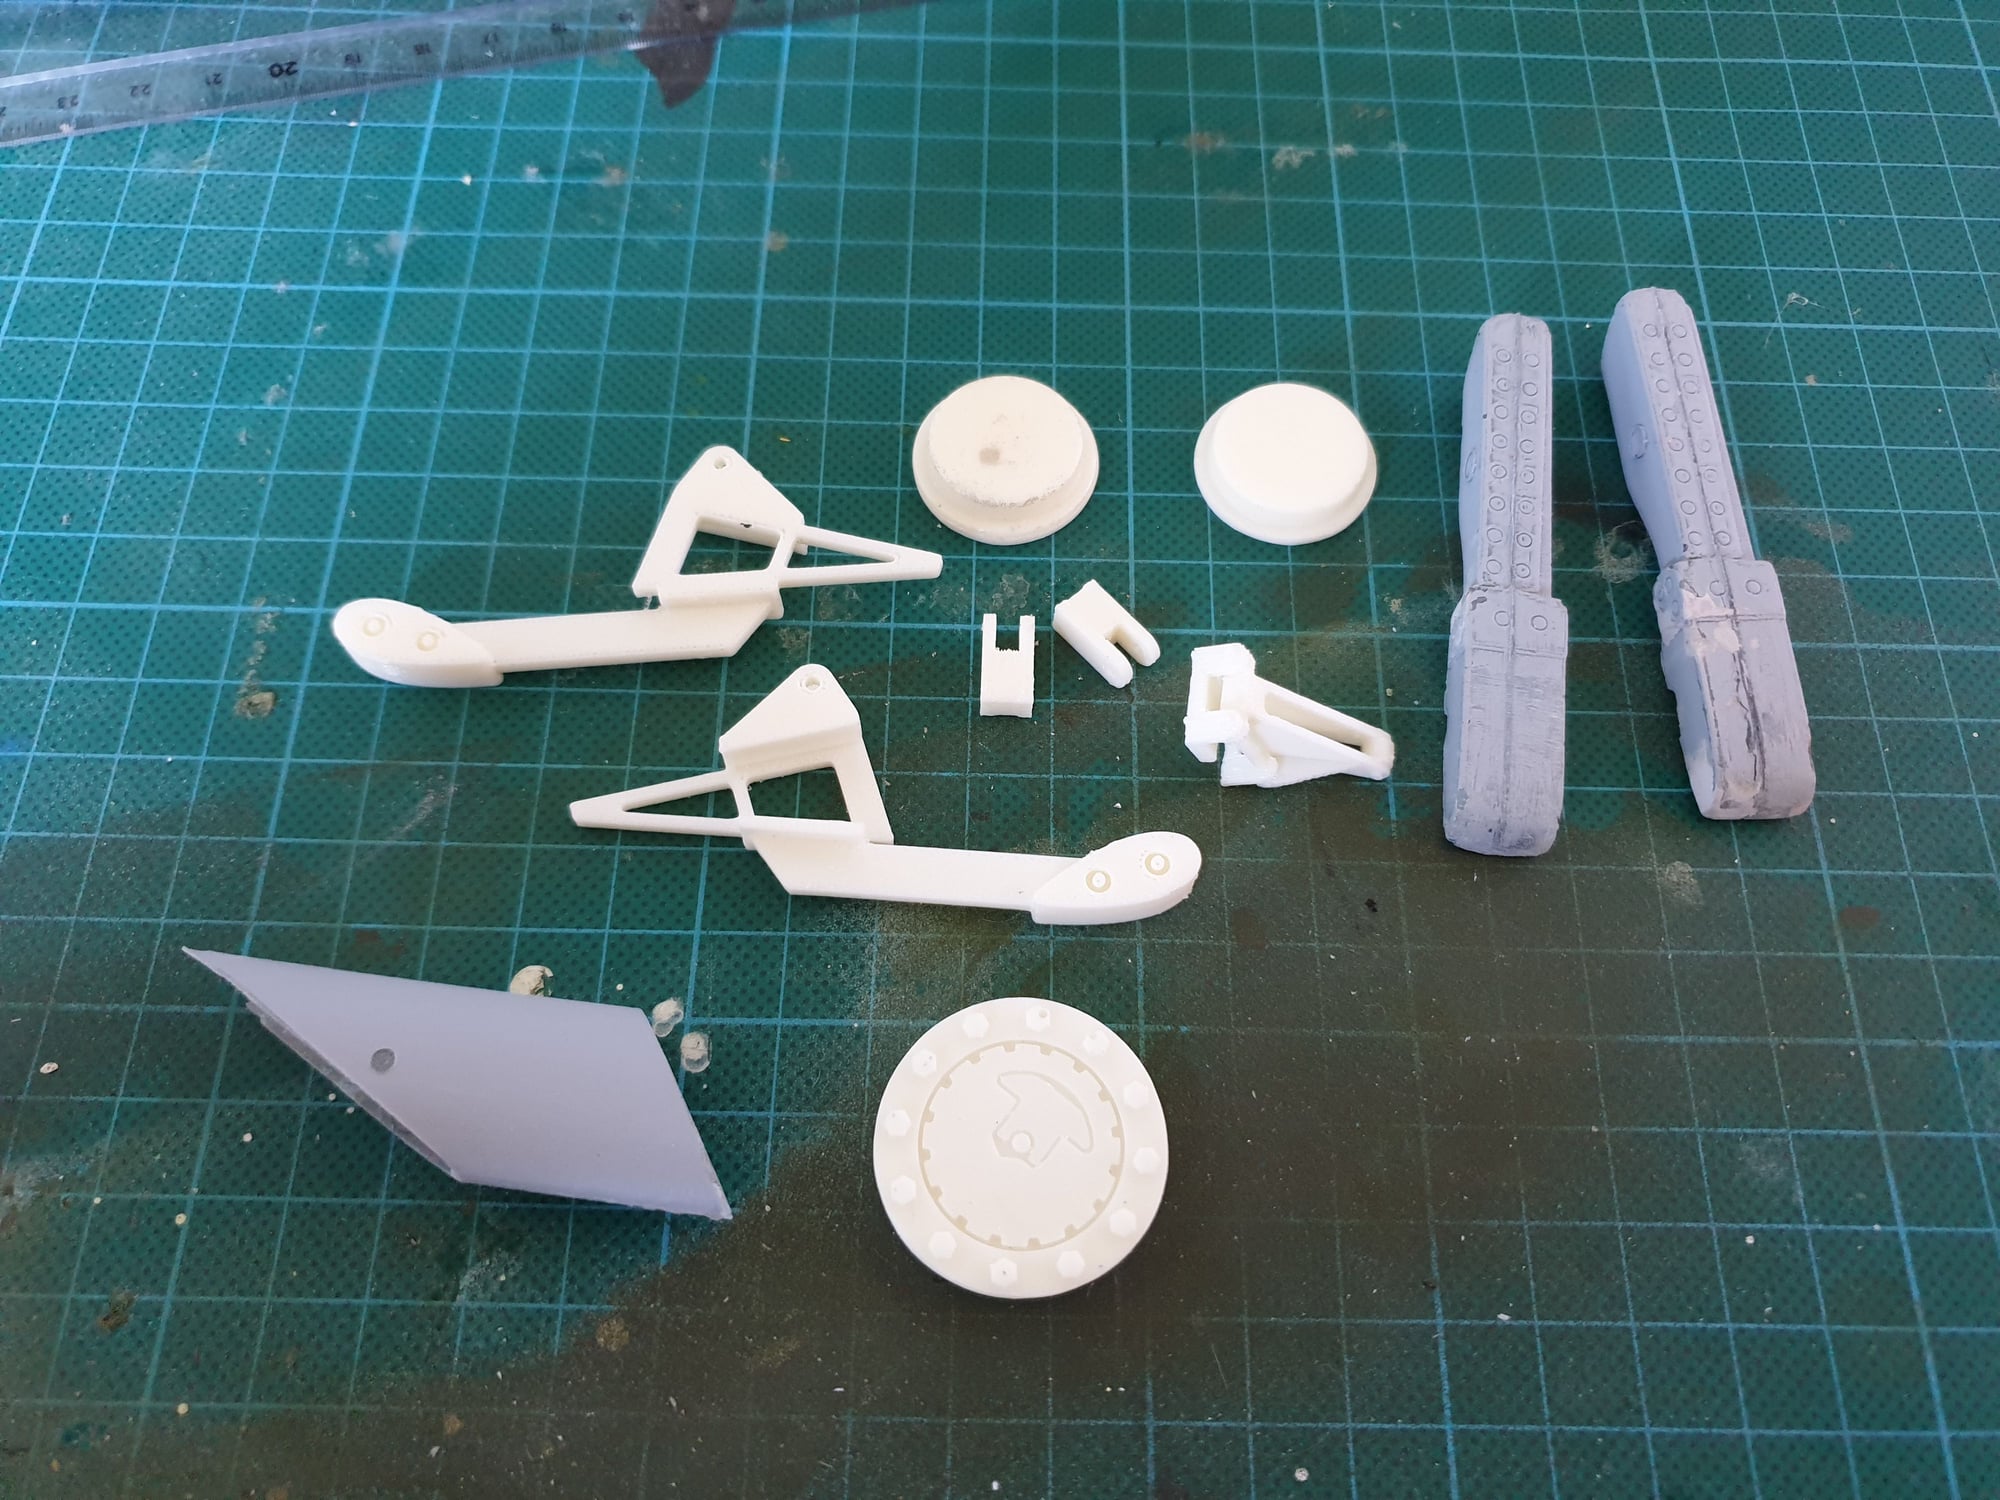
Guys, any ideas where these details are going ?
My A10 is a Gen 5.5 for information.
Ravill, I was in the same situation as you, when I picked up my plane it was primed in gray but the plane was not frosted after the fiber pieces got removed from the molds so the paint is not holding correctly on the plane. Unfortunately, my friend did the painting with the weak undercoat so everytime I'm moving my plane, I create chipping parts ..
I hope that it will be better after a coat of varnish ?
04-16-2020, 06:13 AM
#238
Guys, any ideas where these details are going ?
My A10 is a Gen 5.5 for information.
Ravill, I was in the same situation as you, when I picked up my plane it was primed in gray but the plane was not frosted after the fiber pieces got removed from the molds so the paint is not holding correctly on the plane. Unfortunately, my friend did the painting with the weak undercoat so everytime I'm moving my plane, I create chipping parts ..
I hope that it will be better after a coat of varnish ?
My A10 is a Gen 5.5 for information.
Ravill, I was in the same situation as you, when I picked up my plane it was primed in gray but the plane was not frosted after the fiber pieces got removed from the molds so the paint is not holding correctly on the plane. Unfortunately, my friend did the painting with the weak undercoat so everytime I'm moving my plane, I create chipping parts ..
I hope that it will be better after a coat of varnish ?
Hi Jimbar!
Welcome to the Hog builds! I remember reading the thread on the 5.5 and wondered what happened to everyone building?!
I can help you with a few of those pieces. Buuuutttt, if you are having problems with paint sticking, then THAT might be where you need to start.
To recap what I had to do:
1. Strip the WHOLE airplane with paint gun cleaner. (messy, but VERY effective at taking paint off without loosing small scale details)
2. Sand the WHOLE airplane with 600 grit sand paper.
3. Apply EPOXY PRIMER as a sealer. Using it as a sealer, lessens how much primer is sprayed on the jet, which can obscure some of the small scale details.
A few notes on EPOXY PRIMER. A: Its an epoxy, it WILL harden, so wash your gun after using it. Your gun will turn into a paper weight if not. B: Because it's an EPOXY, it will stick to almost anything. So this is THE property you are trying to maximize.
Don't forget you will need to use this epoxy primer on all the little parts too. I had to redo my landing gear because I forgot to use my EPOXY primer, I used a regular primer which was a mistake.
The other "tips" I can think of for painting:
Only start painting parts which you can finish (primer, paint, clear) all in one sitting. If you take longer than 24 hours between any of those steps, you have to "scratch" your primer or paint (depending on where you stopped) with a scotchbrite pad (or equivalent) so that the next paint step will stick. If you paint all 3 steps back to back to back, you increase the adhesion.
Wear nitrile gloves when handling the airplane until you apply clear.
I didn't get convinced that I NEEDED to do a gloss clear before applying decals (wet transfer) or paint masks, but that's what I did.
Runs where the most likely for me with clear, so I had to practice alot and still got a few runs.
Matte clear is AMAZING!
Regarding the scale 3D printed pieces:
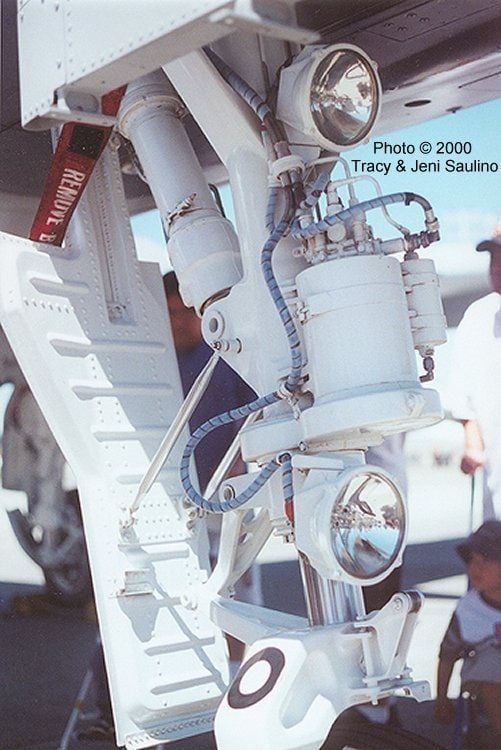
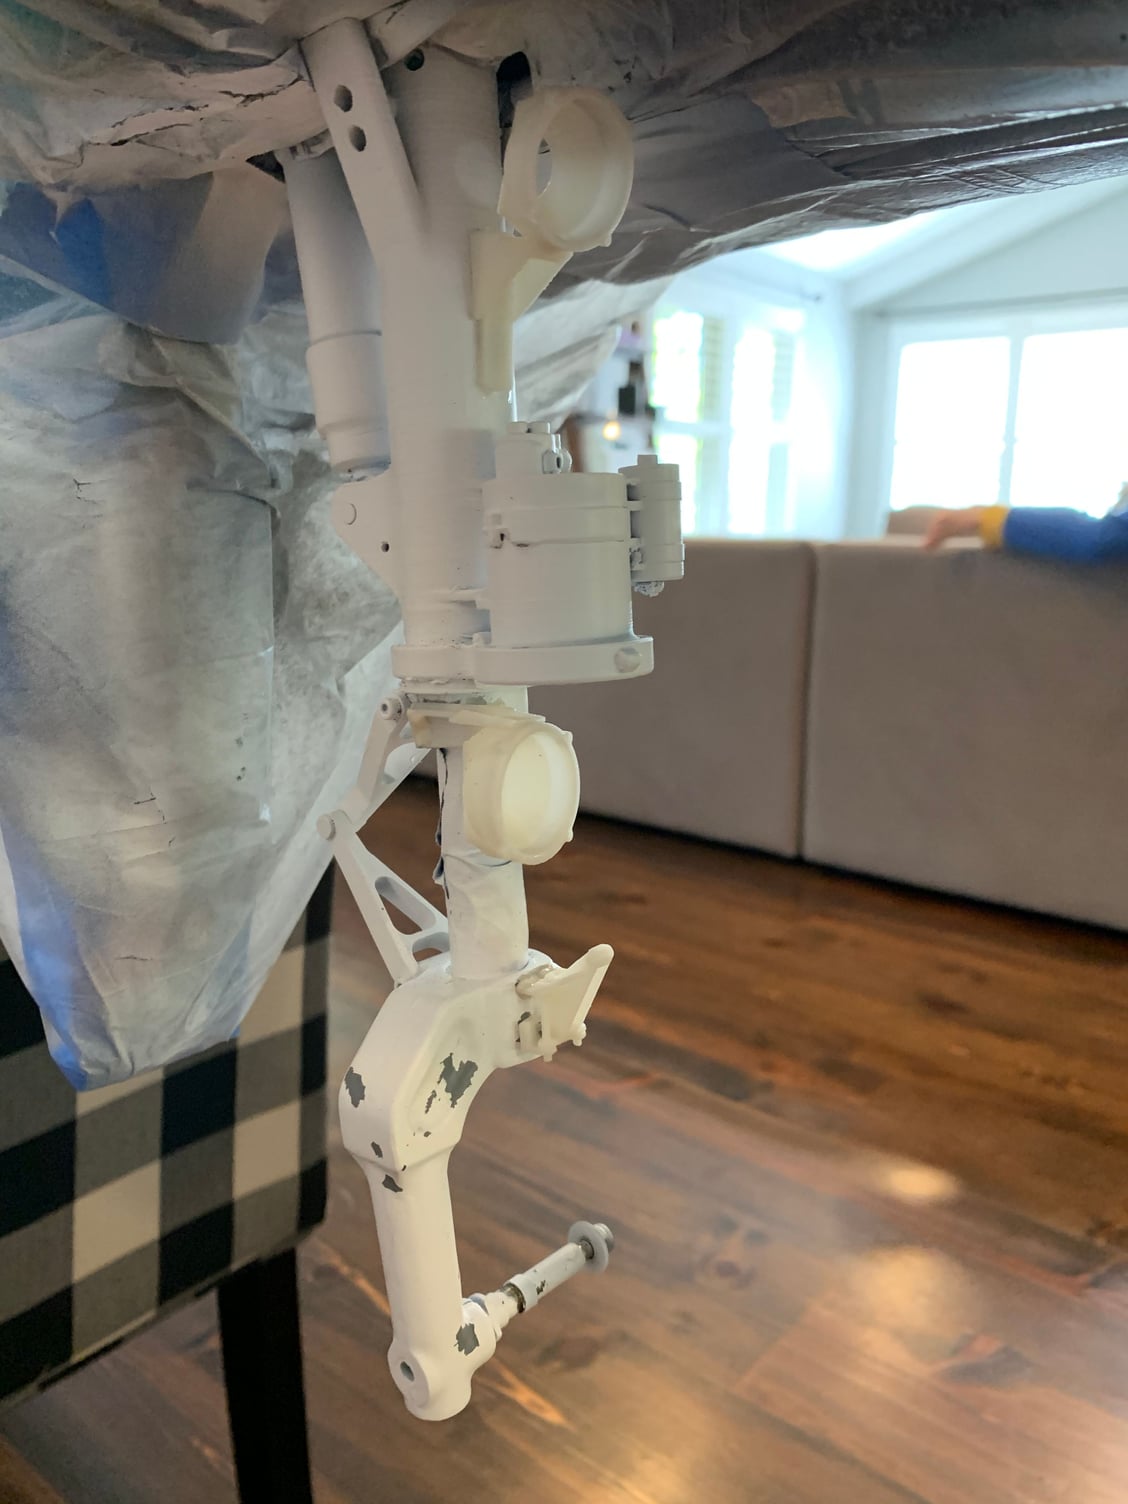
The small white piece towards the bottom of your pic next to the two long grey pieces with rivet detail, fits on the front gear strut.
The oval looking swept back pipe thingy, goes on the bottom rear of the jet and is a fuel dump pipe.
What looks like a fuel filler, if you have two, I'd say they go on the wing, if you only have one, it may go either on the Right front of the jet (just above the gun) or on the top of the get, just behind the hatch.
The other parts, I am not sure about.
I'll try to post some pics in a bit for you.
Last edited by ravill; 04-16-2020 at 05:23 PM.
 04-16-2020, 11:39 AM
#242
Hi Jimbar!
Welcome to the Hog builds! I remember reading the thread on the 5.5 and wondered what happened to everyone building?!
I can help you with a few of those pieces. Buuuutttt, if you are having problems with paint sticking, then THAT might be where you need to start.
To recap what I had to do:
1. Strip the WHOLE airplane with paint gun cleaner. (messy, but VERY effective at taking paint off without loosing small scale details)
2. Sand the WHOLE airplane with 600 grit sand paper.
3. Apply EPOXY PRIMER as a sealer. Using it as a sealer, lessens how much primer is sprayed on the jet, which can obscure some of the small scale details.
A few notes on EPOXY PRIMER. A: Its an epoxy, it WILL harden, so wash your gun after using it. Your gun will turn into a paper weight if not. B: Because it's an EPOXY, it will stick to almost anything. So this is THE property you are trying to maximize.
Don't forget you will need to use this epoxy primer on all the little parts too. I had to redo my landing gear because I forgot to use my EPOXY primer, I used a regular primer which was a mistake.
The other "tips" I can think of for painting:
Only start painting parts which you can finish (primer, paint, clear) all in one sitting. If you take longer than 24 hours between any of those steps, you have to "scratch" your primer or paint (depending on where you stopped) with a scotchbrite pad (or equivalent) so that the next paint step will stick. If you paint all 3 steps back to back to back, you increase the adhesion.
Where nitrile gloves when handling the airplane until you apply clear.
I didn't get convinced that I NEEDED to do a gloss clear before applying decals (wet transfer) or paint masks, but that's what I did.
Runs where the most likely for me with clear, so I had to practice alot and still got a few runs.
Matte clear is AMAZING!
Regarding the scale 3D printed pieces:
The small white piece towards the bottom of your pic next to the two long grey pieces with rivet detail, fits on the front gear strut.
The oval looking swept back pipe thingy, goes on the bottom rear of the jet and is a fuel dump pipe.
What looks like a fuel filler, if you have two, I'd say they go on the wing, if you only have one, it may go either on the Right front of the jet (just above the gun) or on the top of the get, just behind the hatch.
The other parts, I am not sure about.
I'll try to post some pics in a bit for you.
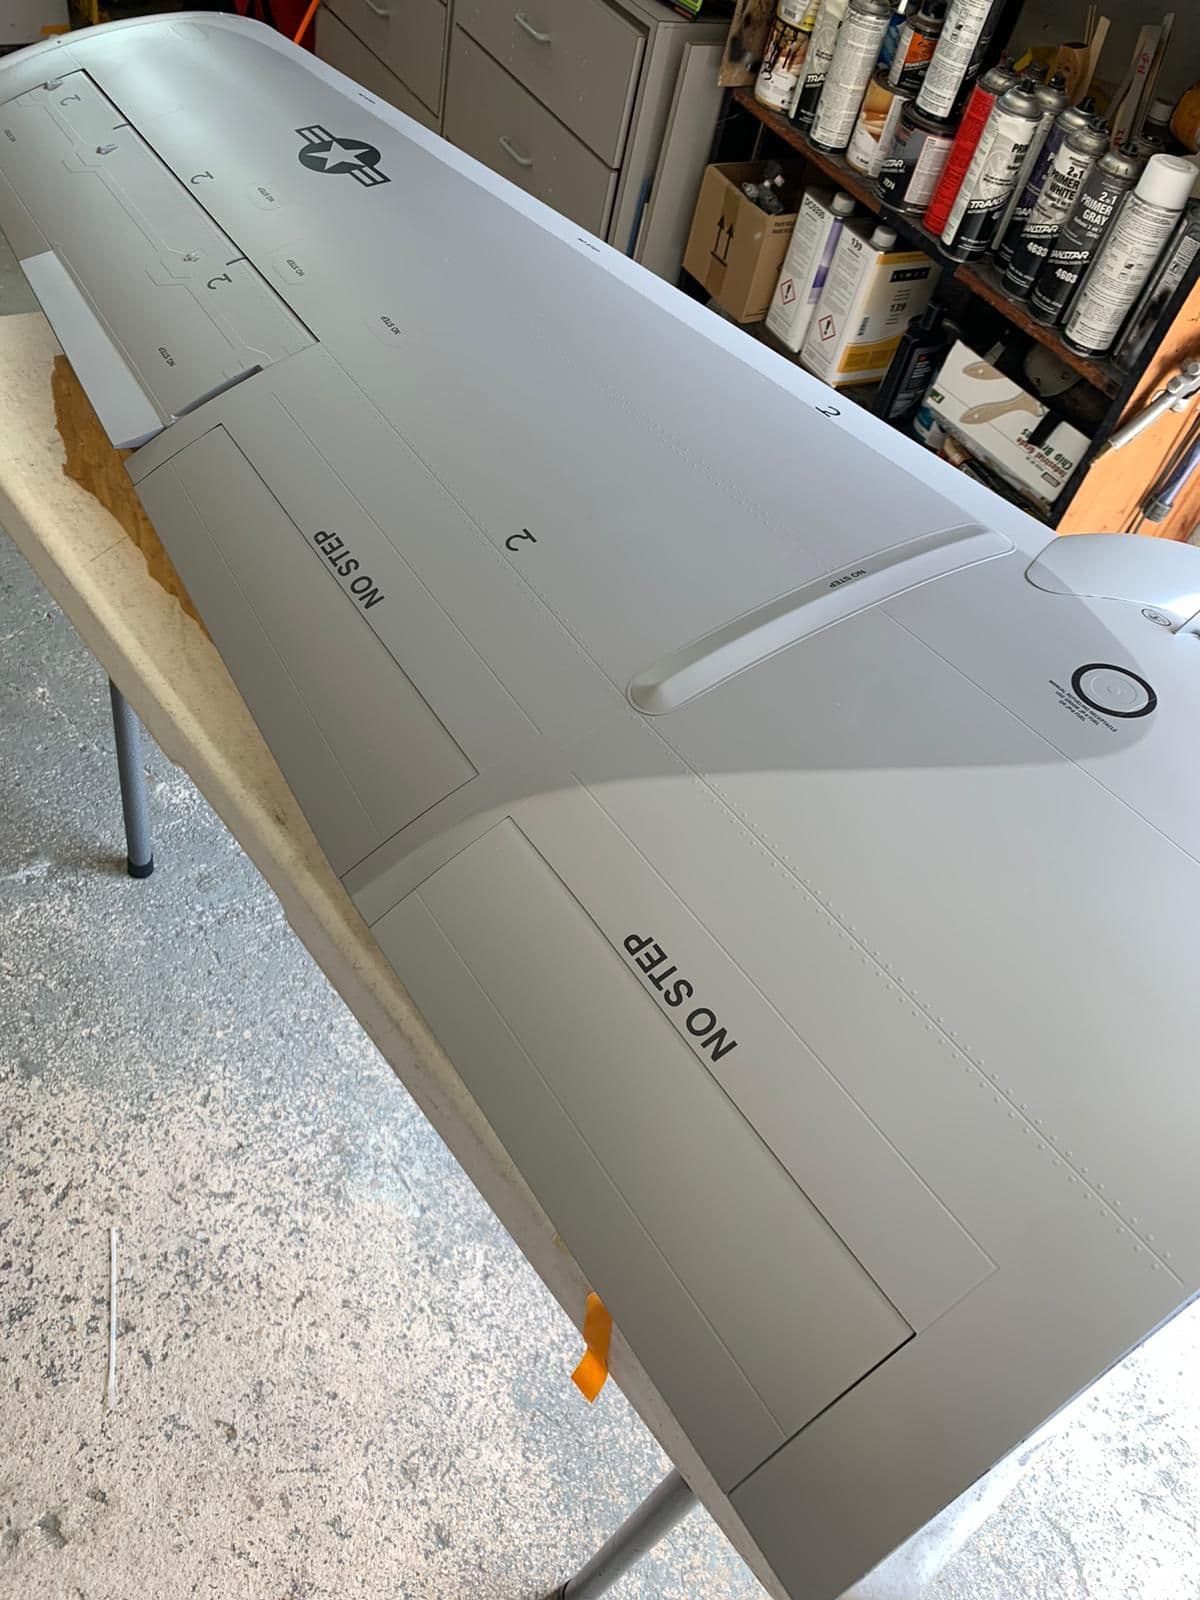
I'm slowly correcting all the mistakes and the messy parts, it's taking time and I won't be able to get everything but as I'm planning a heavy weathering, I don't think it'll be noticeable.
I'll wait your pictures for the details. Alan sent some pictures that clealry help a lot.
04-16-2020, 01:47 PM
#243
 04-17-2020, 01:19 AM
#247
Thanks again Ravill !
Looks like these pieces are going to the ailerons, correct !
Of course it's not the ind of details you would like to install after the paint is done ....
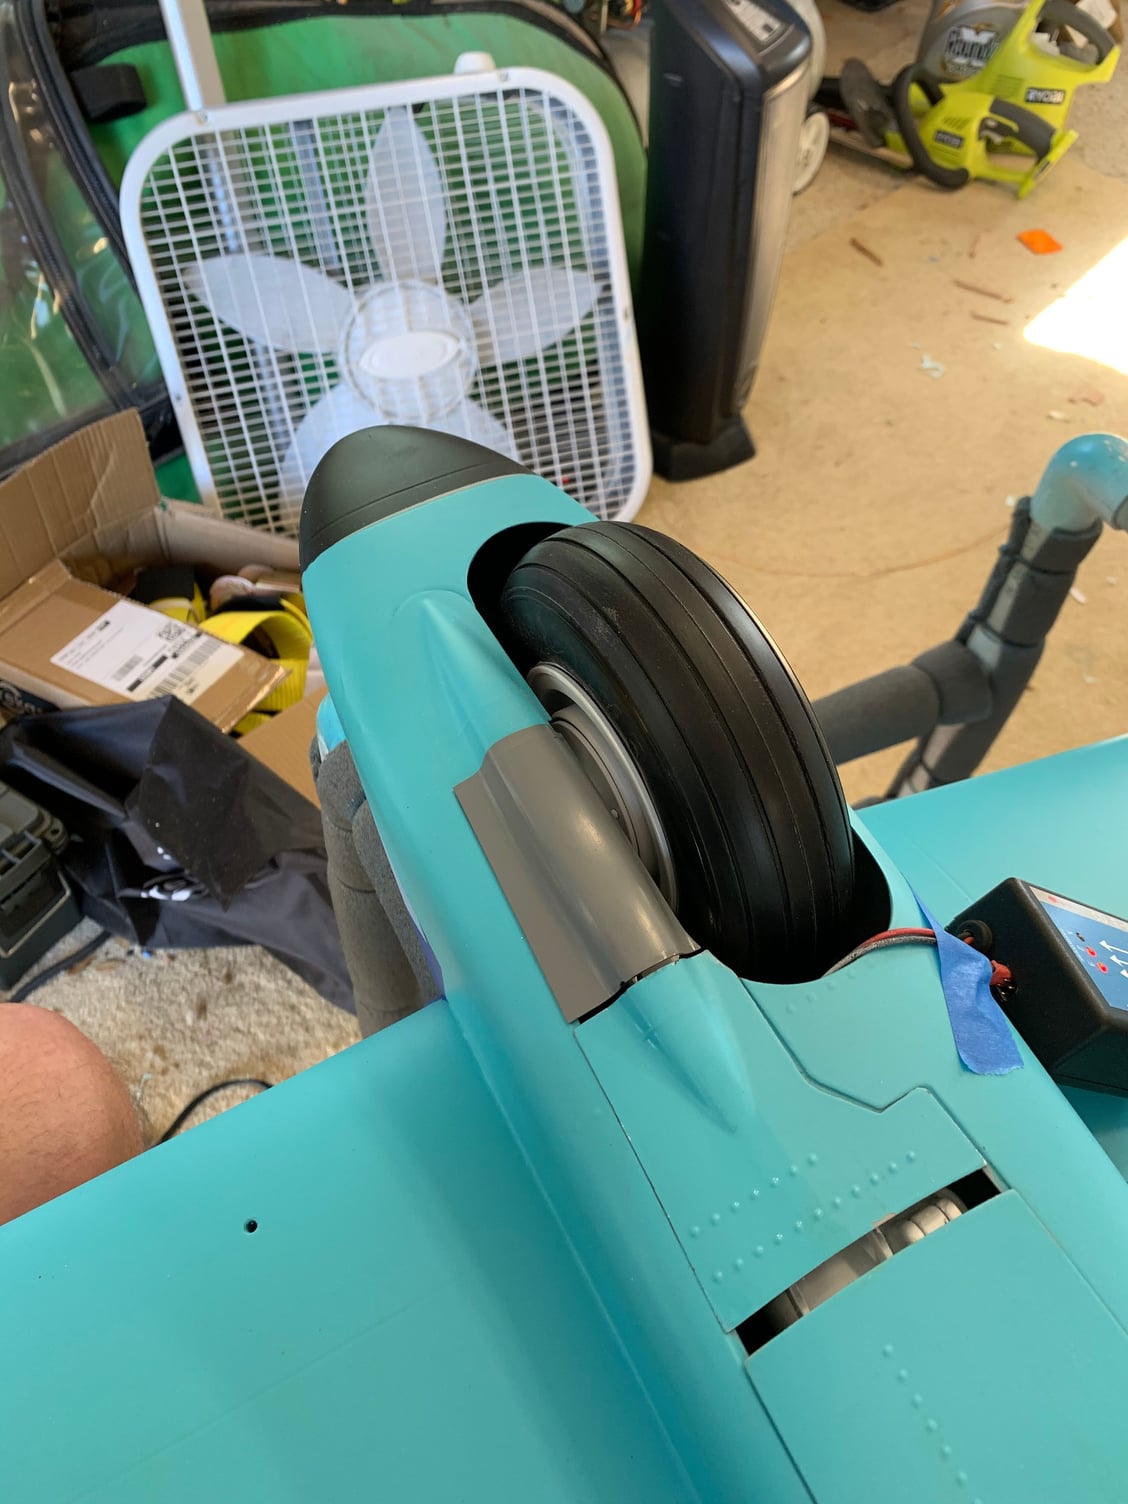
Do you have to remove the gear for painting it ?
Looks like these pieces are going to the ailerons, correct !
Of course it's not the ind of details you would like to install after the paint is done ....
Do you have to remove the gear for painting it ?
04-17-2020, 07:09 AM
#248
Ian! You moved! That’s why I haven’t seen you! I hope you and your family are doing well man!
Yeah, this paint job was crazy! I better LOVE it when it’s all said and done! LOL
Jimbar, look on post #195, I did not remove my gear. Make sure you scuff all the aluminum really well.
Yeah, this paint job was crazy! I better LOVE it when it’s all said and done! LOL
Jimbar, look on post #195, I did not remove my gear. Make sure you scuff all the aluminum really well.
04-17-2020, 04:01 PM
#249
Getting to the point where the plastic canopy need to be cut to glue them to the canopy frames.
There are no marks in the plastics canopy to indicate where it needs to be cut, so I guess need to eyeball it.
Any ideas or recommendations on this part of the build?
Thanks
There are no marks in the plastics canopy to indicate where it needs to be cut, so I guess need to eyeball it.
Any ideas or recommendations on this part of the build?
Thanks
04-17-2020, 04:20 PM
#250

Getting to the point where the plastic canopy need to be cut to glue them to the canopy frames.
There are no marks in the plastics canopy to indicate where it needs to be cut, so I guess need to eyeball it.
Any ideas or recommendations on this part of the build?
Thanks
There are no marks in the plastics canopy to indicate where it needs to be cut, so I guess need to eyeball it.
Any ideas or recommendations on this part of the build?
Thanks
Behzad