


Aviation Design Diamond Build by Ultimate Jets
 11-05-2014, 12:35 PM
#1

Thread Starter
My Feedback: (3)
Join Date: Oct 2004
Location: Houston, TX
Posts: 337
Likes: 0
Received 0 Likes
on
0 Posts
Hello everyone,
We just took delivary of a Diamond kit done in the "Red Racing Scheme" for a customer. We will be doing a full P&P set up for this build.
I'll do my best to describe the progress. It should be a nice build and look forward to it.
The build will actually start sometime late this week. Nevertheless I'll update the thread as I go.
The Ultimate Jets website has full details of this awesome kit. "Aviation Design Diamond"
Some Specs of the model are:
Wing Span: 97"
Length: 132"
Dry Weight: 40-44lbs
Powerplant: 160N to 220N (35 to 45 lbs)
We appreciate your feedback on this build


Regards,
We just took delivary of a Diamond kit done in the "Red Racing Scheme" for a customer. We will be doing a full P&P set up for this build.
I'll do my best to describe the progress. It should be a nice build and look forward to it.
The build will actually start sometime late this week. Nevertheless I'll update the thread as I go.
The Ultimate Jets website has full details of this awesome kit. "Aviation Design Diamond"
Some Specs of the model are:
Wing Span: 97"
Length: 132"
Dry Weight: 40-44lbs
Powerplant: 160N to 220N (35 to 45 lbs)
We appreciate your feedback on this build
Regards,
 11-11-2014, 05:55 PM
#6
Thread Starter
My Feedback: (3)
Join Date: Oct 2004
Location: Houston, TX
Posts: 337
Likes: 0
Received 0 Likes
on
0 Posts
Little update on the Diamond Build.
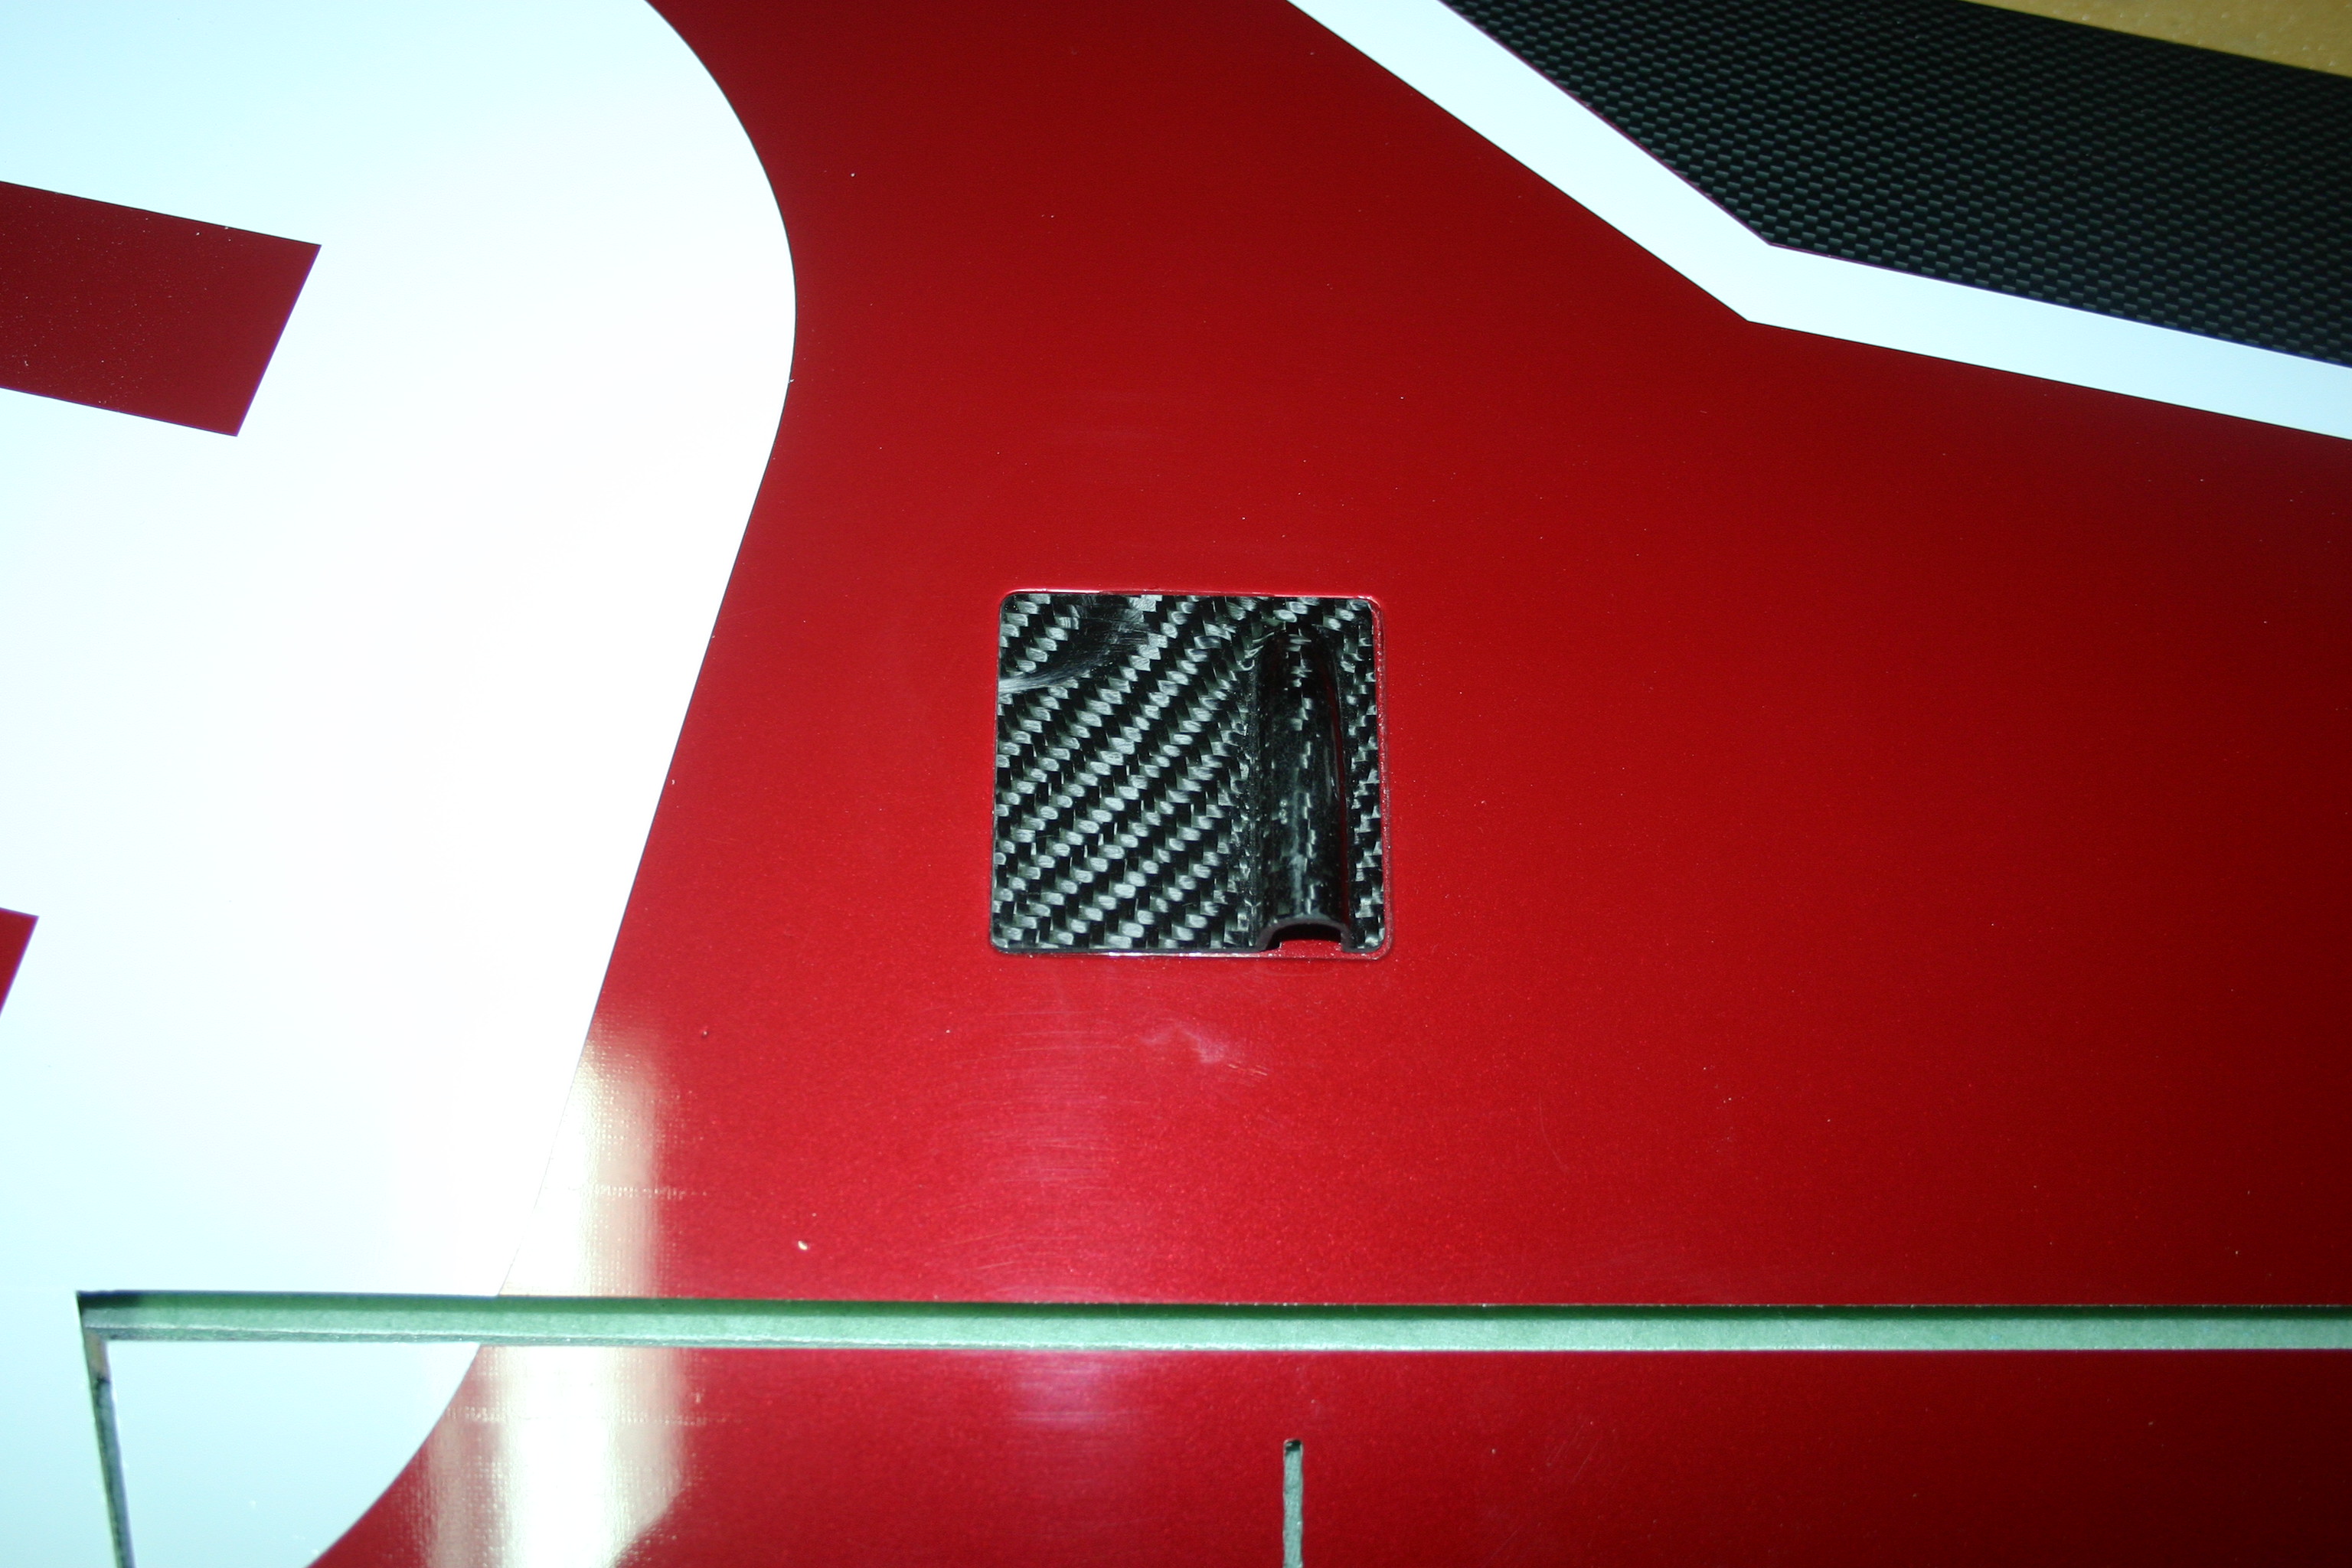
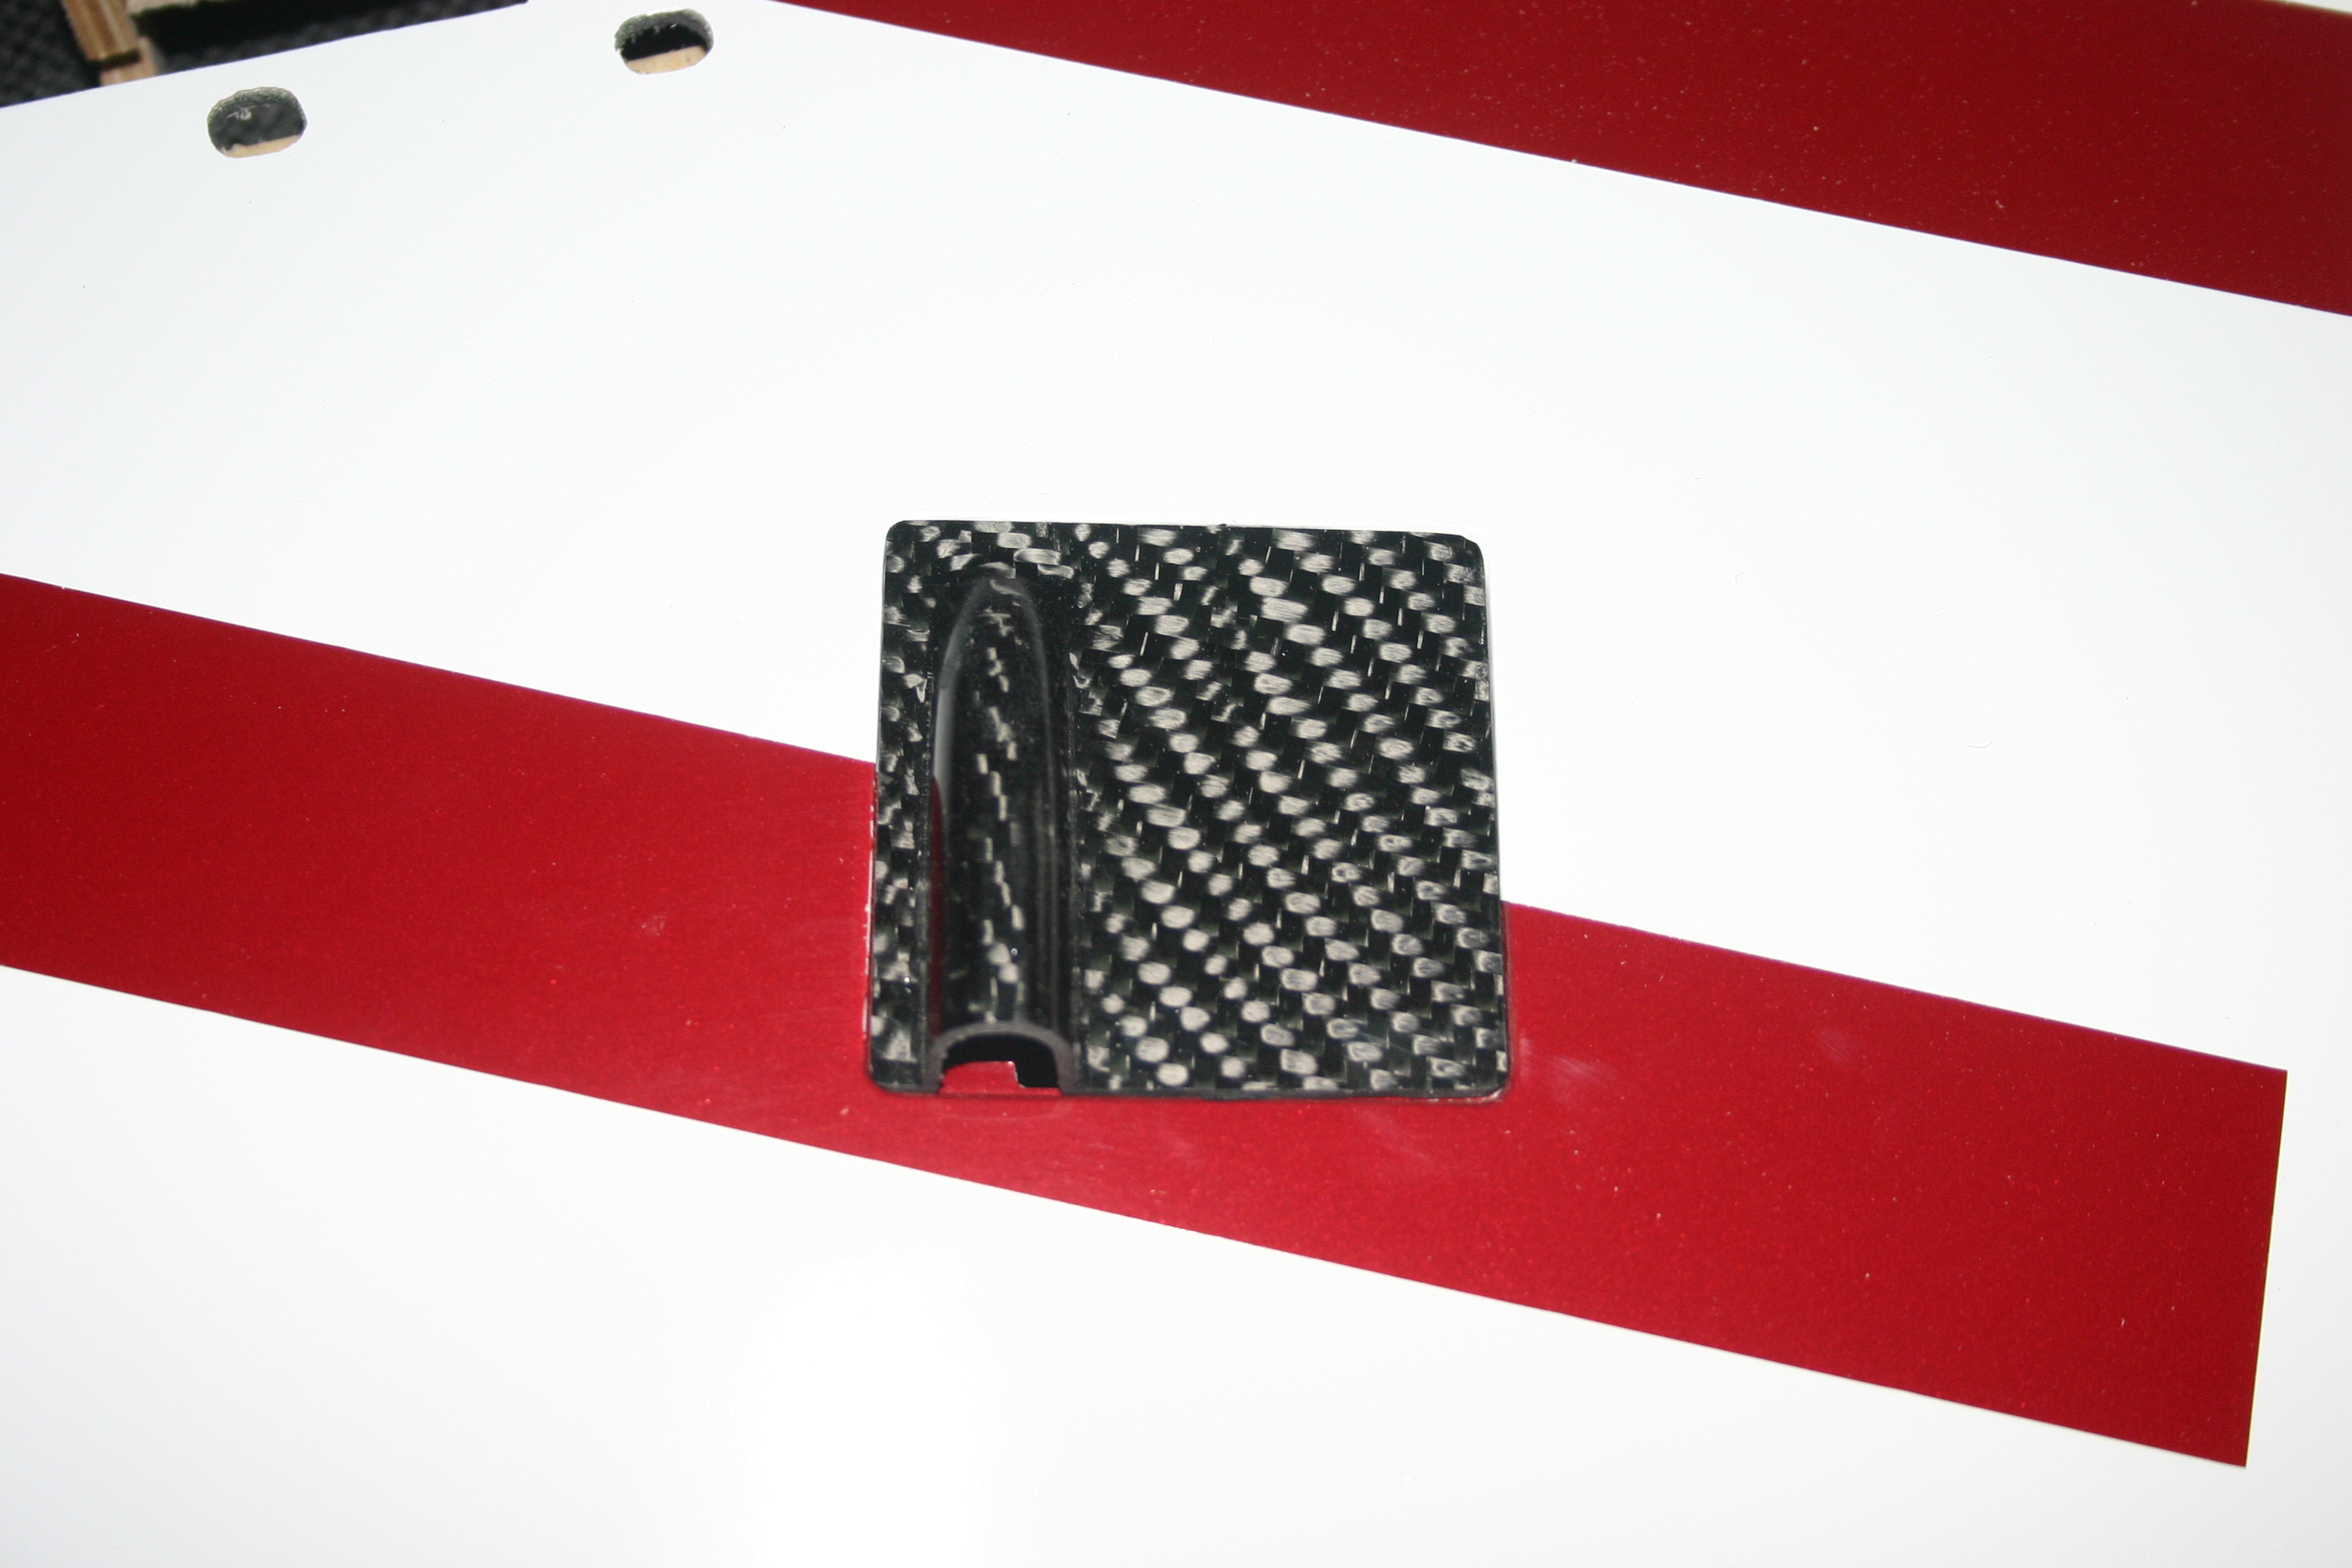
Fitted all the carbon fiber servo covers for the flaps and ailerons. This process basically just calls for using a perma grit tools and
removing some material. Overall, the fit is really good with a nice tight seam. Ready for holes to be drilled and countersunk.
Nose landing gear with direct servo put together. Should be for a neat and easy install
Main landing gear assembled and awaiting install in the wing.
Tonight i'll be measuring up the servo wiring and getting them ran along with the landing gear airlines. It was chore trying to run tag lines inside the structure.
It took a good time fishing two nyrods inside the wing. We will be updating this on future kits with strings attached inside for easy pulling of the servo wire and airlines.
Still have some pics left to take and more posting tomorrow.
And "Happy Veterans Day"
11-12-2014, 12:49 AM
#8

Join Date: Jan 2007
Location: farnborough, , UNITED KINGDOM
Posts: 3,294
Likes: 0
Received 1 Like
on
1 Post
For anyone trying to fish cable etc inside a wing or fuselage the best method I have found is to grab a length of the metal bath plug chain and use this rather than a plastic snake or similar. Its weight allows it to find those former holes etc and as it's got smooth bobbles along its length it does not snag - use gravity to get it where you want, it's saved me hours in the past 
marcs
marcs
11-12-2014, 08:11 AM
#9
Thread Starter
My Feedback: (3)
Join Date: Oct 2004
Location: Houston, TX
Posts: 337
Likes: 0
Received 0 Likes
on
0 Posts
I have not got to that strp yet. I usually go with getting the servos installed then do the control horn install. Soon as I get there I'll let you know.
I forgot to take a picture of the nose wheel. I'll post tonight with info
11-12-2014, 08:15 AM
#10
Thread Starter
My Feedback: (3)
Join Date: Oct 2004
Location: Houston, TX
Posts: 337
Likes: 0
Received 0 Likes
on
0 Posts
For anyone trying to fish cable etc inside a wing or fuselage the best method I have found is to grab a length of the metal bath plug chain and use this rather than a plastic snake or similar. Its weight allows it to find those former holes etc and as it's got smooth bobbles along its length it does not snag - use gravity to get it where you want, it's saved me hours in the past
marcs
marcs
I like that trick. I'll have to try it.
My method is using 2 golden nyrods one with a hook and the with a safety wire loop and catching the loop with hook. It does the trick for most wings but the Diamonds wings where a bit tougher to do.
11-12-2014, 05:52 PM
#11
Thread Starter
My Feedback: (3)
Join Date: Oct 2004
Location: Houston, TX
Posts: 337
Likes: 0
Received 0 Likes
on
0 Posts
Both wings are done as far as the servo wiring goes. The only problem is that I forgot to snap some photos of this process.
Only posted one shot of the retracts with the airlines attached. Both are done and just awaiting install. Came to realize that I would not have enough airline for the brakes. So I'll be doing a trip to the store for some in the morning.
All servo covers installed on the wings with the wiring inside. Soon as my servo arms come in I'll be completing the control surface horns and pushrods.
I heard that my USC connectors arrived so I'll be installing them tomorrow.
More pictures tomorrow
11-12-2014, 09:00 PM
#12

Yes, all the control surface are built with hard wood blocks for the control horns. It is absolutely essential for a plane of that size that is reaching these speeds. The hinging torque for the ailerons for example is well over 600 oz.in at max speed with a pushrod force of 15 lbs.
11-13-2014, 01:46 AM
#14

Yes, all the control surface are built with hard wood blocks for the control horns. It is absolutely essential for a plane of that size that is reaching these speeds. The hinging torque for the ailerons for example is well over 600 oz.in at max speed with a pushrod force of 15 lbs.
Last edited by Tuggs; 11-13-2014 at 02:01 AM.
11-13-2014, 02:53 AM
#15
Sorry to correct you Oli, but not on the Diamonds I have seen yet. Only wood in the trailing edges of the elastic flaps. In the area where the slot for the control horns is carved out, there is no hardwood inside. The control horn can only bond with top and bottom surface of the respective rudder / aileron etc. Judging from the photos in this thread likewise.
It has got hardwood blocks that we add ourselves.
11-13-2014, 02:59 AM
#16
Well, whatever.Sorry for the jump on your build thread.Congratulations to the guys getting an airworthy airframe from You with all those 'essential' modifications.
Last edited by Tuggs; 11-13-2014 at 03:07 AM.
 11-25-2014, 05:58 AM
#19

Join Date: Apr 2007
Location: AUSTRALIA
Posts: 397
Likes: 0
Received 0 Likes
on
0 Posts
Anymore on the build project. Have received word that my White Racing scheme will be departing Europe this week. Expected delivery week to a week and half.
Upon ordering was advised 3 months. Well its been two weeks shy of that. Pretty good estimate. Nice early Xmas present.
Upon ordering was advised 3 months. Well its been two weeks shy of that. Pretty good estimate. Nice early Xmas present.
Last edited by number27; 11-25-2014 at 06:08 AM.
11-25-2014, 07:53 PM
#20

Join Date: Jun 2006
Location: Gold Coast, Queensland, AUSTRALIA
Posts: 1,469
Received 26 Likes
on
24 Posts
Anymore on the build project. Have received word that my White Racing scheme will be departing Europe this week. Expected delivery week to a week and half.
Upon ordering was advised 3 months. Well its been two weeks shy of that. Pretty good estimate. Nice early Xmas present.
Upon ordering was advised 3 months. Well its been two weeks shy of that. Pretty good estimate. Nice early Xmas present.
That is one seriously nice looking scheme....
Jan
") 11-26-2014, 09:57 AM
11-26-2014, 09:57 AM
#22
Thread Starter
My Feedback: (3)
Join Date: Oct 2004
Location: Houston, TX
Posts: 337
Likes: 0
Received 0 Likes
on
0 Posts
Just small update. I appologize but the holidays has kept me pretty busy with full scale aircraft maintenance.
I think my SD card on my camara got corrupt. I'm not able to get all my pictures uploaded. Here are some I retook.
All in all , in house mods have been completed on Diamond. And all control horns and servos have been installed and servo wire inside vertical/horizontal stabs and wings
Batt tray is getting installed and still figering out the setup on that.
Both main landing gear have been installed.
The USC connectors where a little too big for the vert stab/elevator leads so I decided to go with the Emcotec connectors.
The wings we are using the Ultimate Servo Connector 12 way connectors we stock at Ultimate Jets.
Still waiting on turbine so not sure where all the wiring will go inside the fuselage. So I decided to start working on the tall man (pilot figure) sitting in the Diamonds office
He sits a little tall due to a parachute so it will probably call for some trimming.
But after Thanksgiving, I should have figured something out with that stage.


Warm regards and Happy Thanksgiving from Ultimate Jets Crew,
I think my SD card on my camara got corrupt. I'm not able to get all my pictures uploaded. Here are some I retook.
All in all , in house mods have been completed on Diamond. And all control horns and servos have been installed and servo wire inside vertical/horizontal stabs and wings
Batt tray is getting installed and still figering out the setup on that.
Both main landing gear have been installed.
The USC connectors where a little too big for the vert stab/elevator leads so I decided to go with the Emcotec connectors.
The wings we are using the Ultimate Servo Connector 12 way connectors we stock at Ultimate Jets.
Still waiting on turbine so not sure where all the wiring will go inside the fuselage. So I decided to start working on the tall man (pilot figure) sitting in the Diamonds office
He sits a little tall due to a parachute so it will probably call for some trimming.
But after Thanksgiving, I should have figured something out with that stage.
Warm regards and Happy Thanksgiving from Ultimate Jets Crew,
12-26-2014, 09:19 PM
#23
Join Date: Apr 2007
Location: AUSTRALIA
Posts: 397
Likes: 0
Received 0 Likes
on
0 Posts
Lookin good. A couple of questions re your diamond assembly and after reading your manual (no manual in the kit or supplied). With the main wing fixings there is only One hole already made for fixing and that is in the larger of the two diamter tubes. On the smaller tube there is no fixing point marked out like Rudder, elevators etc. Your manual states to put hardwood in both tubes. Any guidance as to where the holes for the second wing tube are located please?
On another note if posible some pictures of the UJ nose fastening system would be appreciated. From your instructions I dont get the picture of it?
Happy Holidays and looking forward to flying my white racer in the new year.
On another note if posible some pictures of the UJ nose fastening system would be appreciated. From your instructions I dont get the picture of it?
Happy Holidays and looking forward to flying my white racer in the new year.
12-27-2014, 01:29 AM
#24
Thread Starter
My Feedback: (3)
Join Date: Oct 2004
Location: Houston, TX
Posts: 337
Likes: 0
Received 0 Likes
on
0 Posts
Lookin good. A couple of questions re your diamond assembly and after reading your manual (no manual in the kit or supplied). With the main wing fixings there is only One hole already made for fixing and that is in the larger of the two diamter tubes. On the smaller tube there is no fixing point marked out like Rudder, elevators etc. Your manual states to put hardwood in both tubes. Any guidance as to where the holes for the second wing tube are located please?
On another note if posible some pictures of the UJ nose fastening system would be appreciated. From your instructions I dont get the picture of it?
Happy Holidays and looking forward to flying my white racer in the new year.
On another note if posible some pictures of the UJ nose fastening system would be appreciated. From your instructions I dont get the picture of it?
Happy Holidays and looking forward to flying my white racer in the new year.
Can you upload a picture of what your referencing.
ive not updated in a while. I apologize for this.
I'm away from home on a trip visiting family. Soon as I get back I'll take some pics
12-27-2014, 02:34 AM
#25
Join Date: Apr 2007
Location: AUSTRALIA
Posts: 397
Likes: 0
Received 0 Likes
on
0 Posts
Any pictures of the installation of your UJ fastening system for the nose cone on the Diamond. Pages 33 and 34 of your manual from Ultimate Jets site. If you are away will have to wait until you return.
The second of the wing tubes has no pre drilled holes in the wing just holes drilled for the bigger diameter of the tubes. Have you fastened the second wing tube if so any measurements to the location of the hole in the wing?
The second of the wing tubes has no pre drilled holes in the wing just holes drilled for the bigger diameter of the tubes. Have you fastened the second wing tube if so any measurements to the location of the hole in the wing?