


12V or 24V, how to tell?
 03-30-2020, 11:12 AM
#1
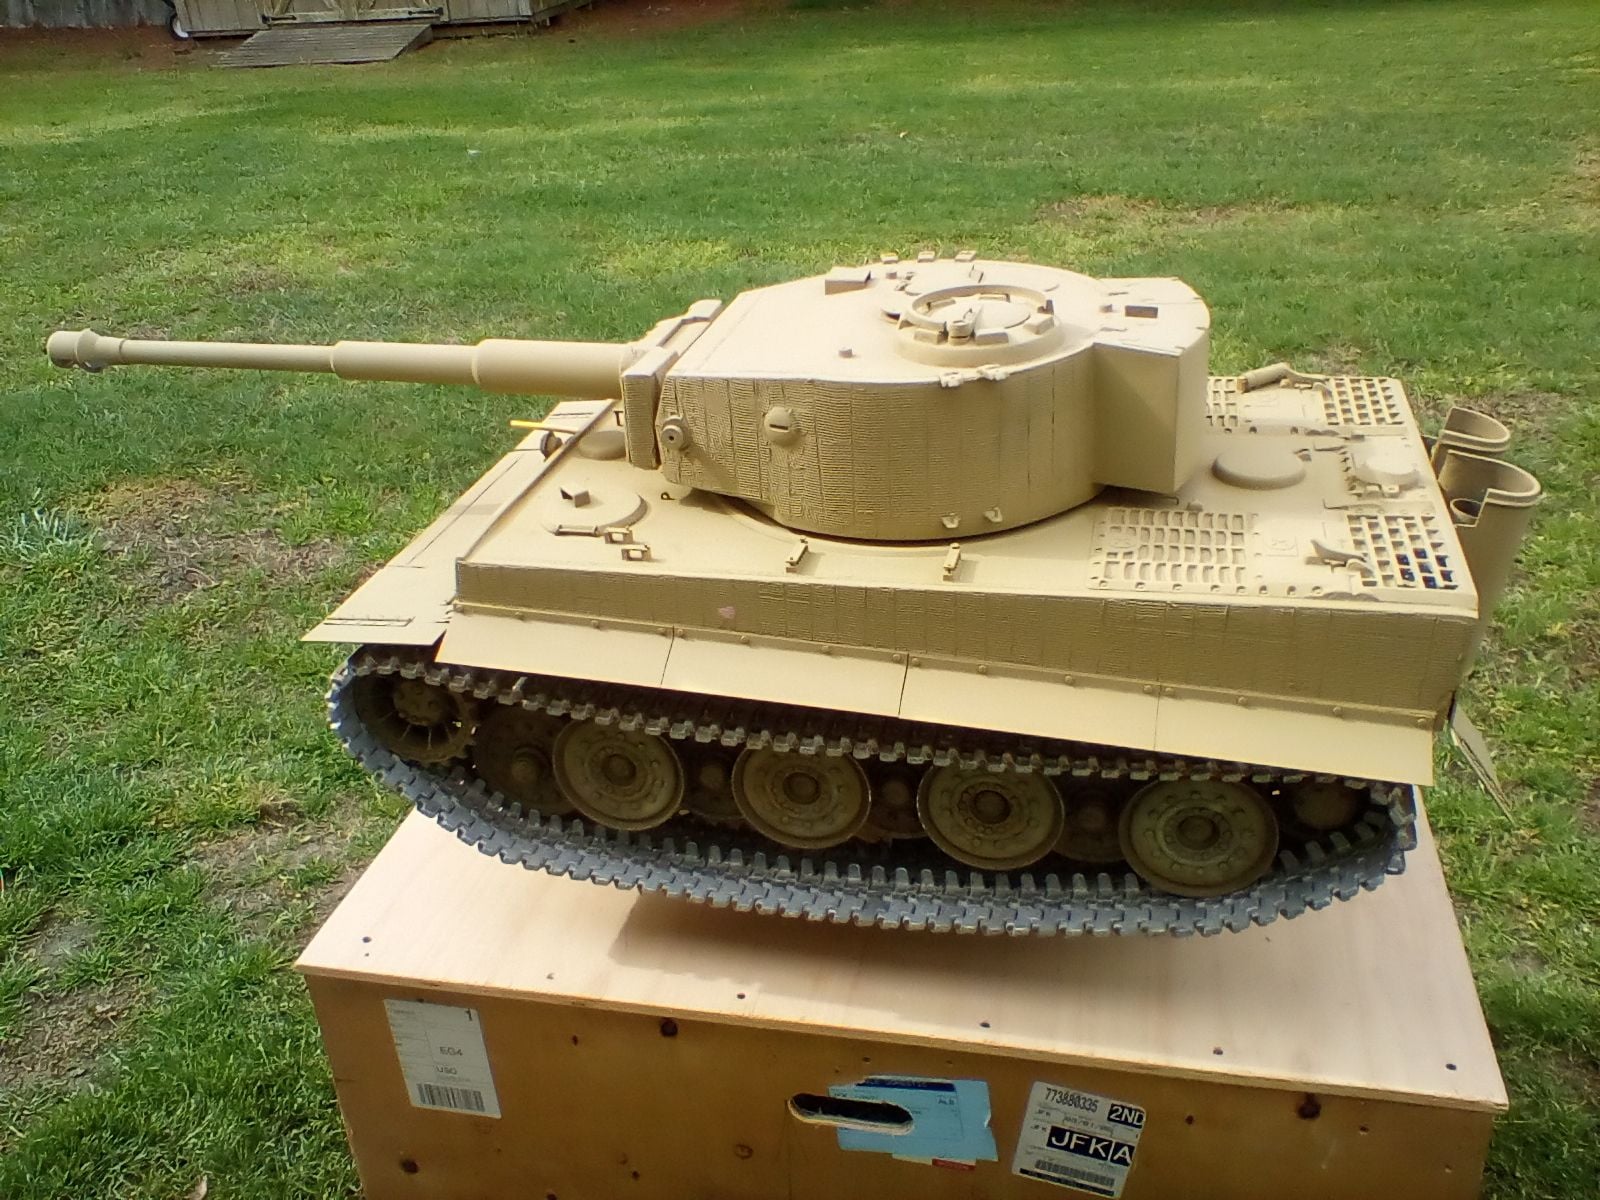
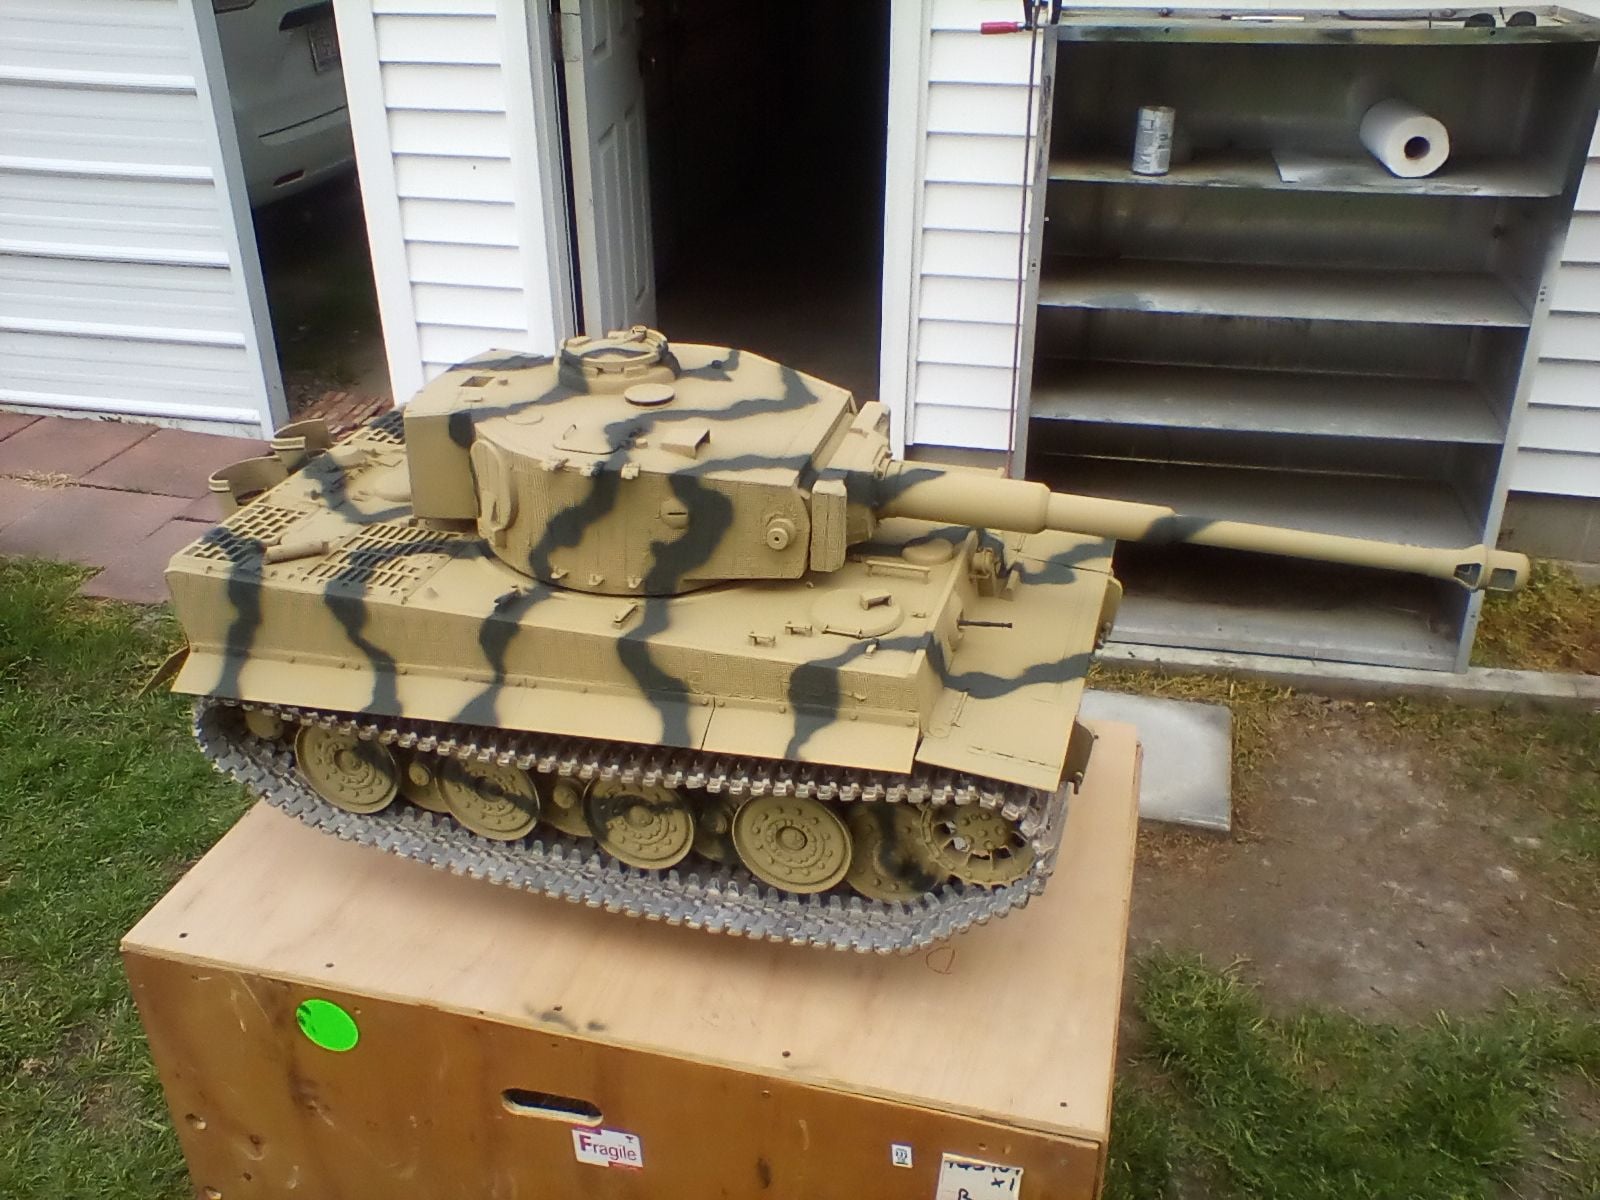
Hello fellow tankers, I hope everyone is doing Ok thru this crises. Since I am getting some time off from work I thought I would make the best of it and start on the re-furbish Tiger project. A couple of months ago a friend who I had met at the Danville tank museum called me up out of the blue and asked if wanted the 1/6 Tiger 1 that he had. I had seen the model during the Armortek gathering and thought it was worth saving but it needed a bunch of work. Over the past couple of weeks I have sanded the thing down, took out all the antique Sanyo radio stuff, scratch built lots of missing small details & finally started a re-paint. The model was originally built in Russia and then sold to a gentleman in England who has since passed away several years ago. It's all fiberglass with metal running wheels and seems to drive OK. The previous owner had bought a Dimension Engineering Sabertooth 2X12 speed control which I have wired in and working fine with my Spectrum 8 radio.
Finally my question is this, how do I tell if the motors in this thing are 12 or 24 volt? Right now the model will drive around nicely on my smooth shop floor but when it gets outside it will not turn due to lack of power. I am currently running a 12V lead acid motorcycle battery. The Sabertooth is rated up to 30V max so I am not worried about the speed control but I don't want to toast a motor, I can't imagine trying to find parts for this thing!
Larry
Last edited by 1qaz; 03-30-2020 at 11:17 AM.

The following users liked this post:
Old MSgt (04-02-2020)
03-30-2020, 01:49 PM
#2
1 Gaz,
Those were sold by Mark 1 tanks in the UK. They are 24V. If it doesn't have enough power on 12V it is surely 24V. Just connect 2X 12V batteries in Series to get 24V. It should then run with plenty of torque.
Nice looking Tiger, esp for the price!
B
Those were sold by Mark 1 tanks in the UK. They are 24V. If it doesn't have enough power on 12V it is surely 24V. Just connect 2X 12V batteries in Series to get 24V. It should then run with plenty of torque.
Nice looking Tiger, esp for the price!
B
The following users liked this post:
Markocaster (03-30-2020)
03-30-2020, 02:44 PM
#3

I run my Hetzer (1/6 scale) on a 30C 8000 mah 6S lipo battery that cost about $85. Very compact, easy to remove and charge, and 24 volts at full charge (rated at 22.1 volts). Like this
https://chinahobbyline.com/index.php...&product_id=87
I see they've gone up a bit, but they run sales all the time so I'd shop around. Much less hassle than lead acid bats, IMHO.
https://chinahobbyline.com/index.php...&product_id=87
I see they've gone up a bit, but they run sales all the time so I'd shop around. Much less hassle than lead acid bats, IMHO.
03-30-2020, 04:09 PM
#4
Thanks for the great info guys! I had found the tank in the Mark 1 models web site and kinda put 2 & 2 together.
Crius, I have 4 packs of the Pulse 6S 5000ma LiPo packs that I fly my larger scale R/C airplanes with and I had thought about going that route for power. I need to order up some new Castle connectors and give that a try.
I will probably end up giving the model back to my friend when I am finished with the re-build, I get the feeling I am trying to polish a turd But I am having an enjoyable time with it!
Crius, I have 4 packs of the Pulse 6S 5000ma LiPo packs that I fly my larger scale R/C airplanes with and I had thought about going that route for power. I need to order up some new Castle connectors and give that a try.
I will probably end up giving the model back to my friend when I am finished with the re-build, I get the feeling I am trying to polish a turd
But I am having an enjoyable time with it!
The following 2 users liked this post by 1qaz:
Markocaster (03-30-2020),
Old MSgt (04-02-2020)
03-30-2020, 06:04 PM
#5
It wasn't a cheap tank. I'm guessing it was close to $3000 new.
 03-30-2020, 06:22 PM
#6
I would not be a "happy camper" if I paid that for this thing, I consider myself very lucky that my friend who gave it to me offered to take it back and pay the additional cash I sink into the model. I can enjoy putting lipstick on the pig and not end up stuck with it
The following users liked this post:
Markocaster (03-30-2020)
03-31-2020, 09:52 AM
#8
Junior Member
Hi - this is a very early Mark 1 tiger. It will be 12 volts only- you can tell by the enclosed gearbox - don't put 24v through the motors, they won't like it! The 12v versions were very slow on turns as you have already found out, the reason why most convert to chain drive and 24v.
03-31-2020, 10:40 AM
#9
Hello Peter,
I guess you could call the gearbox "enclosed" as it is covered with a clear plastic and appears to be sealed around the edges with maybe RTV? Thank you for the info about the voltage! I would not call the model slow to turn, nonexistent turns would be a better description of it's turns on any surface other than my smooth shop floor.
When you say it's a "very early Mark 1 Tiger" what years were they made? I was told that it was made around 2008, does that sound correct?
03-31-2020, 12:30 PM
#10
Personally I would upgrade the motors then if it has no power. There are much better motors around now then there used to be. I use these in my paintball combat tank that weighs over 150lbs with steel track:
450W GEARED Motor - 24 Volts (Style: MY1018Z)
Those motors have plenty of power and I have no issues with turning in any kind of terrain. Of course when I bought them they were around $70 per motor. Not sure why they have shot up in price. Here they are installed in my KV-2:
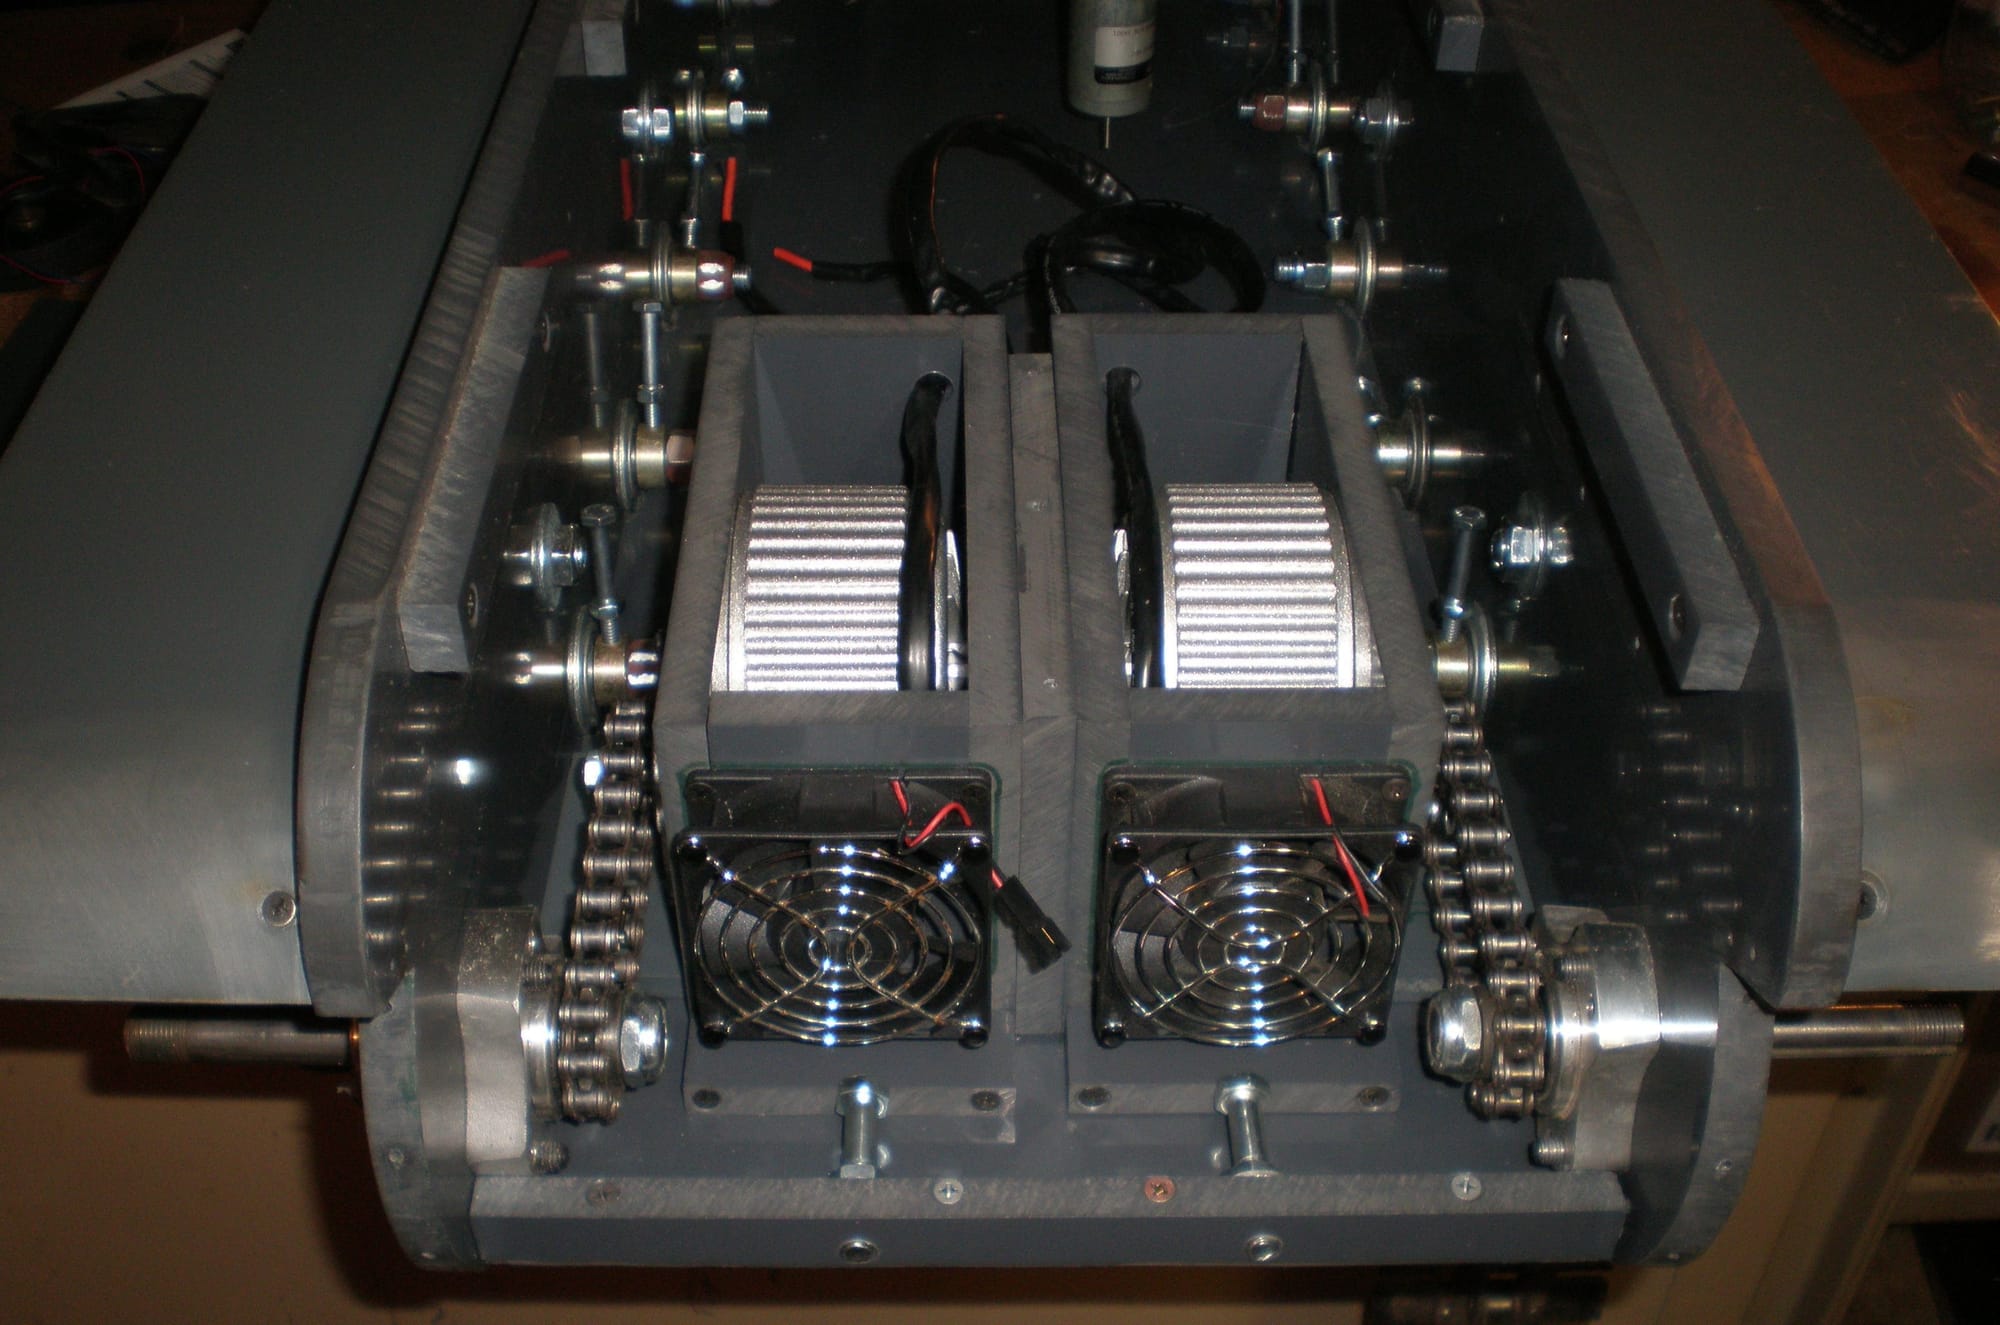
40 pitch chain. 5/8" go kart hubs with bearings. Each motor is mounted in a sliding "tray" so the drive chains can be tensioned independently. Overall track tension is done on the front idler wheels.
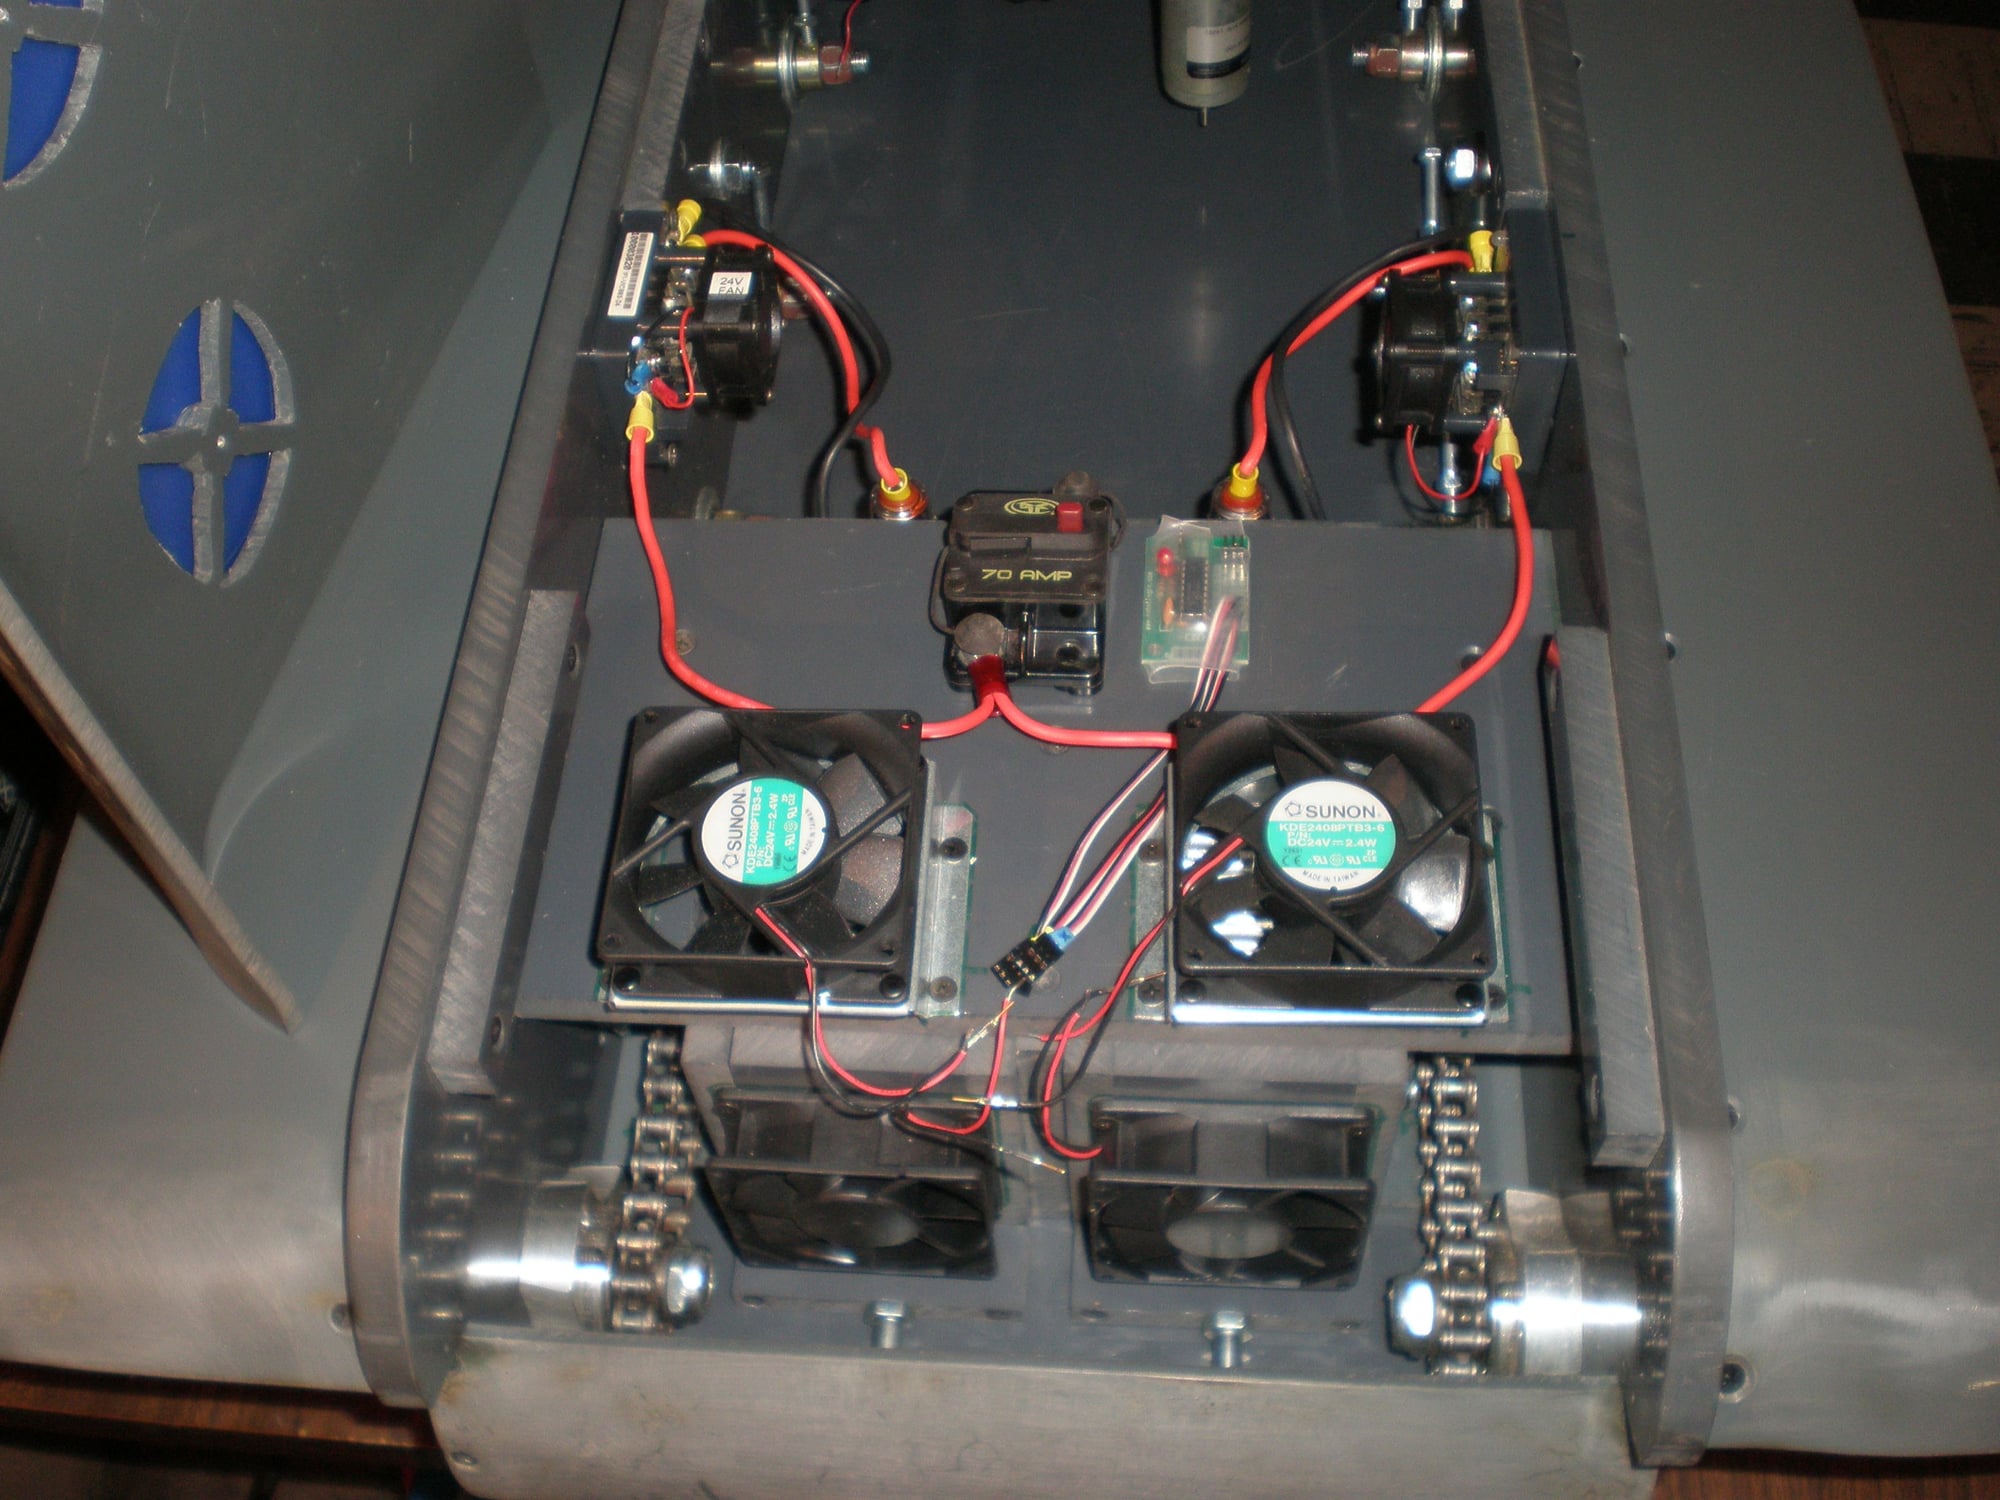
Fans are just for some airflow around the motors. Cool motors are happy motors. This is how the wiring used to look.
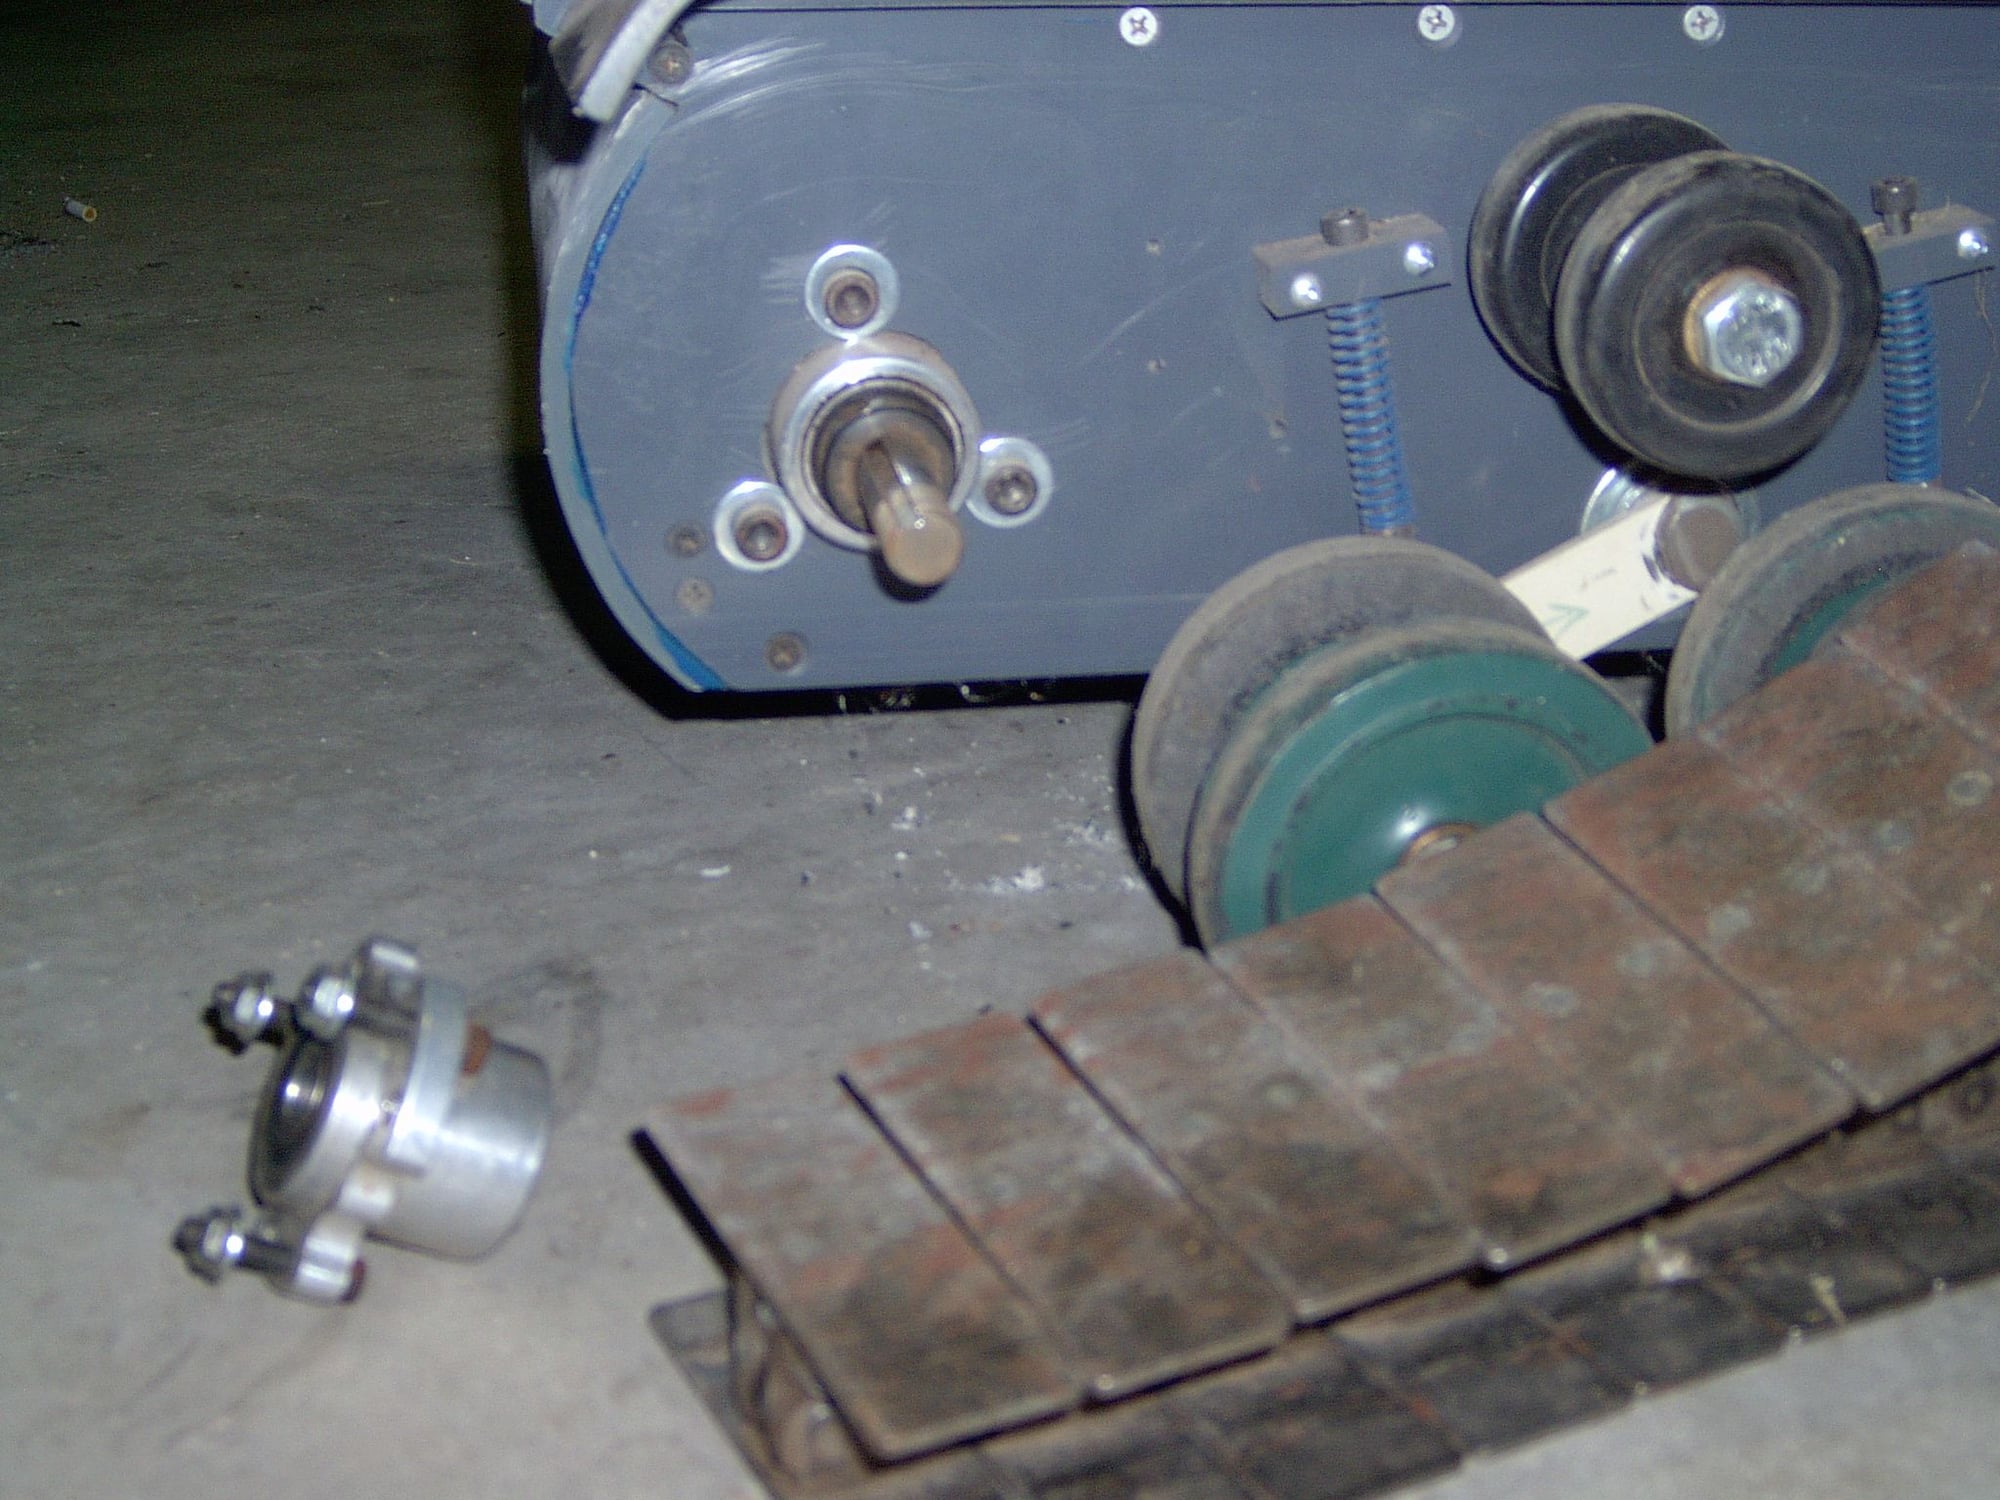
Other side of the go kart hub and the 4.5" wide steel conveyor belt tracks.
450W GEARED Motor - 24 Volts (Style: MY1018Z)
Those motors have plenty of power and I have no issues with turning in any kind of terrain. Of course when I bought them they were around $70 per motor. Not sure why they have shot up in price. Here they are installed in my KV-2:
40 pitch chain. 5/8" go kart hubs with bearings. Each motor is mounted in a sliding "tray" so the drive chains can be tensioned independently. Overall track tension is done on the front idler wheels.
Fans are just for some airflow around the motors. Cool motors are happy motors. This is how the wiring used to look.
Other side of the go kart hub and the 4.5" wide steel conveyor belt tracks.
03-31-2020, 01:04 PM
#11
TankMe, that is one slick looking installation! I would not mind spending $107 for the good motors but then I would end up having to re-engineer the gearbox or chain drive and then the running wheels and suspension need to be stiffened up. To really do it right I would need to scratch build an all new lower hull from aluminum like an Armortek model, then use all the wheels and tracks. If I just had to have a 1/6 Tiger 1 tank model I would enjoy the challenge, but I am quite happy modeling in 1/16 for now.
I am going to finish up the cosmetics on this thing and give it back to my friend, I would like to see a photo of your big KV-2 if you have one.
Thanks again for all the great info in regards to this thing!
Larry
I am going to finish up the cosmetics on this thing and give it back to my friend, I would like to see a photo of your big KV-2 if you have one.
Thanks again for all the great info in regards to this thing!
Larry
03-31-2020, 08:36 PM
#12
Better yet...here she is:
Since the vid I've rewired it and it's now powered by LiPO batteries.
Since the vid I've rewired it and it's now powered by LiPO batteries.
04-01-2020, 02:36 AM
#13
If you are interested the Russian manufacturer site is:
Radio Controlled Model Tanks - Big rc tanks, large scale rc tanks by Alex Shlakhter
The tanks came in 12 or 24 volt versions upon order
Since Alex's passing not sure how/if their business is running
Radio Controlled Model Tanks - Big rc tanks, large scale rc tanks by Alex Shlakhter
The tanks came in 12 or 24 volt versions upon order
Since Alex's passing not sure how/if their business is running
04-01-2020, 03:03 AM
#14
Junior Member
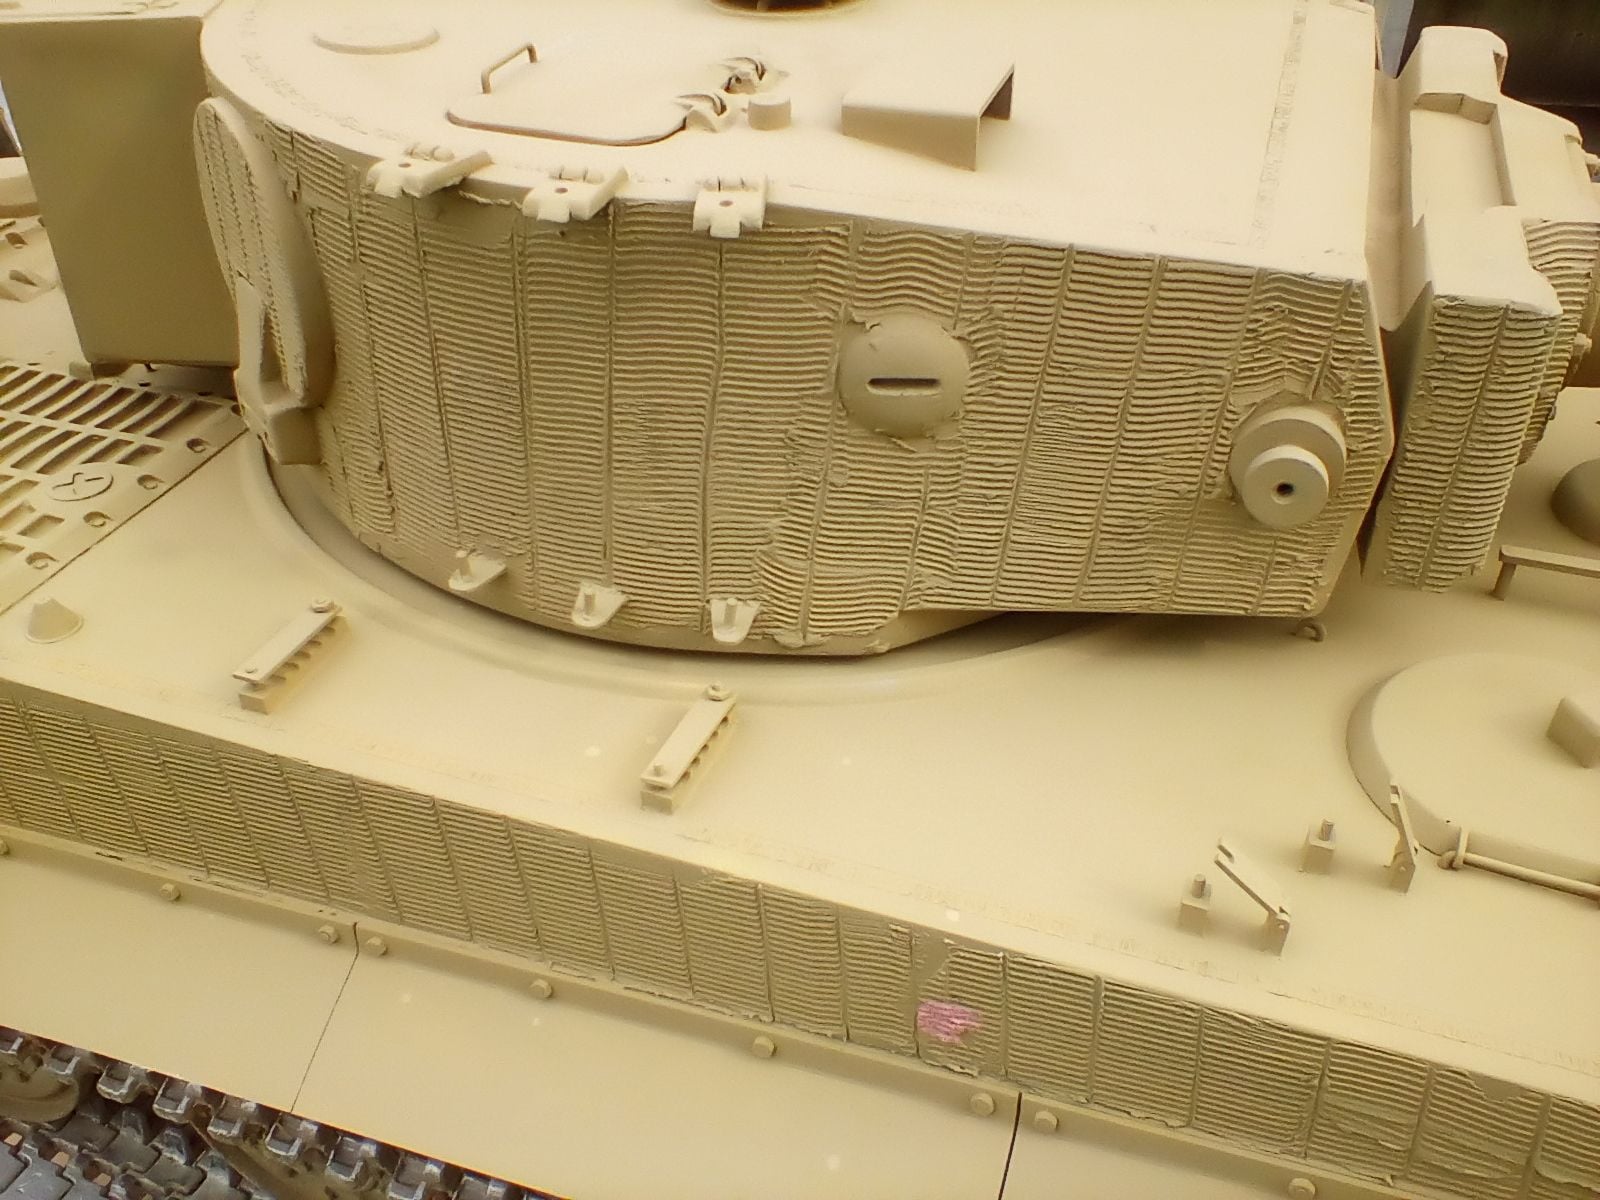
Hi 1qaz. These were made as early as 2002/3 but its not easy to date precisely. I have the same model and I improved the performance considerably by removing the gearbox cover (held on by silicone seal) and cleaning out the old hardened grease and re greasing. You can go on altering these models, and I've seen owners alter them until there's nothing left of the original, which to me is a bit pointless. They are pretty crudely made as you have seen , but your friend can still have some fun with it, subject to it's limitations. You're doing a great job by the looks of it.
04-01-2020, 04:49 AM
#15
Great video TankMe! Thanks for posting it, looks like a really nice model.
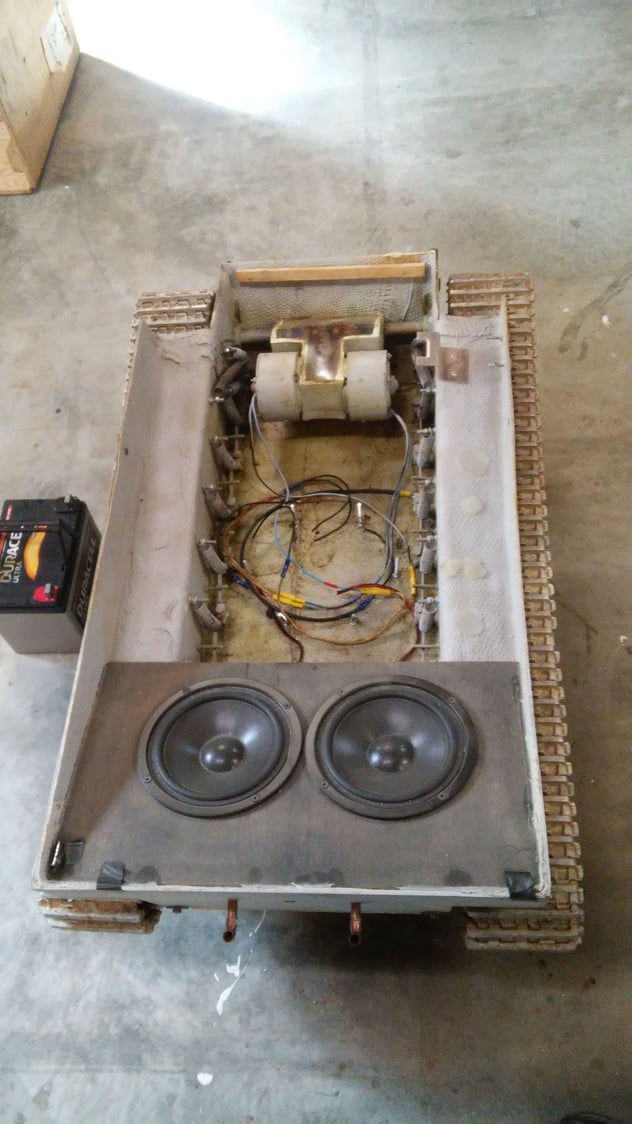
Peter, you hit the nail on the head when you said these models are "crudely made"! I had to make up some extruded aluminum cross braces to take the warp & sag out of both the turret and the top surface of the lower hull. I think maybe at some point in time the model got left in a hot shed and all the upper surfaces sagged in the heat. I did get everything back so that it's nice and flat and it will not warp again. The photo of the lower hull is before I used some counter sunk screws to bolt in my braces, you can see at the ends of the aluminum how warped the hull was. Big 1/2" gaps in some places! I had thought about cleaning out the old grease, if you had good luck with new grease then I will give that a try. it won't cost a thing to try new grease!
Peter, how about a photo of your big model?
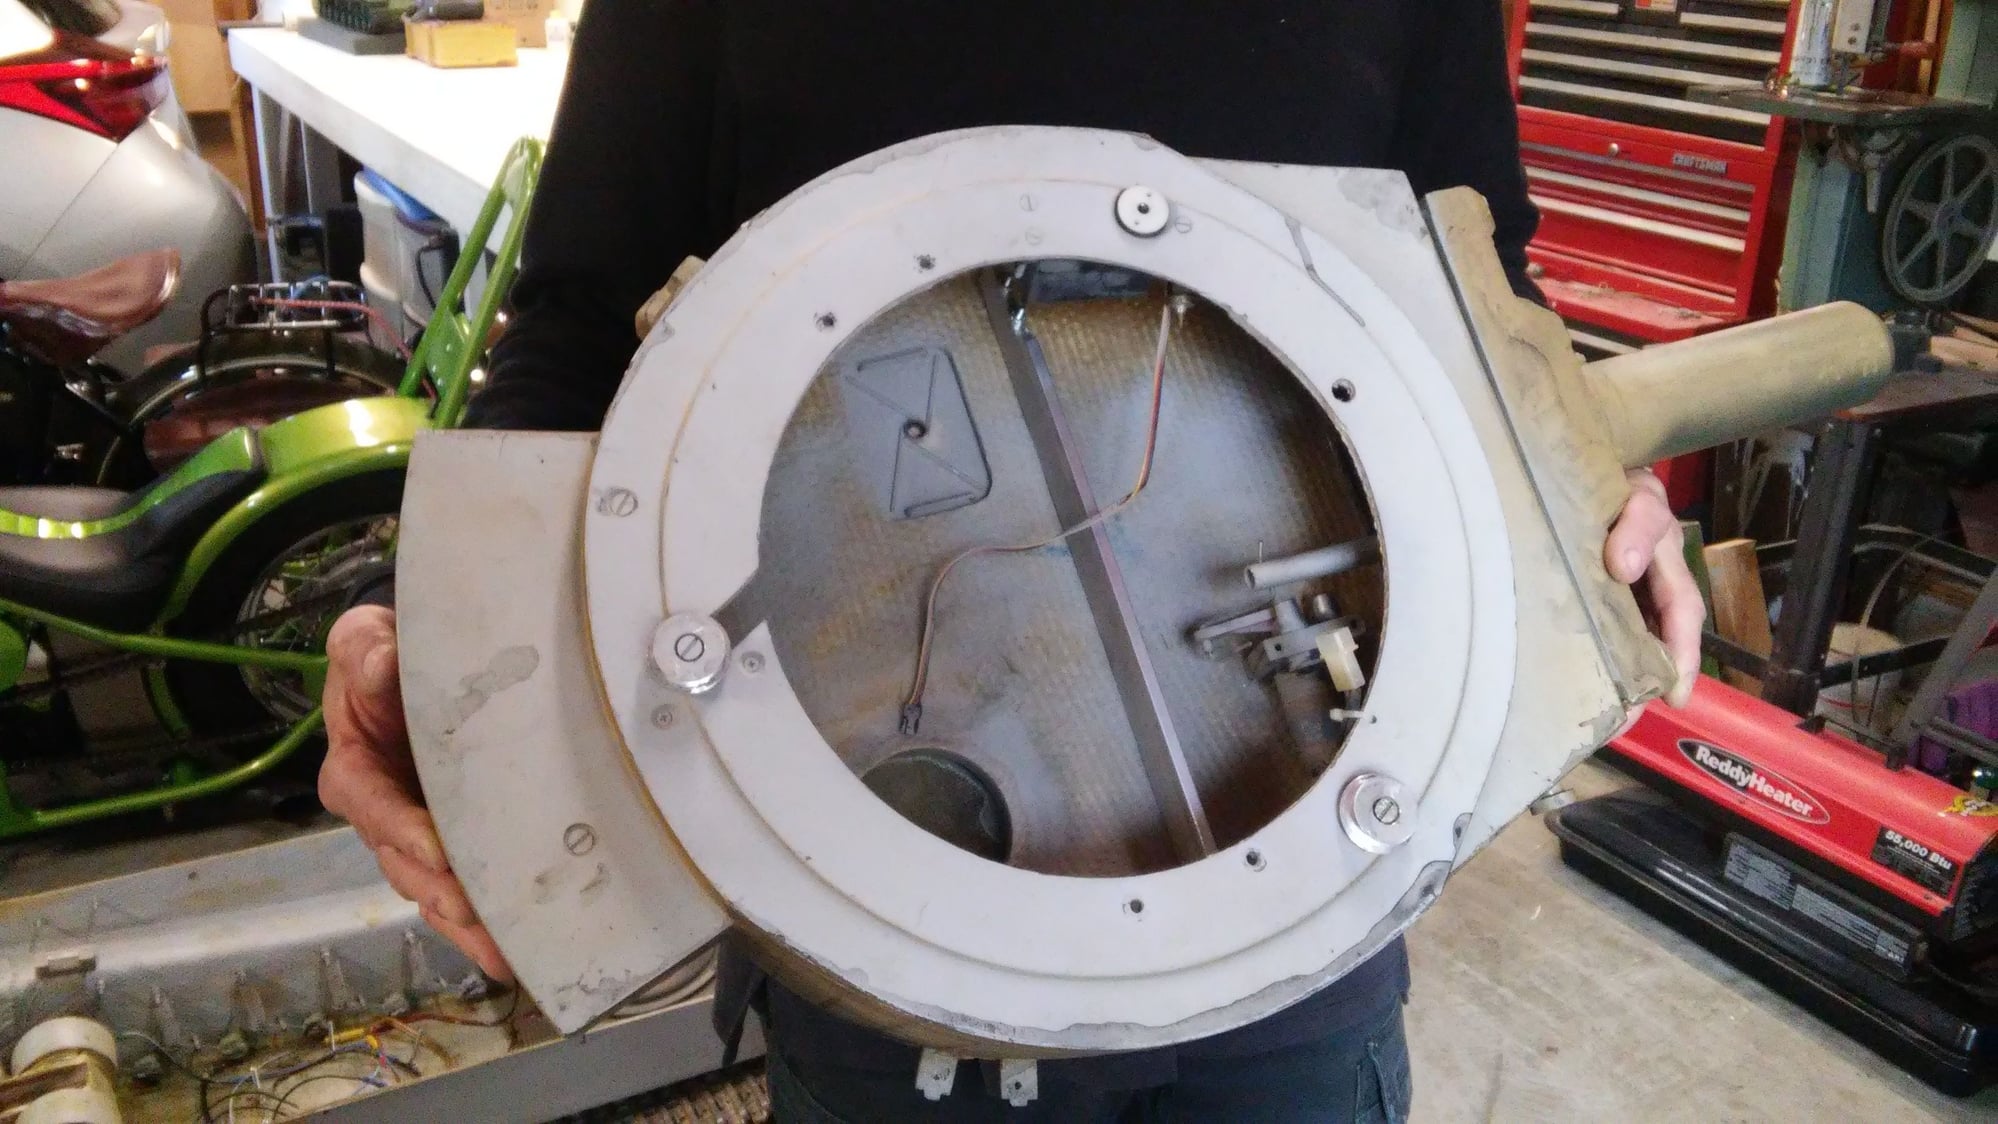
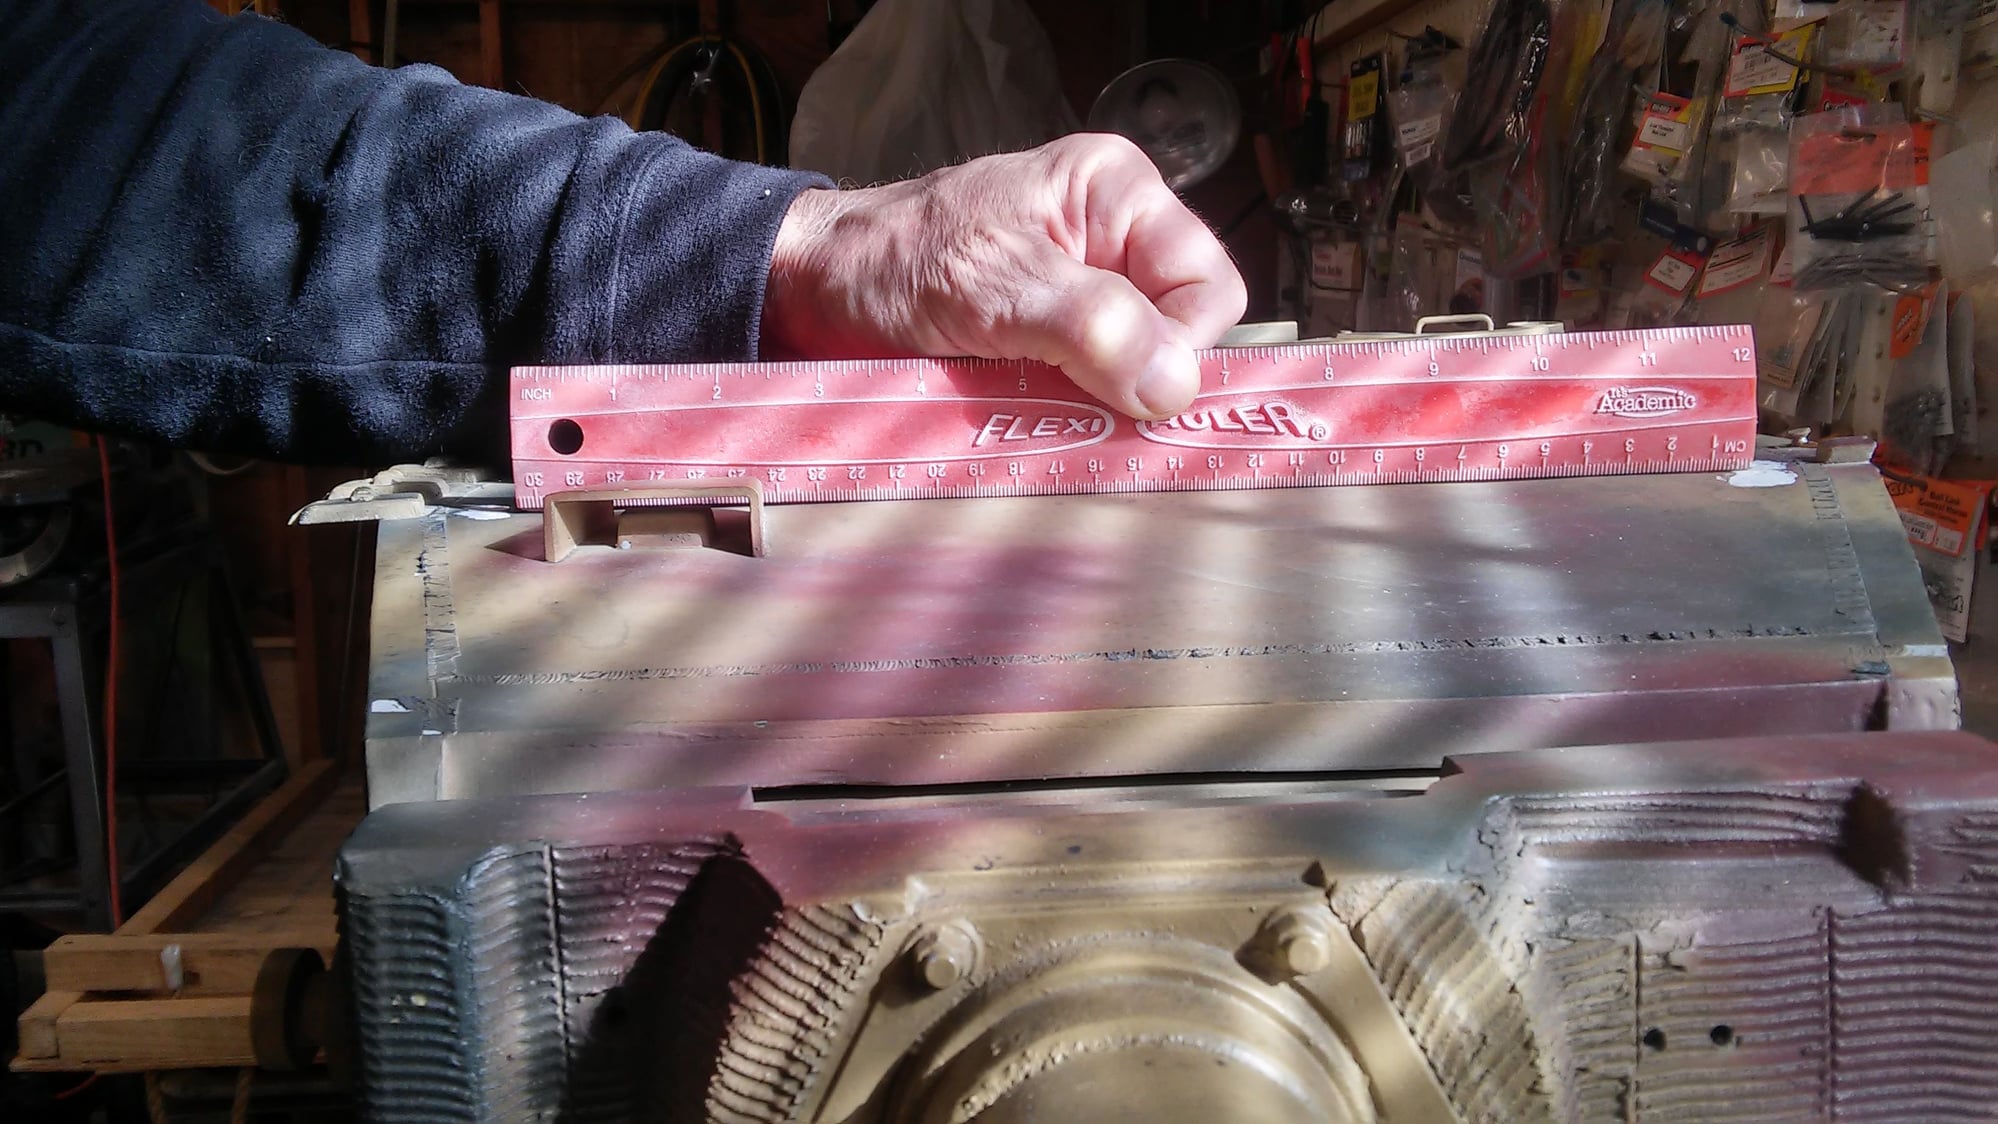
Last edited by 1qaz; 04-01-2020 at 05:58 AM.
The following users liked this post:
Old MSgt (04-02-2020)
04-01-2020, 06:53 AM
#16
Junior Member
1qaz - you're doing a belt and braces job with that model ! One major thing to look out for is warping of the hull due to the weight of the tracks. Take the tracks off the model if it's not to be used for a while. The middle section of each side of the hull tends to bow inwards so that the track has to run in a curved shape. This also leads to the bolts retaining the suspension springs bending and pulling through the hull sides and the axles doing the same. Its a good idea to reinforce the spring bolts with larger bolts and the largest washers you can find. The axles are more complicated - not easy to dismantle due to the inner arms being welded in place! You would have to carefully grind down the welds and prize off the arms to take apart. 2 or 3 bulkheads in the hull will help.Depends on how far you want to go obviously and how much your friend will want to use it.. Try not to cut through the glass if you can avoid it - you'll find hardboard or something similar sandwiched between the glass layers! I have a 1/4 scale King Tiger from the same manufacturer and it's made in exactly the same way.
Unable to do piccies currently - 1/6 tank collection has outgrown the house and is in storage and don't really want to go out too much due to the dreaded lurgy.
Unable to do piccies currently - 1/6 tank collection has outgrown the house and is in storage and don't really want to go out too much due to the dreaded lurgy.
04-01-2020, 11:31 AM
#17
I guess I didn't realize all the issues these tanks had. My KV-2 was built to take paintball hits and move around the battlefield with a purpose so it wasn't designed to be completely scale. Everything is overbuilt for a scale model. Good luck with your rebuild. Looks like a task... Makes me want to get back to work on my big tank.
Makes me want to get back to work on my big tank.
04-01-2020, 12:54 PM
#18
 04-01-2020, 07:05 PM
#19
I'm glad others have said what I was only thinking when I saw that this was one of the early 1/6 Russian Tigers. I've seen one close up and 'crudely built'
is kind. A late friend, a known perfectionist, who had made the transition to 1/6 years ago and I recall he purchased one of these. His reaction on seeing it
up close was like someone who's just taken a generous swig of what was supposed to be a fine vintage wine only to discover it's turned to vinegar!
I believe nothing soured me more on 1/6 armor than watching one of those fiberglass marvels floating around covered with 1/6 scale dolls... Before anyone gets bent I've come
to appreciate the life-like aspect a few dolls can bring but the models felt as an after thought in many instances.
I am pleased however and can heartily relate that the OP is having fun restoring the model; he's made it look quite nice. I'd be cautious putting more powerful motors
in that model. I thought the original gearboxes used hardened steel gears and quite massive ones but perhaps I am wrong regarding the hardness.Electric motors
can be extremely hard on gearing and I've seen the results on gearboxes not meant to be used with high torque motors. If you have a variable
power source power the model, statically and see what it can do on higher voltages. I'm sure the model has fuses or breakers to protect it but implement those if not.
Jerry
04-01-2020, 11:32 PM
#20
I'm with you on the breakers and protection. My KV-2 has a 70A breaker from the batteries to the main bus and then each motor has a breaker rated for 50A if I remember correctly. It is a heavy tank and has an 80A continuous per channel 24V Vantec RDFR ESC powering it. Those 450W scooter motors can stall at close to or over 100A per motor which is why the main fuse is so high. That way if either motor stalls it will pop the 50A breaker for the motor. If both start to pull to many amps then the main breaker will pop. I have stalled the smaller 250W motors like these and popped 30A fuses in an earlier design. I run two 8AH 6S LiPO batteries in parallel to power it.
04-02-2020, 06:28 AM
#21
Cleaning out the grease today, the photo is taken after I did the initial scooping out of the grease with a popsicle stick. It is packed with dried up grease so I have some hopes that this may help the weak performance.
I also was able to get a photo of the numbers on the side of the motor, does this make sense to any of you electronic gurus out there?
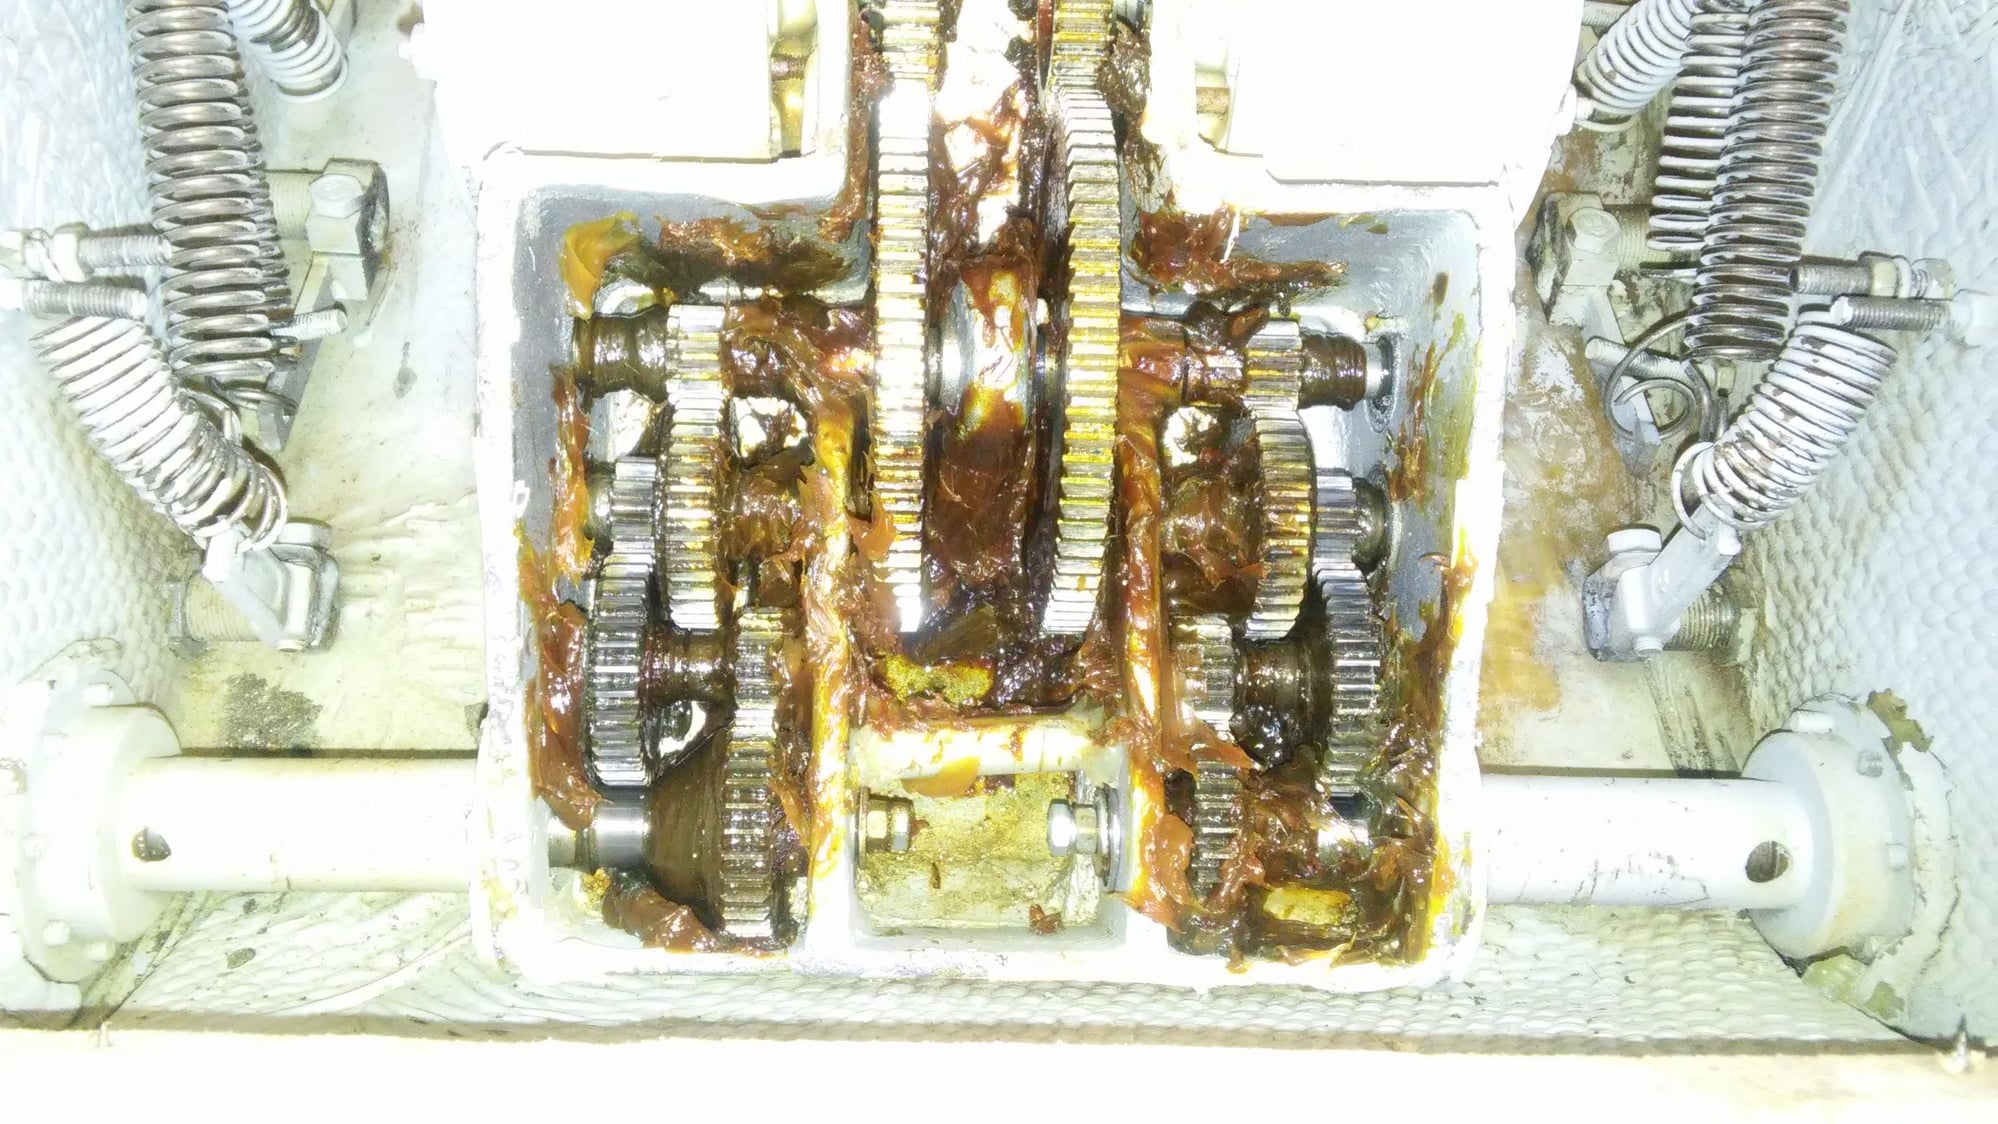
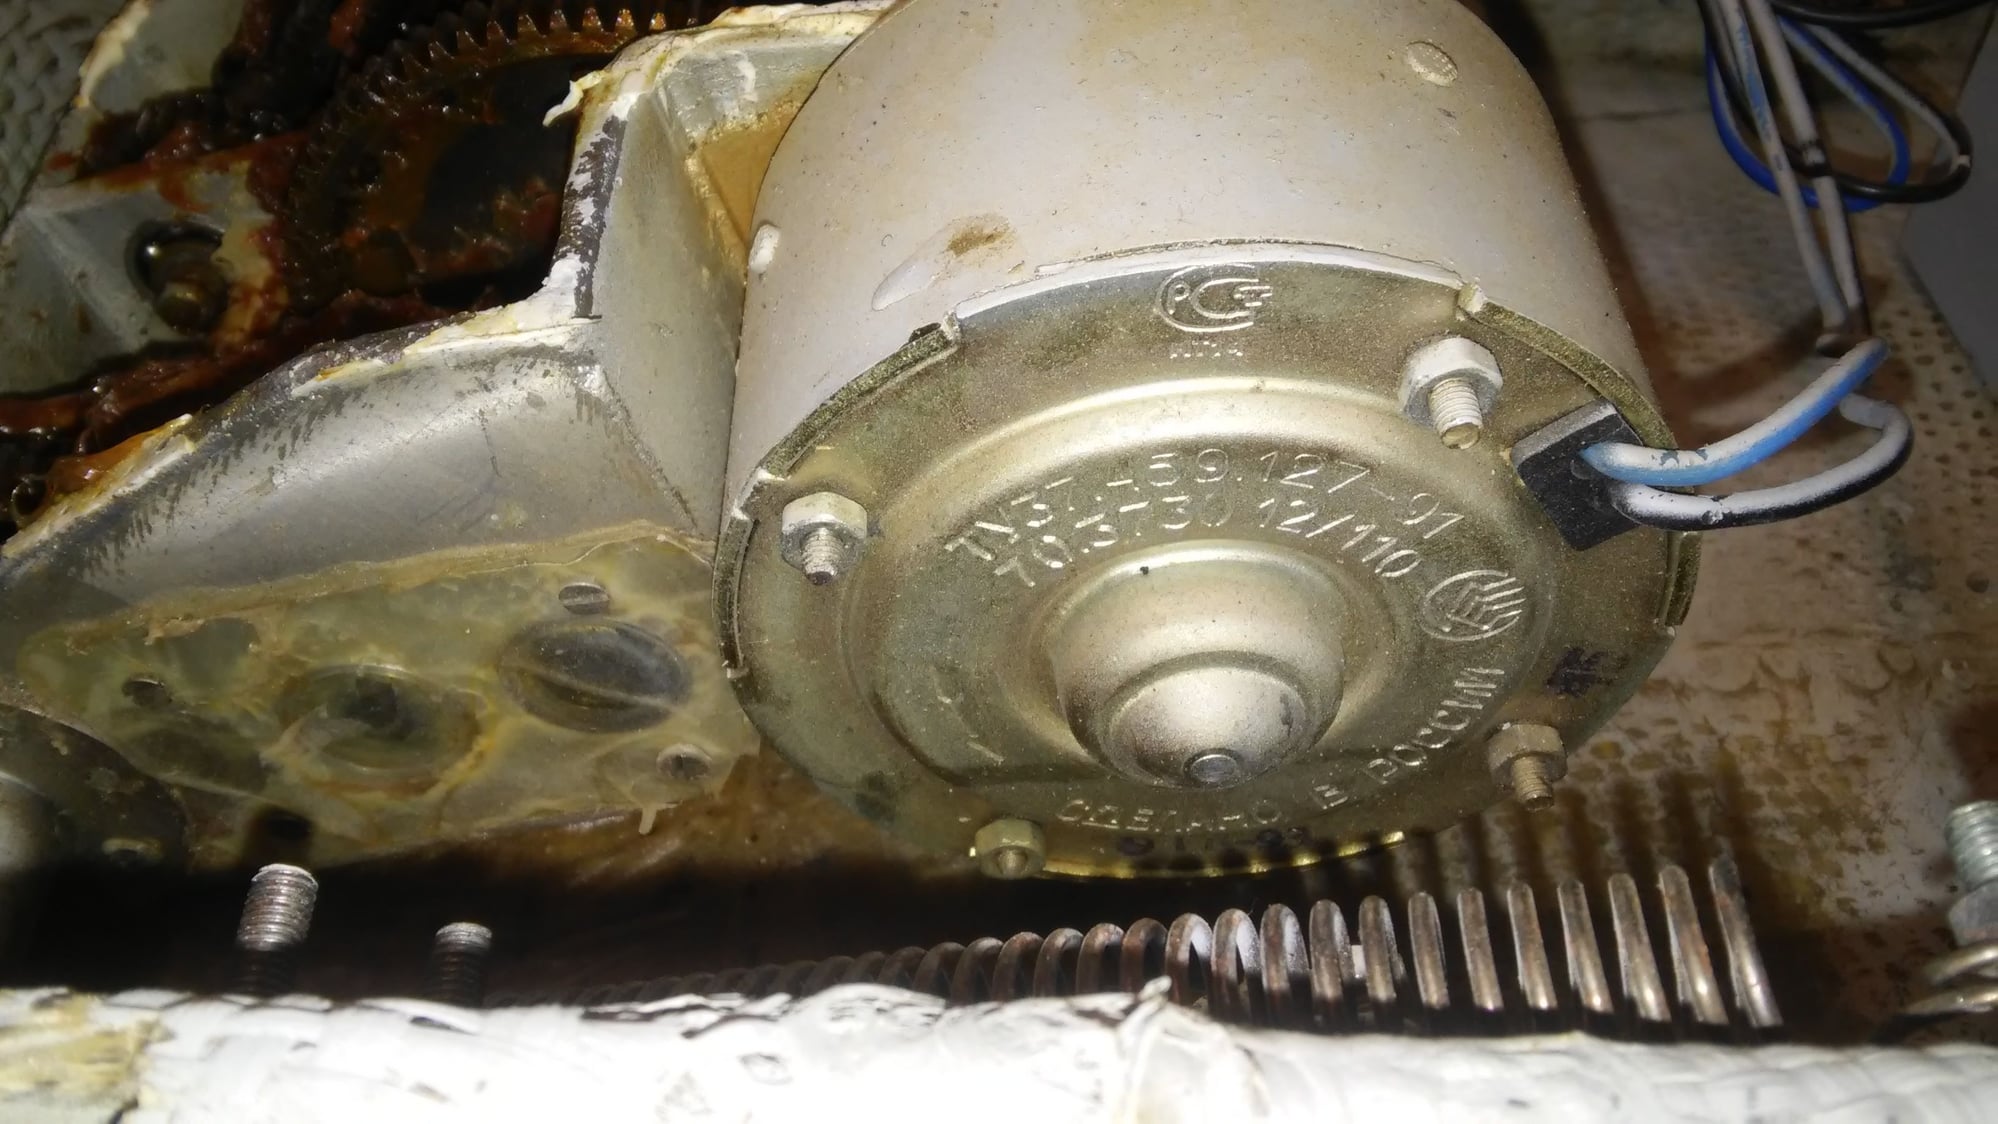
I also was able to get a photo of the numbers on the side of the motor, does this make sense to any of you electronic gurus out there?
The following users liked this post:
Old MSgt (04-02-2020)
The following users liked this post:
Old MSgt (04-02-2020)
04-02-2020, 11:24 AM
#24
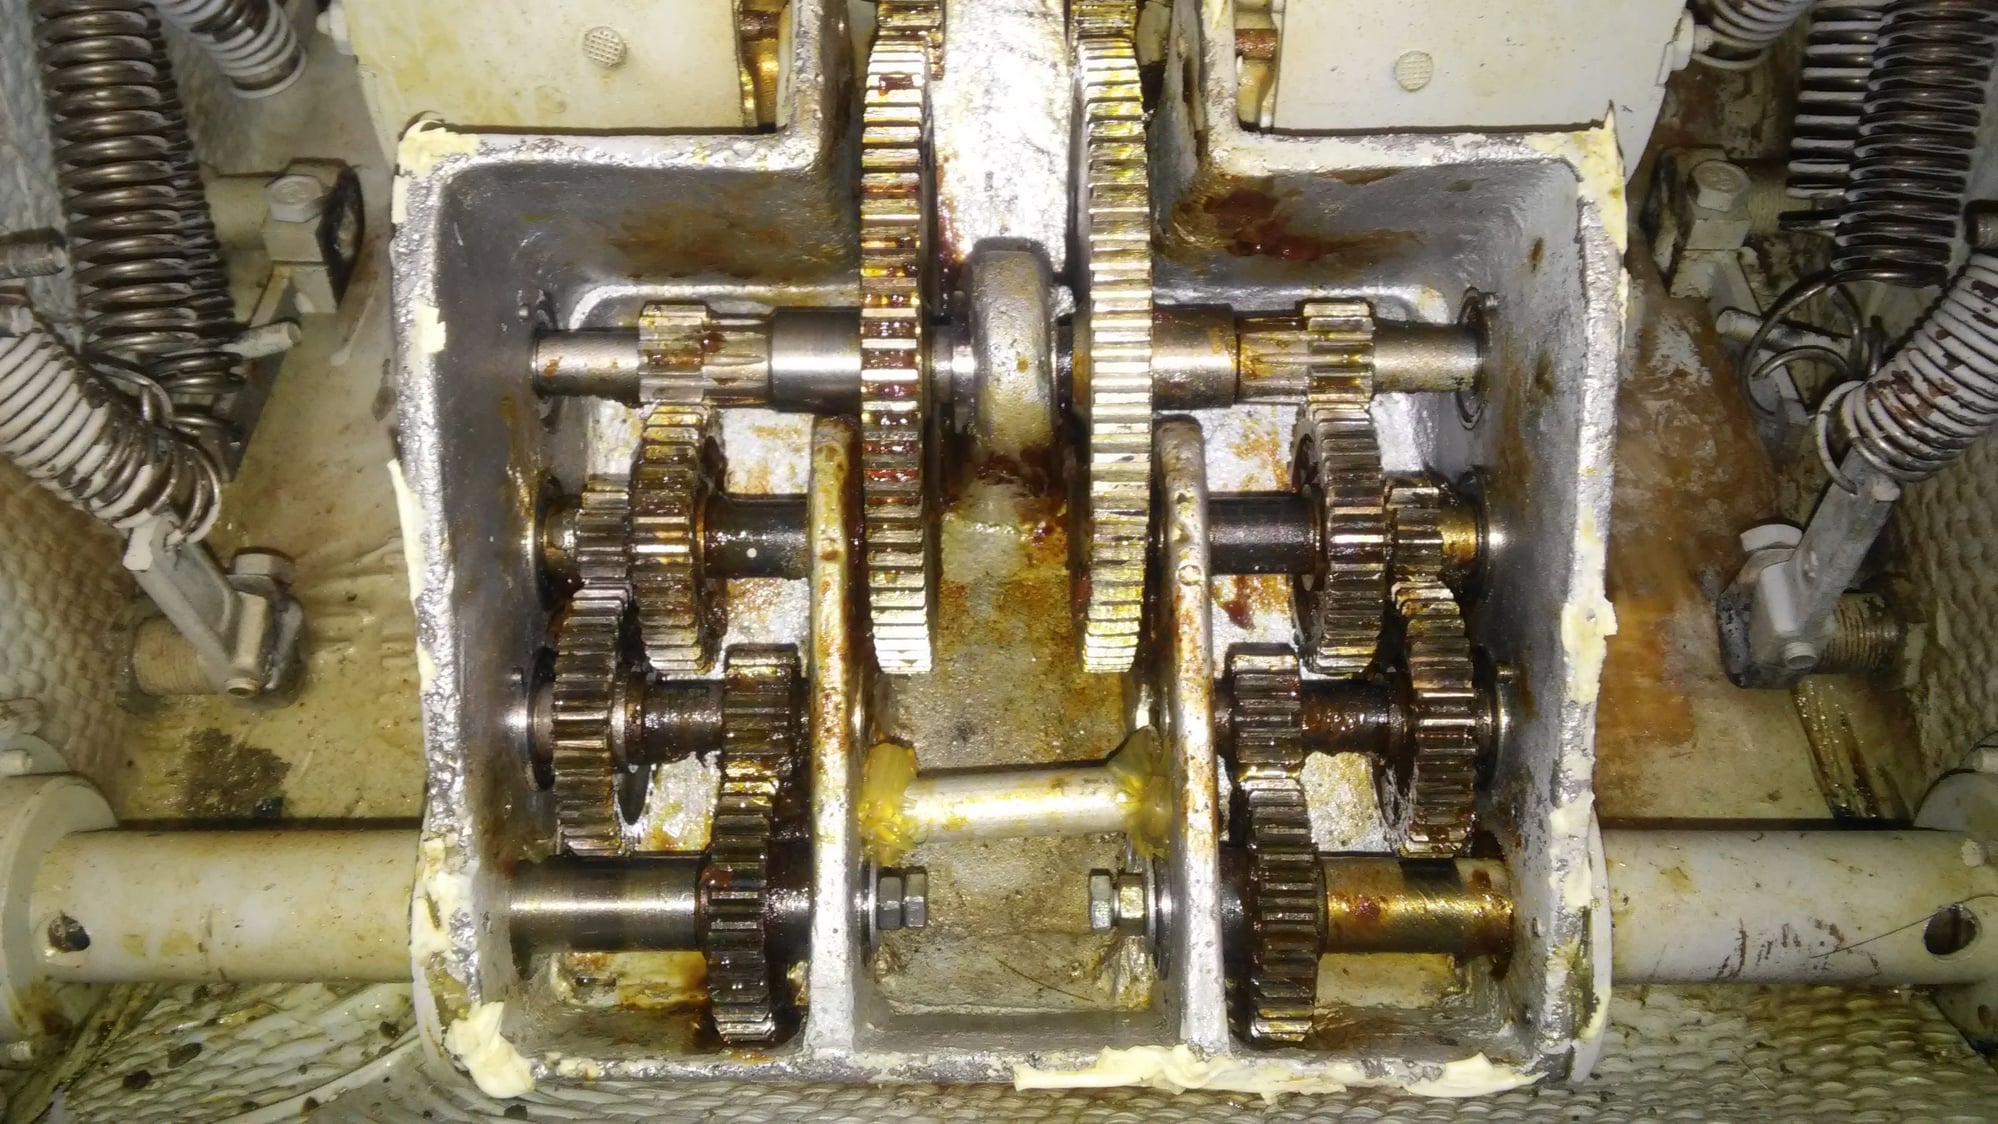
Peterws, You were right! I cleaned out all the old crusty grease, used some 90 weight gear oil on the bearings & used some new bearing grease on the gears. I just took the hull for a test drive around the backyard and it actually turns. I would have never thought that old grease would do more harm than good.
Now to get back to the fun part, paint and cosmetic stuff
Thank you for the great advice!
Larry
Now to get back to the fun part, paint and cosmetic stuff
Thank you for the great advice!
Larry
The following users liked this post:
peterws (04-03-2020)
