


M548 tracked cargo truck
 07-27-2018, 10:53 PM
#1
How's this for a project?

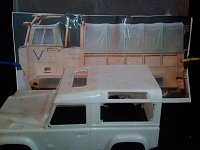
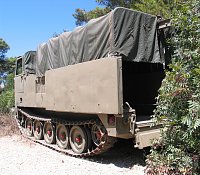
This is a M548, a cold war cargo truck used until today
My project it's kind of ambitious with scratchbuilt body and well,almost everything else, real 1/10 (25cm x 58cm,replica suspension system)
Do you like to see it?
This is a M548, a cold war cargo truck used until today
My project it's kind of ambitious with scratchbuilt body and well,almost everything else, real 1/10 (25cm x 58cm,replica suspension system)
Do you like to see it?
 07-28-2018, 07:01 AM
#2


Join Date: Sep 2014
Location: Fresno CA
Posts: 75
Likes: 0
Received 0 Likes
on
0 Posts
How's this for a project?
Attachment 2261364
This is a M548, a cold war cargo truck used until today
My project it's kind of ambitious with scratchbuilt body and well,almost everything else, real 1/10 (25cm x 58cm,replica suspension system)
Do you like to see it?
Attachment 2261364
This is a M548, a cold war cargo truck used until today
My project it's kind of ambitious with scratchbuilt body and well,almost everything else, real 1/10 (25cm x 58cm,replica suspension system)
Do you like to see it?
 07-28-2018, 01:11 PM
#4
07-28-2018, 10:33 PM
#5
Ok guys... I've started this some time ago and kept it in a restrict circle until i see i could pull it through
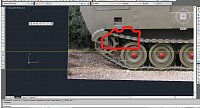
Backstory: a 1/10 Unimog build was in a standstill, needed more fabrication and the motivation had died off. One night, saw the ad for a mobile war game featuring a curious looking tracked truck. Did some research and fell in love for a truck so ugly that's almost russian
Talked to a coworker(ex-military) about it and not only my country has them but he rode one while in service
To the build!
Because this truck was a side affair, tried to go slowly, only to see where it would lead
Size compared to a rc4wd D90
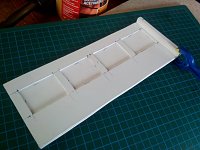
First cuts:
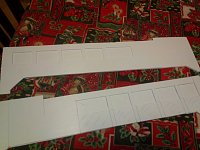

the nose:


Test fit:

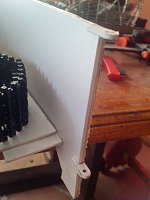
Back to the nose:
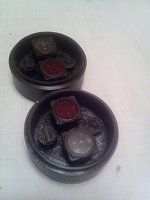
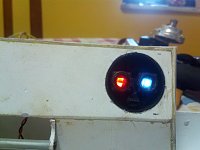
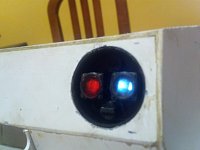
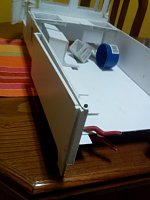
The 1:1 has 2 headlight clusters, containing regular headlights, blacklights for stealthiness, horn, blinkers,etc(depends on the variant). on mine I went for regular lights, red lights to simulate the blacklights and horn
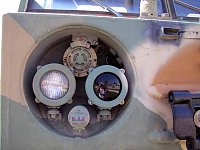
Tought in machine them but 3d print makes it easier,machined only the housing and the lenses were cut from 1:1 car lights:
Backstory: a 1/10 Unimog build was in a standstill, needed more fabrication and the motivation had died off. One night, saw the ad for a mobile war game featuring a curious looking tracked truck. Did some research and fell in love for a truck so ugly that's almost russian
Talked to a coworker(ex-military) about it and not only my country has them but he rode one while in service
To the build!
Because this truck was a side affair, tried to go slowly, only to see where it would lead
Size compared to a rc4wd D90
First cuts:
the nose:
Test fit:
Back to the nose:
The 1:1 has 2 headlight clusters, containing regular headlights, blacklights for stealthiness, horn, blinkers,etc(depends on the variant). on mine I went for regular lights, red lights to simulate the blacklights and horn
Tought in machine them but 3d print makes it easier,machined only the housing and the lenses were cut from 1:1 car lights:
07-29-2018, 02:53 PM
#6
The running gear will be metal heng long gearboxes:
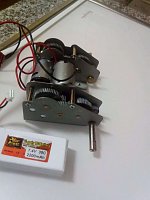
They came with tiny motors(280 or 370) so I had to adapt them to 540 motors. Seemed easier, one done:

This running gear is perfect for this truck. 2 gearboxes with 1 motor each seems that would take too much space but no:
They sit perfectly under the cab floor like the 1:1 and the bottom of the gearboxes align perfectly with the underside
The complete running gear it's 2 motors, 2 ESCs, 1 battery . I was afraid of having to buy a stick radio like all tank guys have but I've tinkered with my usual radio that offers 4 mixing slots and have found the perfect way. Progressive control in both throtle and steering
They I found that a V-tail mixer from airplanes allows to use any grip radio.
They came with tiny motors(280 or 370) so I had to adapt them to 540 motors. Seemed easier, one done:
This running gear is perfect for this truck. 2 gearboxes with 1 motor each seems that would take too much space but no:
They sit perfectly under the cab floor like the 1:1 and the bottom of the gearboxes align perfectly with the underside
The complete running gear it's 2 motors, 2 ESCs, 1 battery . I was afraid of having to buy a stick radio like all tank guys have but I've tinkered with my usual radio that offers 4 mixing slots and have found the perfect way. Progressive control in both throtle and steering
They I found that a V-tail mixer from airplanes allows to use any grip radio.
07-29-2018, 03:32 PM
#7
My Feedback: (1)
Join Date: May 2009
Location: Pearl City, HI
Posts: 372
Likes: 0
Received 0 Likes
on
0 Posts
I really like what you are doing to build this vehicle. My favorite variant of this is the M727 Hawk missile carrier; I always thought it had a cool factor that few other vehicles did. Keep going - I am enjoying your build thoroughly!
07-30-2018, 04:26 AM
#8
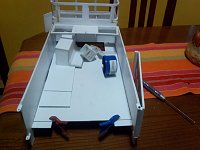
more stuff:
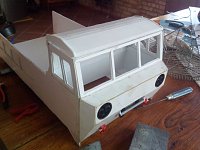
Added the side windows
these rear vents:
Most of the m548 I've seen online(and the ones on our national army) have canvas top but i found that are hardtop variants and knew right away that's the best option:
so, stacked a couple of layers of pvc and tried to do the round corner windows
07-31-2018, 12:03 PM
#9
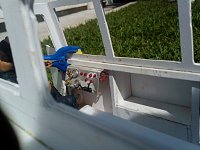
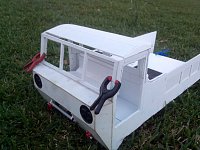
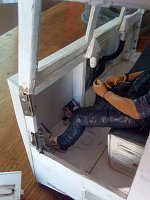
This is the passenger door:
I wasn't planning on opening doors but someone ( ) convinced to do them and being honest,looks better and helps with the interior
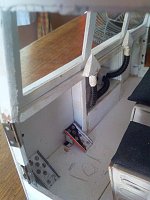
Next, I progress on the "dash",the real one is barebones,military style
Mine it's not 100% accurate but after paint and details, I think it will look good enough
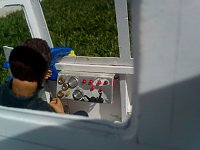
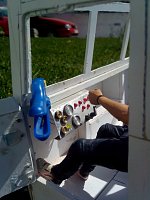
The dials extend to the other side of the sheet metal ,will have wires behind to simulate the connections and only the tip of the LEDs will be showing
I wasn't planning on opening doors but someone (
) convinced to do them and being honest,looks better and helps with the interiorNext, I progress on the "dash",the real one is barebones,military style
Mine it's not 100% accurate but after paint and details, I think it will look good enough
The dials extend to the other side of the sheet metal ,will have wires behind to simulate the connections and only the tip of the LEDs will be showing
08-01-2018, 12:19 PM
#12
started the roof:
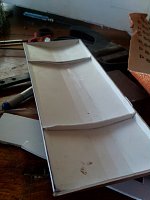
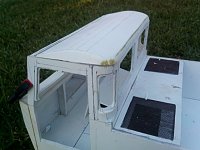
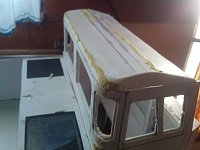
It's far from finished but I need to sort out the interior before gluing the roof and give the final touches
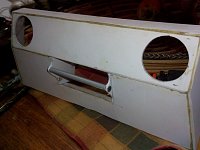
Did the tailgate too:
On the 1:1:


I assumed that the tailgate can be opened to both sides so I went with it
Basic shape, 2 layers of PVC and one of the hinges:
Closed:

One way....
...or another
It's far from finished but I need to sort out the interior before gluing the roof and give the final touches
Did the tailgate too:
On the 1:1:
I assumed that the tailgate can be opened to both sides so I went with it
Basic shape, 2 layers of PVC and one of the hinges:
Closed:
One way....
...or another
08-02-2018, 04:10 AM
#13
After some thought if I 3d print the traction wheels or machine them, went for the 3d print because of their complex shape
the 1:1

Mine have more teeth because of the different design of the tracks
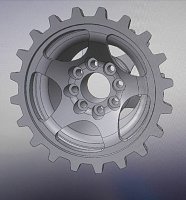
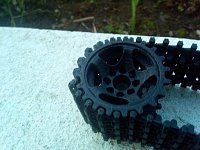
Unfortunately, miss the teeth pitch and it doesn't lock properly with the track. Back to the drawing board to modify the teeth....
the 1:1
Mine have more teeth because of the different design of the tracks
Unfortunately, miss the teeth pitch and it doesn't lock properly with the track. Back to the drawing board to modify the teeth....
08-02-2018, 08:51 AM
#14
Nice progress and looks great so far!!!
08-02-2018, 11:59 AM
#15
08-03-2018, 04:26 AM
#16
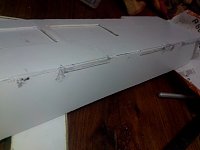
Had the chance to make the hull. Had to bent a 0.8mm aluminium sheet and now with the angle grinder I'm making the last bends. Rivets to hold the corners and epoxy to reinforceThe truck it's very dirty because of handling it at the shop to fit the hull
Front:
Bottom:
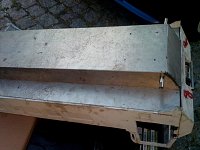
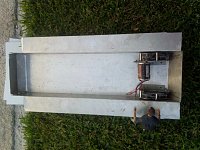
Gearboxes in place:
Not having the "hull" done, delayed progressing on the body. With the hull, everything is figured out.Another view of it,to show better how much space it has for transmission and eletronic
mAh for days....(actually, I'll use only 1 battery, 2 if the stress it's too much)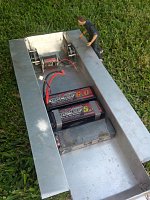
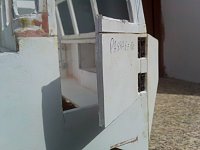
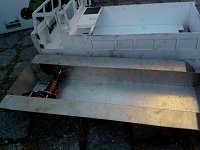
Was planing to do these "fenders" as part of the hull but they were looking bad: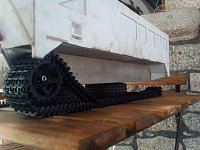
This section was also to be in aluminium but because the hull is removable, there will be gaps showing, so I enclosed it in PVC. Now it's easier to add details

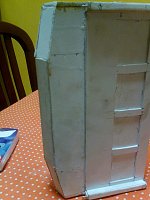
Then, made this bulkhead(?) with service panels for the engine
Front:
Bottom:
Gearboxes in place:
Not having the "hull" done, delayed progressing on the body. With the hull, everything is figured out.Another view of it,to show better how much space it has for transmission and eletronic
mAh for days....(actually, I'll use only 1 battery, 2 if the stress it's too much)
Was planing to do these "fenders" as part of the hull but they were looking bad:
This section was also to be in aluminium but because the hull is removable, there will be gaps showing, so I enclosed it in PVC. Now it's easier to add details
Then, made this bulkhead(?) with service panels for the engine
Last edited by JulliPolas; 08-03-2018 at 04:29 AM.
08-04-2018, 03:43 AM
#17
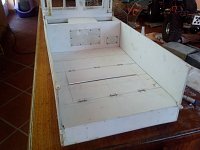
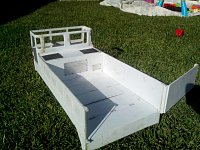
This time didn't do much visible. Lots of sanding and trimming. The most visible chance was the floor of the cargo bay. Had the piece cut from the beginning and now it found it's place
First, some reinforcements :
 I
I
Then, a kind of hatch to change batteries:
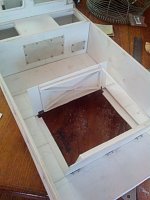
Maybe some magnets to close properly:

Tailgate on:
First, some reinforcements :
Then, a kind of hatch to change batteries:
Maybe some magnets to close properly:
Tailgate on:
08-05-2018, 03:34 AM
#19
08-05-2018, 02:26 PM
#20
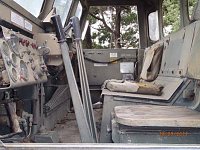
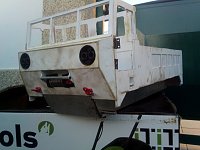
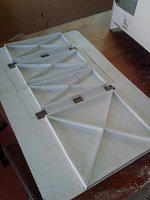
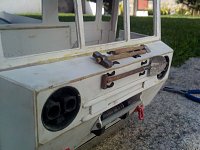
I wasn't liking the squareness of the rear. Looking at more photos, realize that was a mistake. Redone it with angled sides:
Got the cushions for the seats:

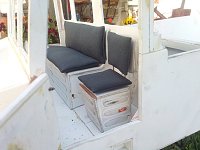
The footrests:
And the levers to steer:
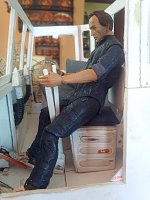

Tried running a gearbox on the hull. The gearbox is loud and the metal hull amplify that. Guess I'm not needing a sound generator
Got the cushions for the seats:
The footrests:
And the levers to steer:
Tried running a gearbox on the hull. The gearbox is loud and the metal hull amplify that. Guess I'm not needing a sound generator
08-06-2018, 10:45 PM
#21
Hi,
I had trouble solving how to do these small mounts for straps:
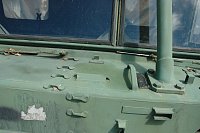
Well,the easier way was designing them and print:

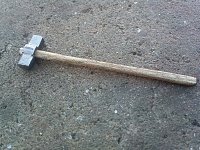
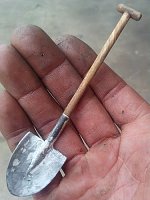
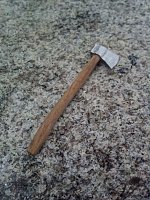
This mounts are for holding tools on the 1:1. An axe, picaxe,sledgehammer and shovel. Quit of doing the picaxe because there wasn't enough space for it
First one:

Second:

Third:

I had trouble solving how to do these small mounts for straps:
Well,the easier way was designing them and print:
This mounts are for holding tools on the 1:1. An axe, picaxe,sledgehammer and shovel. Quit of doing the picaxe because there wasn't enough space for it
First one:
Second:
Third:

