


Sandbagged Easy Eight
 11-20-2019, 12:30 PM
#1


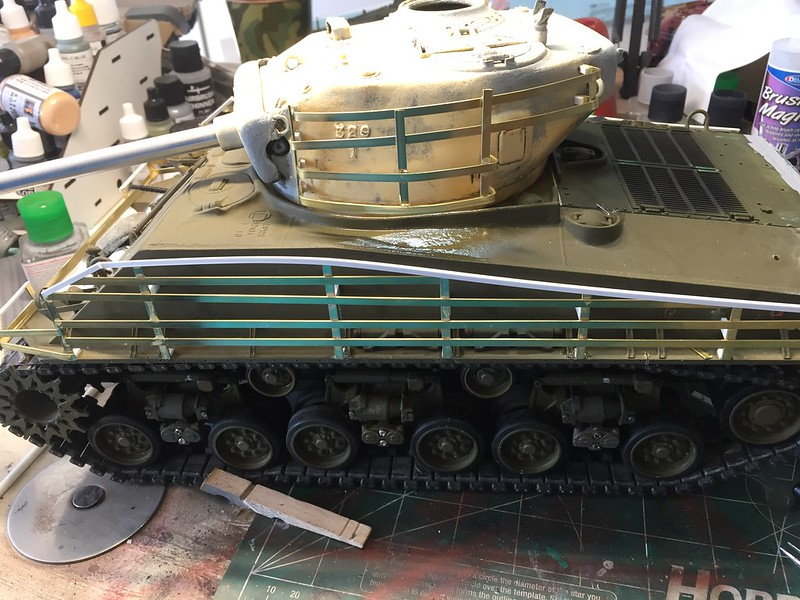
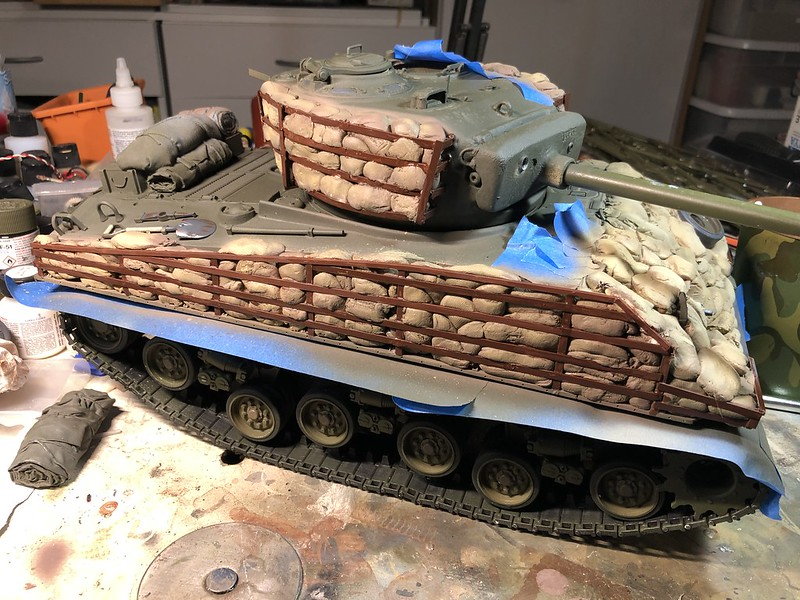
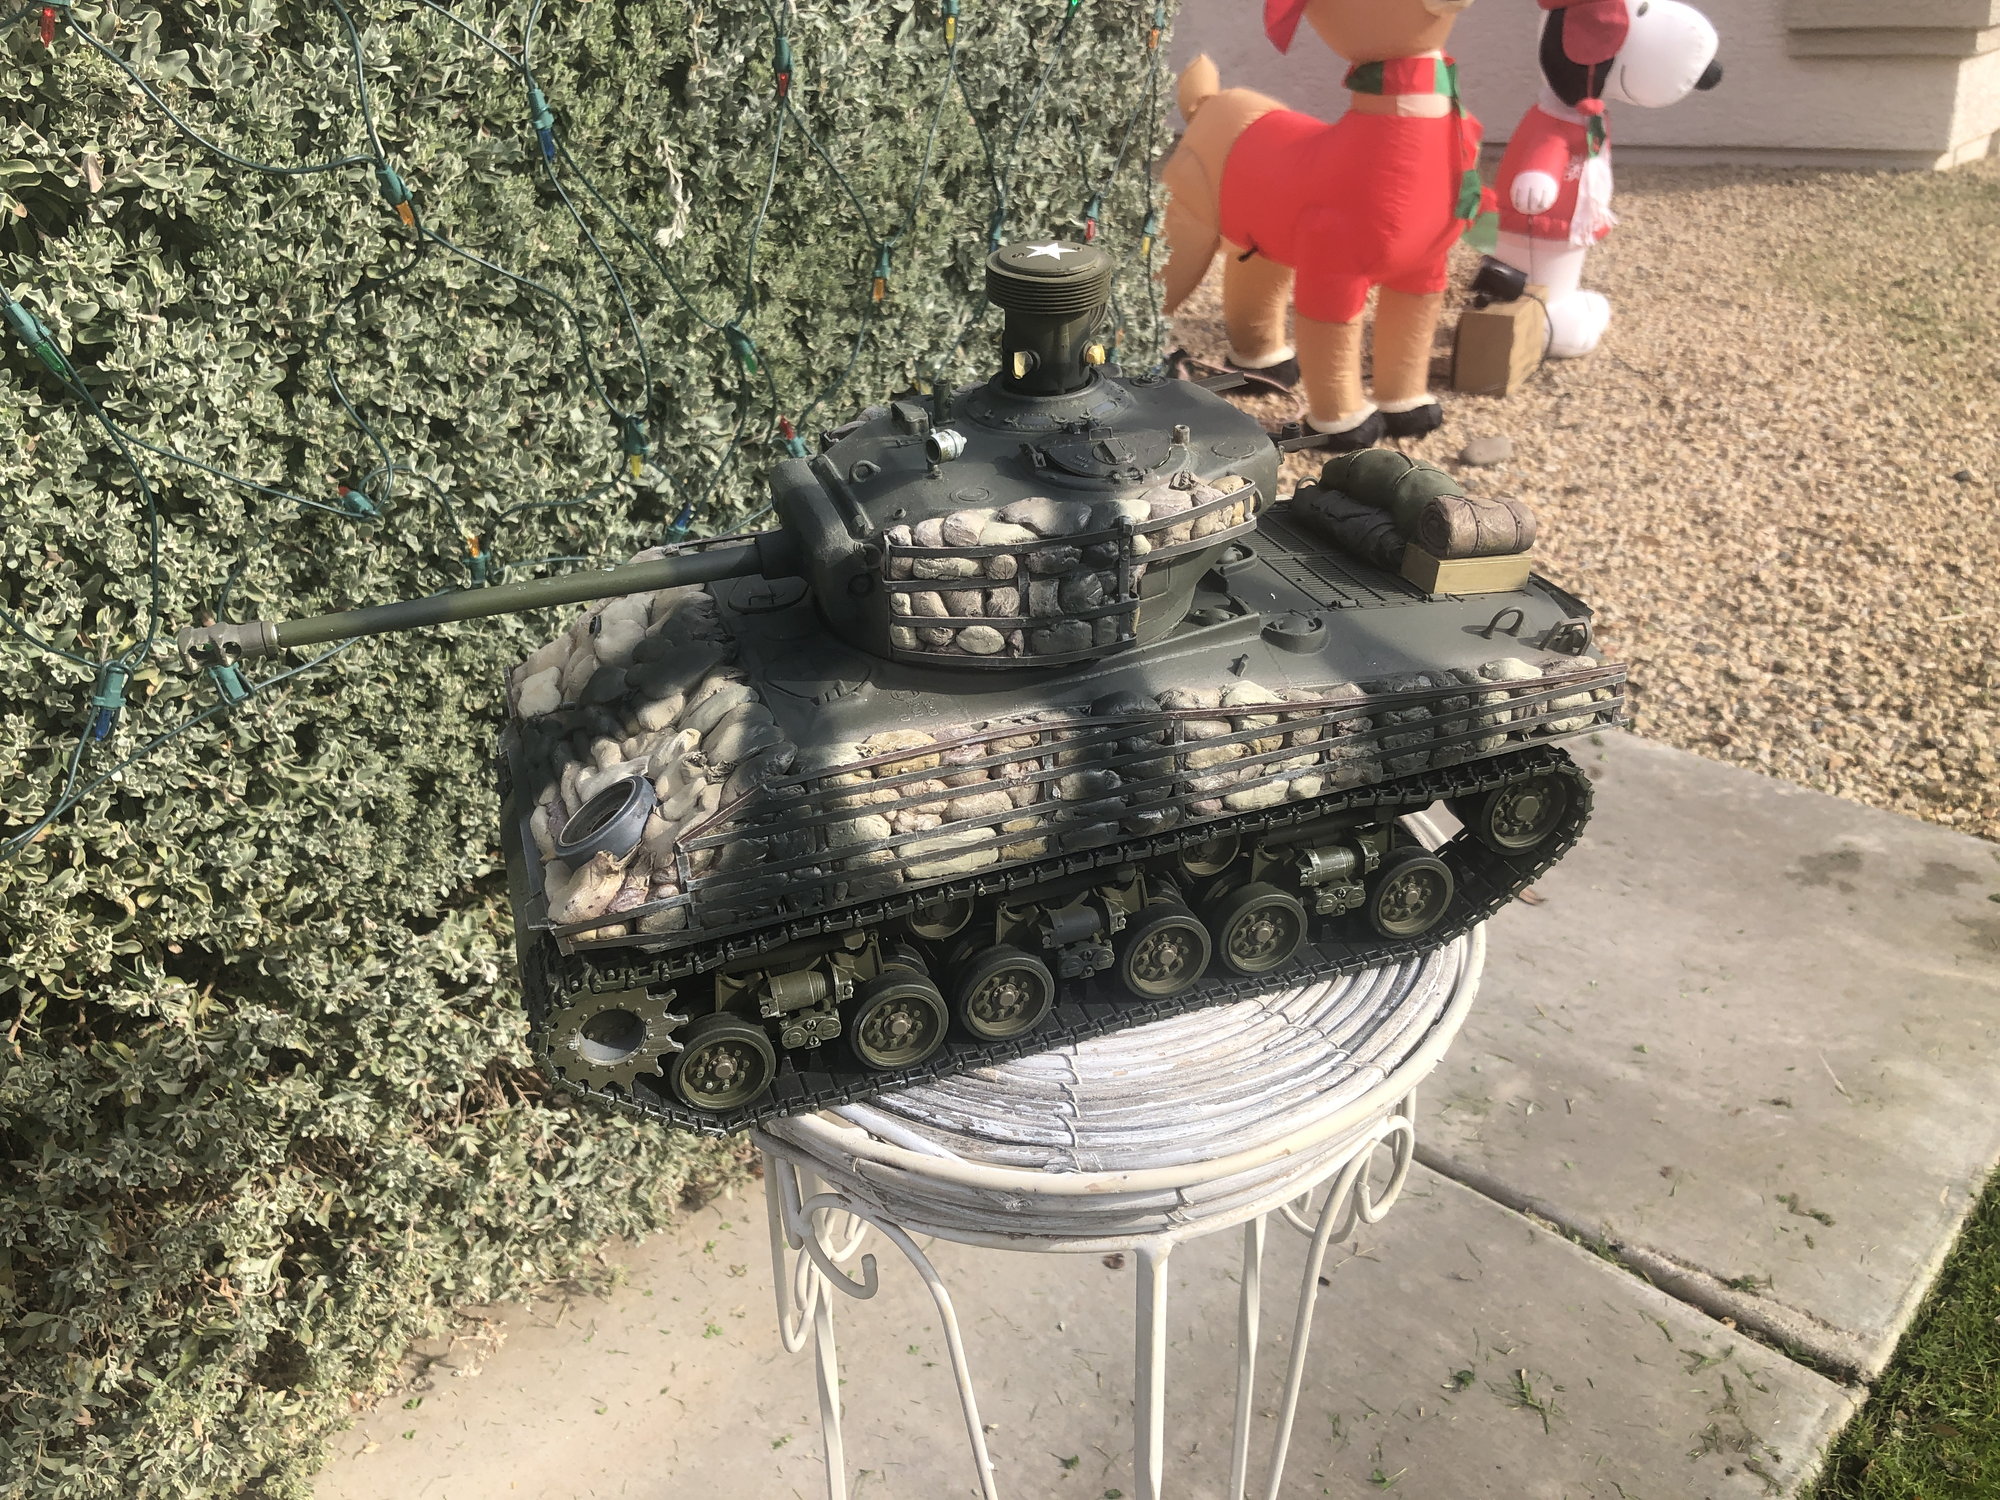
Hello, I am a Sherman-o-holic but the truth is this is the first 1/16 scale project I tried to achieve way back in 2005. Technical issues and some personal failures led to my going with a different up-armored easy eight that is still running after all these years. This time around I just sat down and started the process of making the sand bag racks and eventually the sand bags. Found the brass strip I needed and lots of super glue. I admit the project stalled at that point for two years while life got in the way. Now I have the parts and 6 boxes of milliput to get me through!
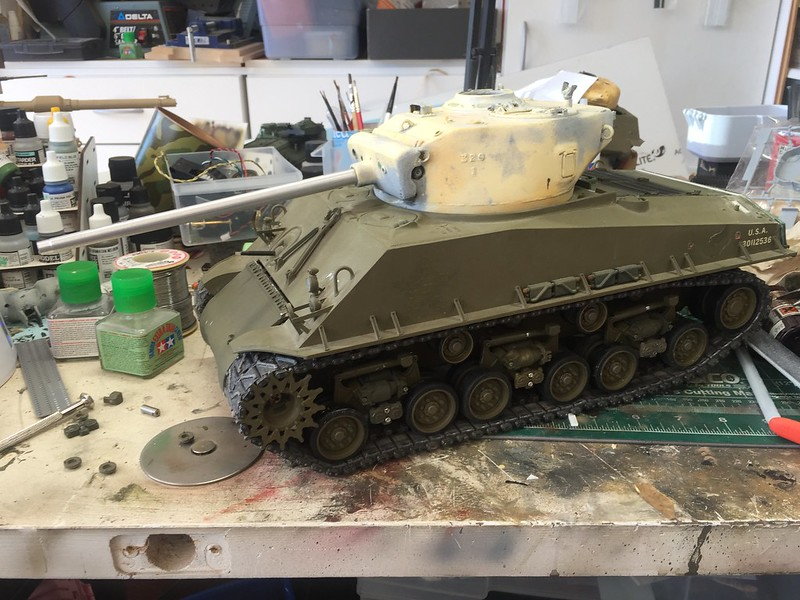
Surplus EASY EIGHT project acquired in a trade.
Styrene and brass oh my.
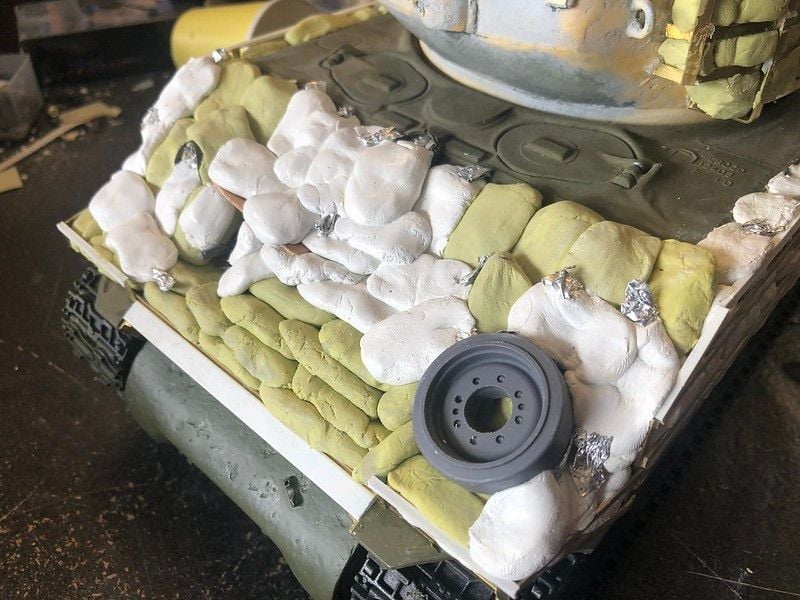
Foil on the trans cover as the bag need to seperate from lower for service
Surplus EASY EIGHT project acquired in a trade.
Styrene and brass oh my.
Foil on the trans cover as the bag need to seperate from lower for service
 11-20-2019, 02:29 PM
#2
That is going to be cool!
11-20-2019, 03:56 PM
#3
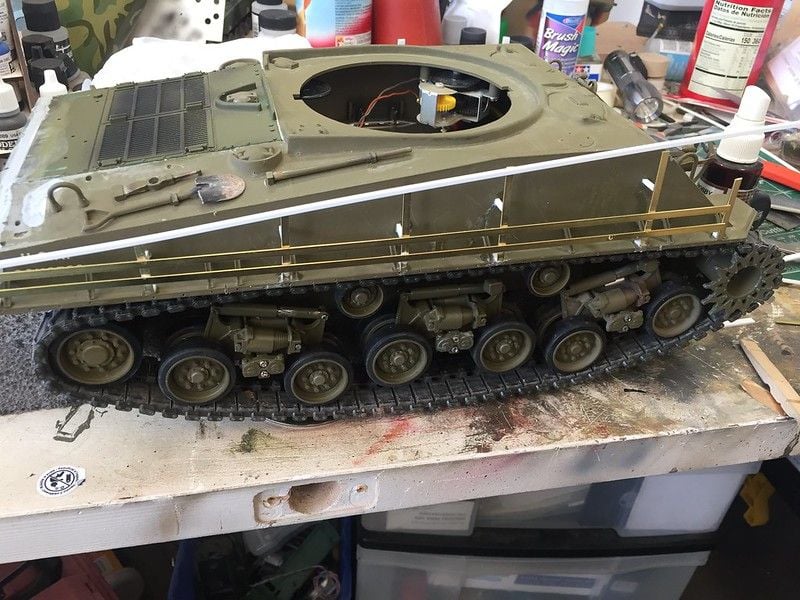
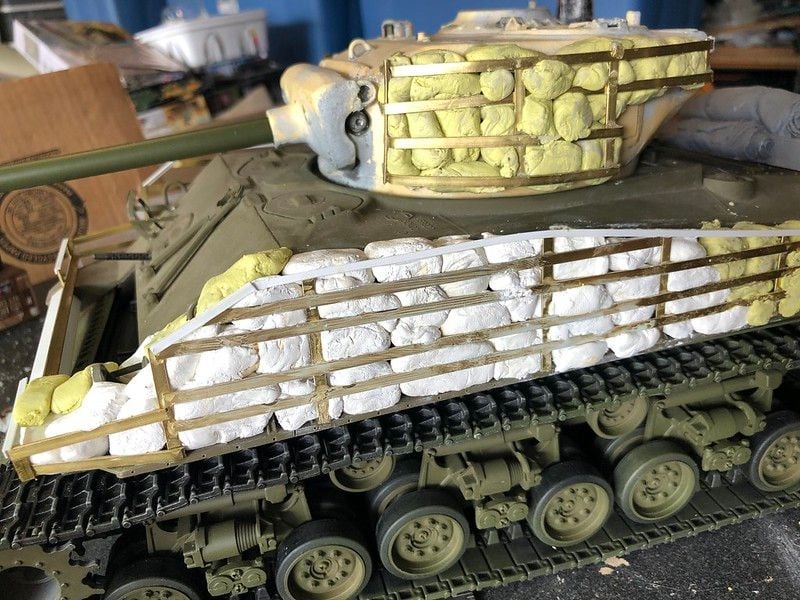
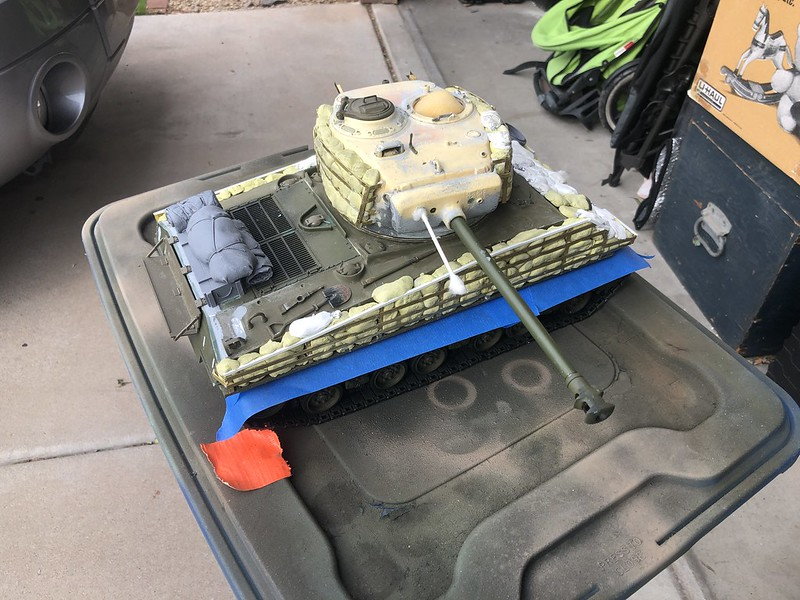
This project was shelved for nearly two years after the bars were done. No time, no funds, other issues came forward. I event parted some of the assembly out for sale. That changed at the last DAK battle when I acquired a set of T66 tracks and enough of the remaining parts to make it all run. It was time to start the sand bags and now I am 6 boxes of Milliput into it.
11-20-2019, 05:14 PM
#4
Those sandbags look good!
11-21-2019, 12:24 PM
#6
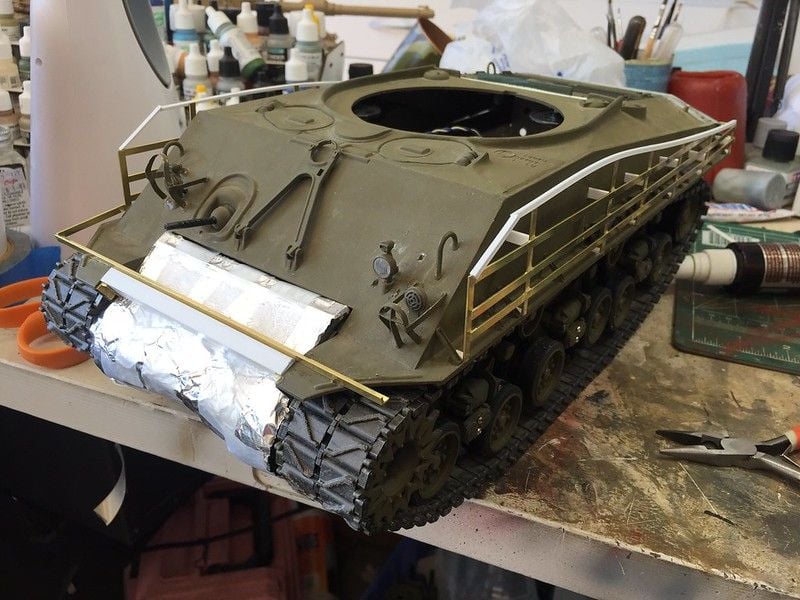
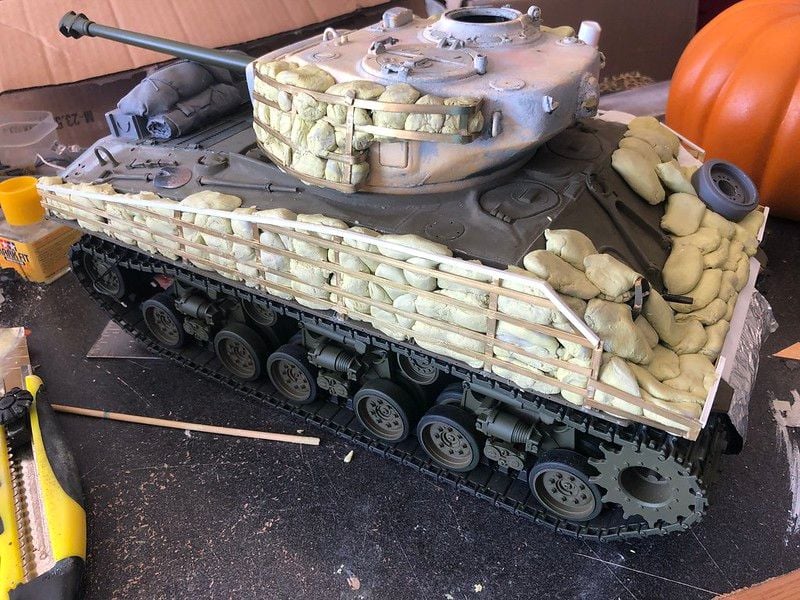
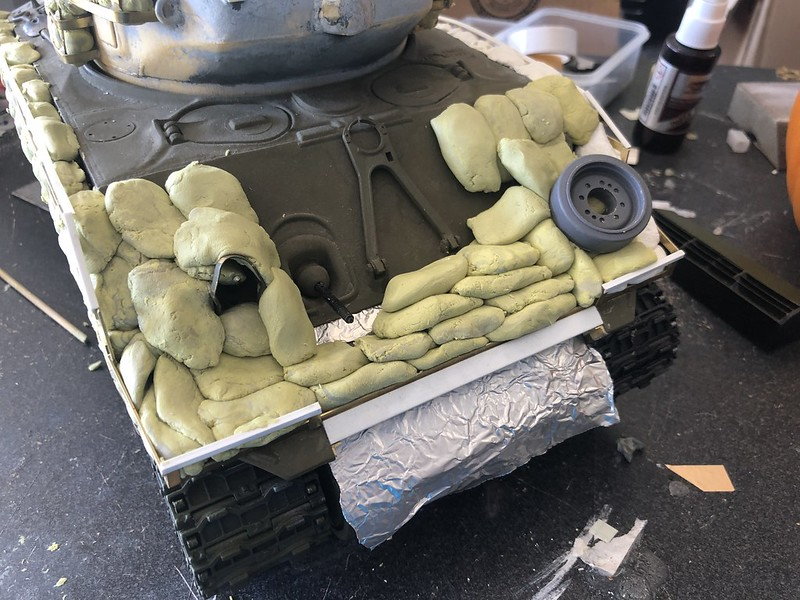
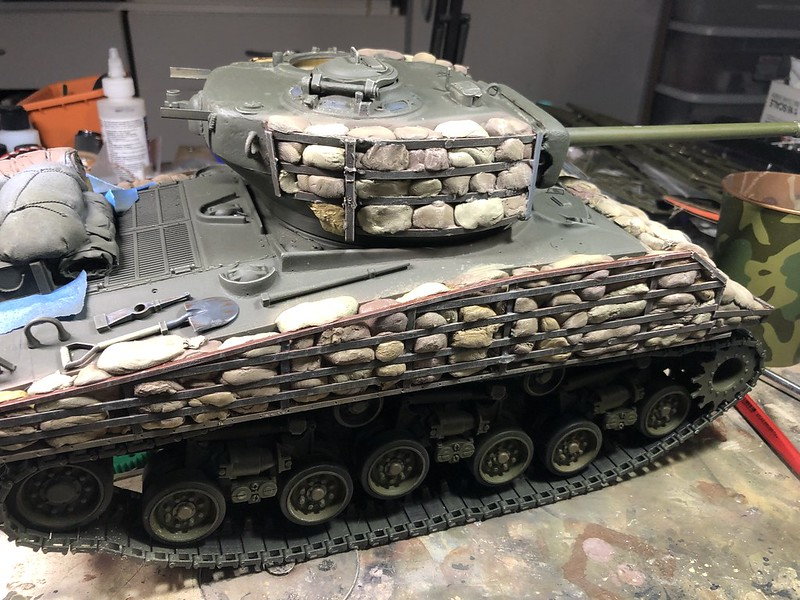
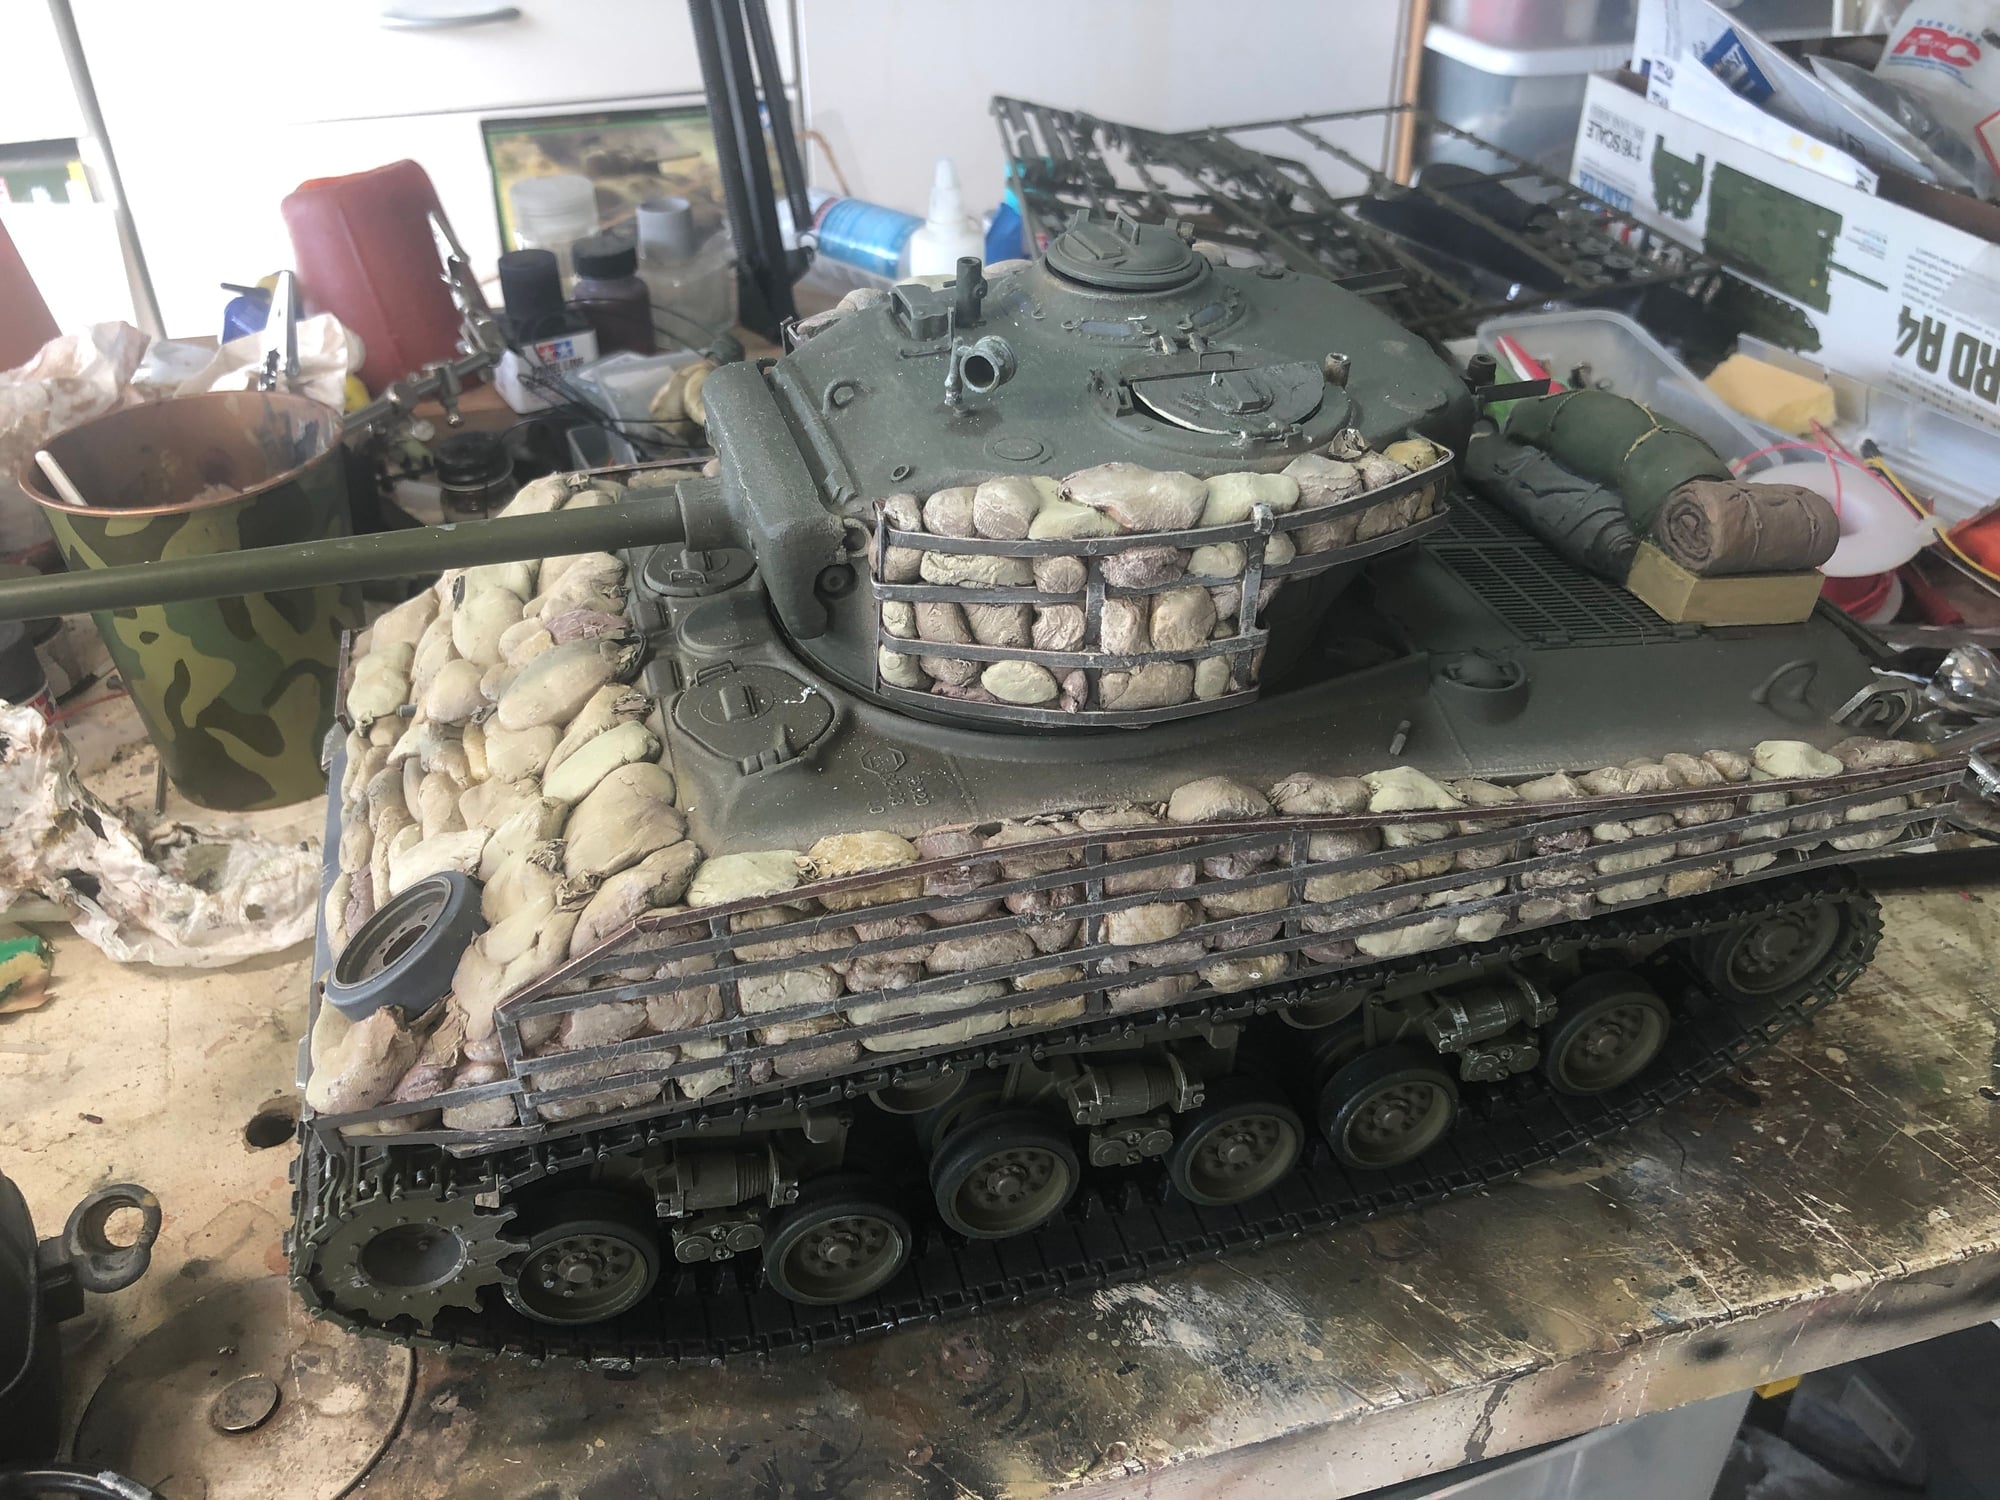
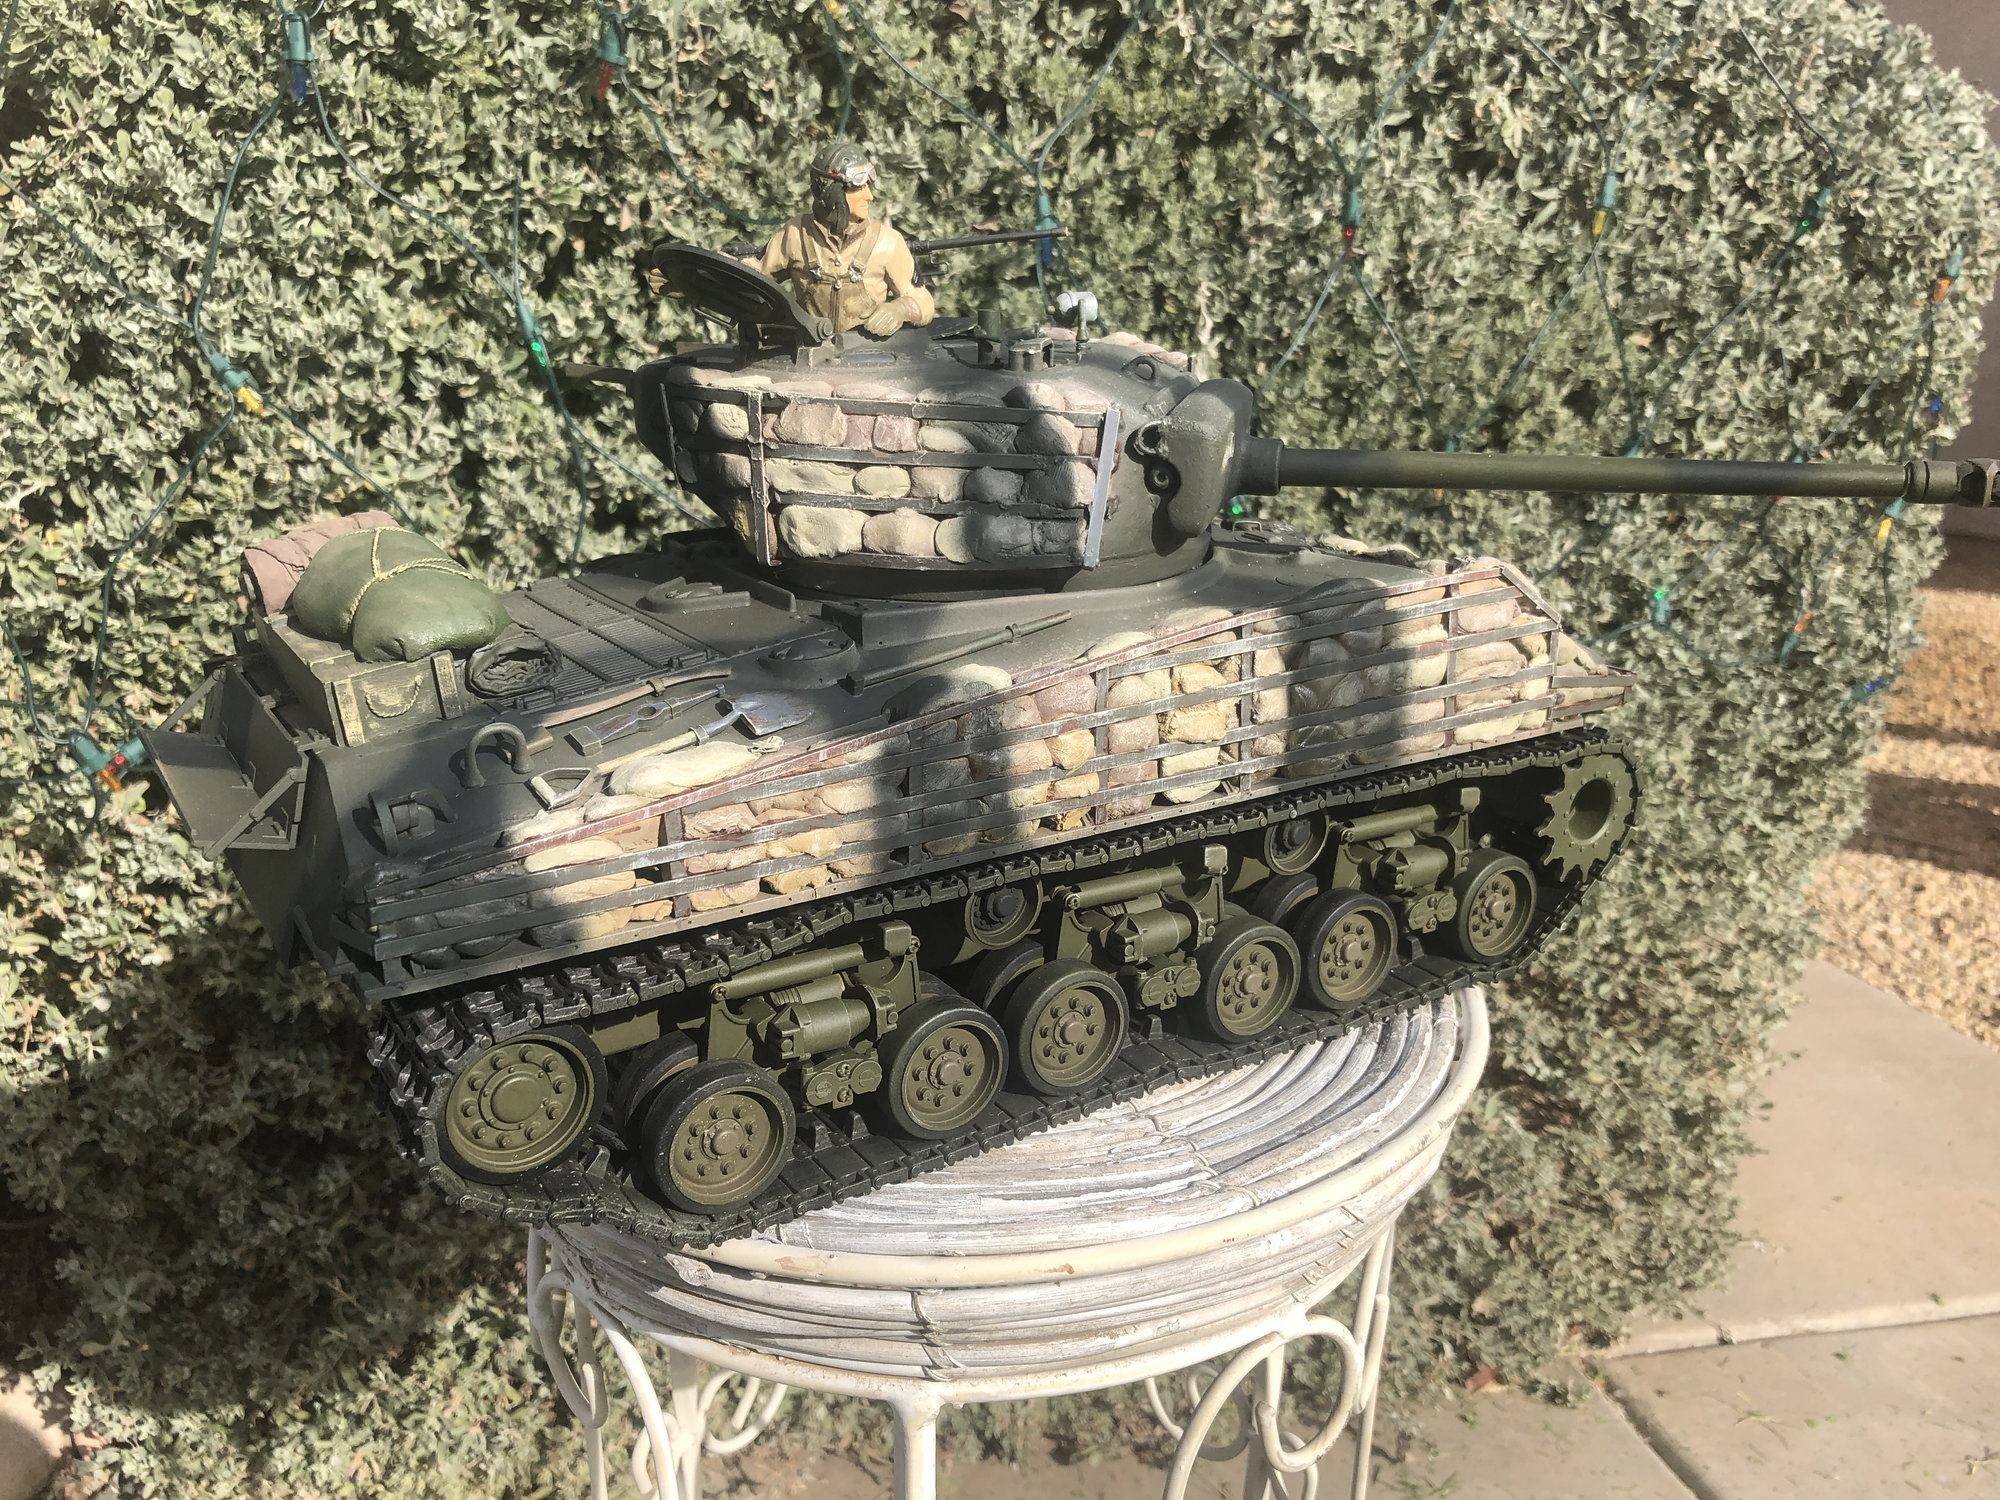
Foil is gonna stay as a backing and now the set is complete. Added some foil twists to simulate the bag openings. Thus upper parts are now a bit heavy as you may guess so it is time to beef up the the traverse and confirm my innards are still working! I transplanted a set of Pershing electronics from another shelf queen that cannot stop shedding tracks.....
11-21-2019, 03:58 PM
#7
Nice Sandbags!!!

 11-23-2019, 10:16 AM
#11
Review my theead on building my ez8 and you will see how i used a pershing or tiger bracket to mount my recoil unit and made a bracket that wraps around the rear curve of the turret as a stay bracket so the middle is open for the recoil to depress.
11-23-2019, 07:57 PM
#12
Great looking E8, my favorite version. I think the T-66 tracks really make it. The sandbags and brass rails look great, esp now that you added some of the extra details like bag ties. Once painted this will look great. I up-armored mine with plates cut from other tanks (AKA 11 Armd division) and changed out the MF and DMD to Pershing as well It will be one fantastic and unique looking Sherman.
Best regards,
Bob
Best regards,
Bob
11-25-2019, 07:14 PM
#13
Rich... No Worries on the recoil. This is my 5th T23 Turret (6 if you count the Jumbo) Each one has been done a little different and so far so good.
Bob. My very first tank was an "expedient Jumbo" 4th AD style. It was the first "DAK" Build on my website. After a few upgrades it still runs just fine!! http://www.desertarmor.com/DAK_PROJE...abana_Boy.html
Bob. My very first tank was an "expedient Jumbo" 4th AD style. It was the first "DAK" Build on my website. After a few upgrades it still runs just fine!! http://www.desertarmor.com/DAK_PROJE...abana_Boy.html
11-25-2019, 07:27 PM
#14
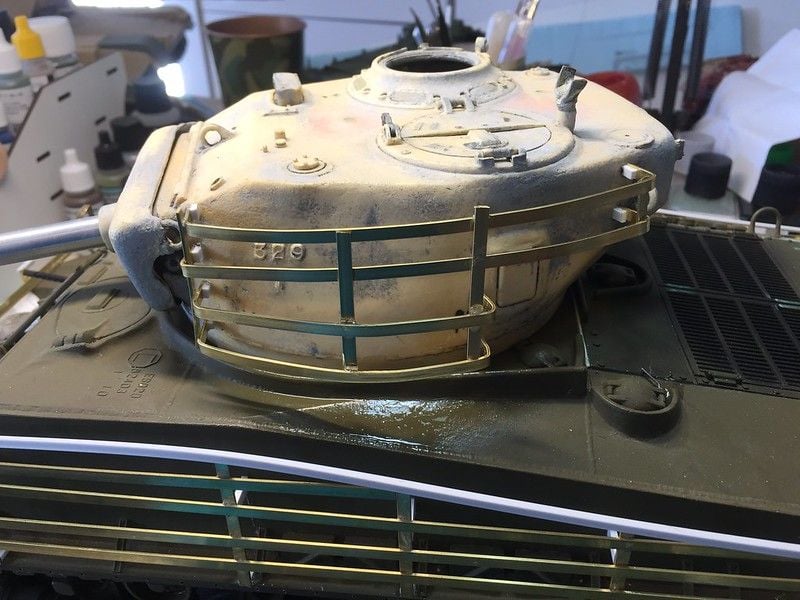
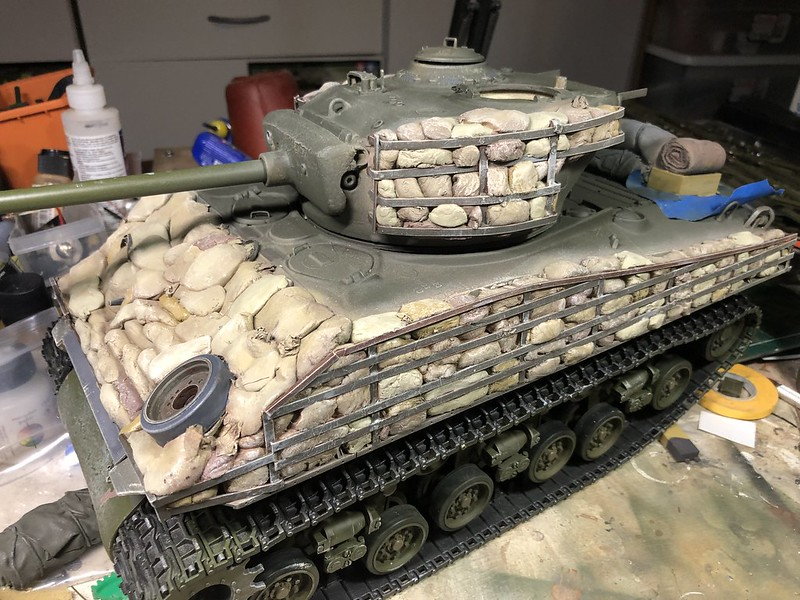
Pushed along and am at the Painting stage. Base coat is Rustoleum Camo Olive. It is a good Primer for the Brass, Plastic, Epoxy, Resin, and Foil. A little Dark for wartime OD but thats what airbrushes are for! Not to mention it dries pretty fast! Second color is Tamiya Earth Brown for the sandbag Base Coat. Then I did different bags in Deck Tan, Dark Yellow, Desert Yellow, and Buff. Next the racks got Flat Brown as the bar stock must have oxidized a bit. Most models I see have the racks tank painted base color but I doubt the tanks got that treatment. Oh Well, Khaki Drab painted over most of the bars.
Next comes a dry brushing with Mission Models Portland Stone. I started to detail some of the stowage and painted the spare Bogie.
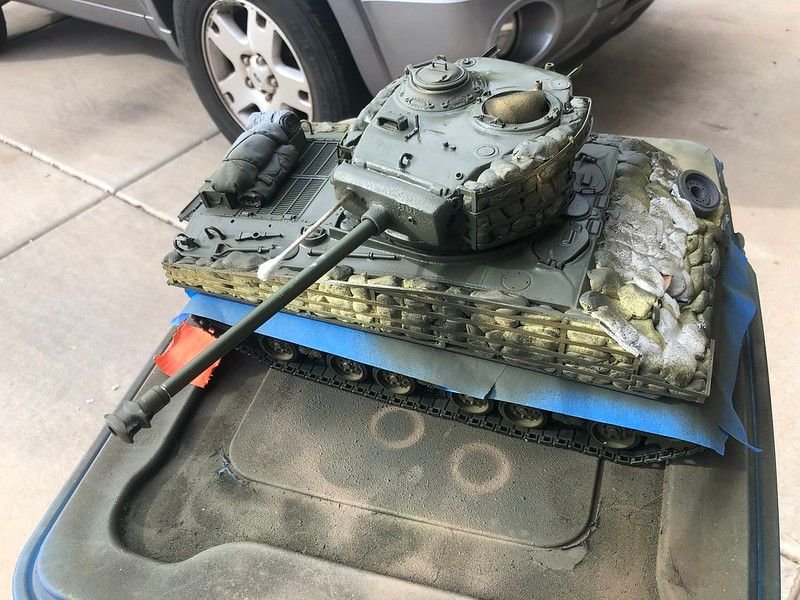
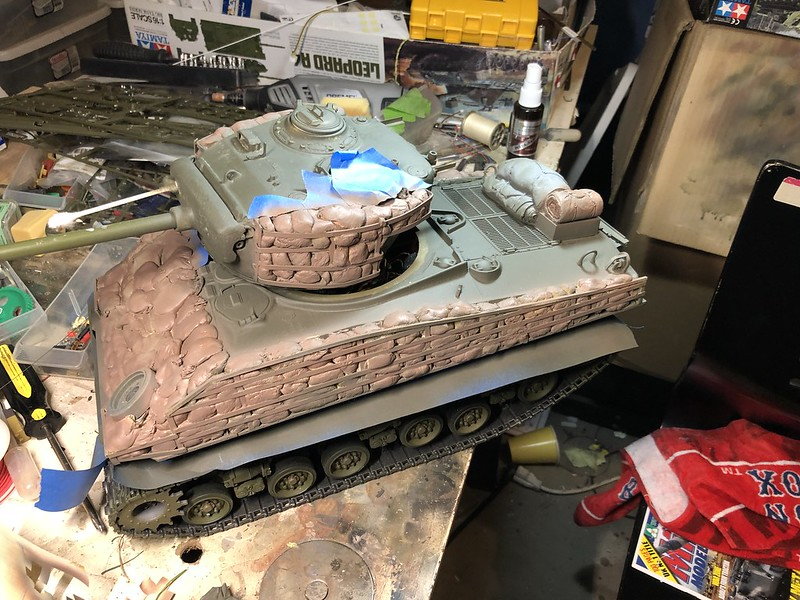

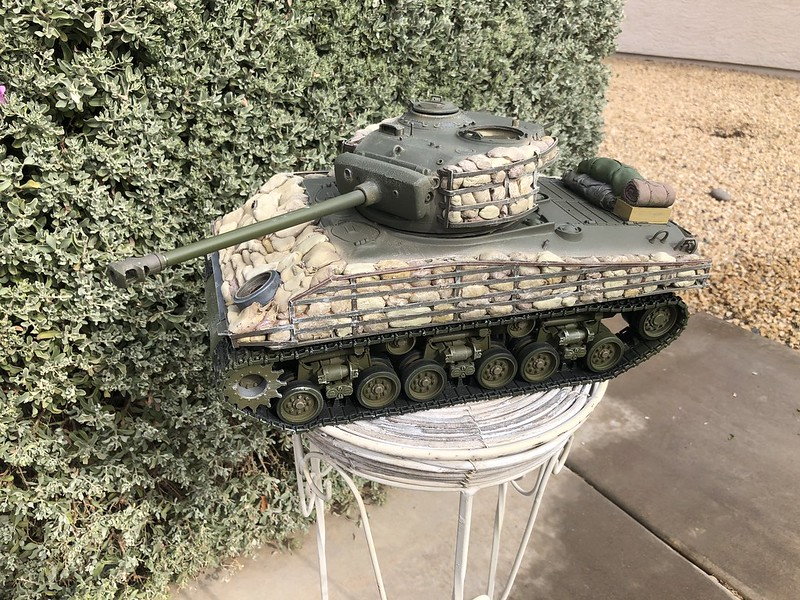
Next comes a dry brushing with Mission Models Portland Stone. I started to detail some of the stowage and painted the spare Bogie.
11-25-2019, 10:34 PM
#15
Looking great man. I love it. Makes me want to stop that wide monstrosity Im building and get back to my other ez8 project.... Or fix Katy Kat. Her elevation fell all apart bouncing around the desert training several a few weeks ago. Man I hate that tamiya elevation unit. Never using them again....
11-29-2019, 07:14 PM
#17
(A)
 12-04-2019, 09:12 PM
#22

I have a huge collection of books, many WWII veteran memoirs, tank reference books, division histories, etc. So one would think that is great to have all that info. I read this and immediately thought of photos from these many books to get a clearer idea of what you were asking. Then the problem became clear!
Which books? Too many to just flip through!
Can't just focus on the Sherman tank books because some photos may be in other references like division or campaign books. Keep in mind a "tank" photo will not always appear in a tank book, authors/editors/publishors will try and not "reuse" photos so if you don't have all the books you don't have all the photos!
So maybe post a sample of what you may use as a paint guide????
But if you already started ignore this post, LOL
12-05-2019, 11:36 AM
#23
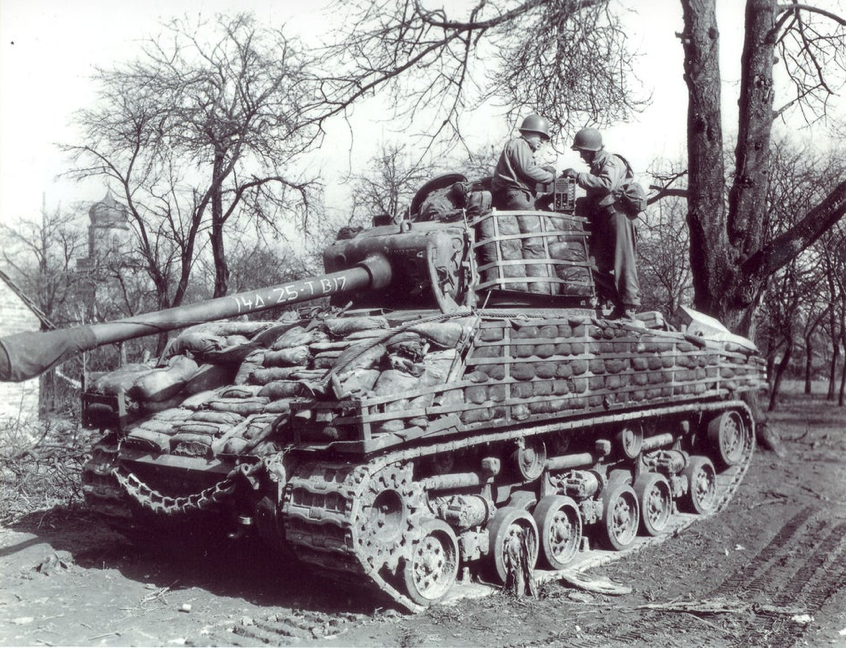
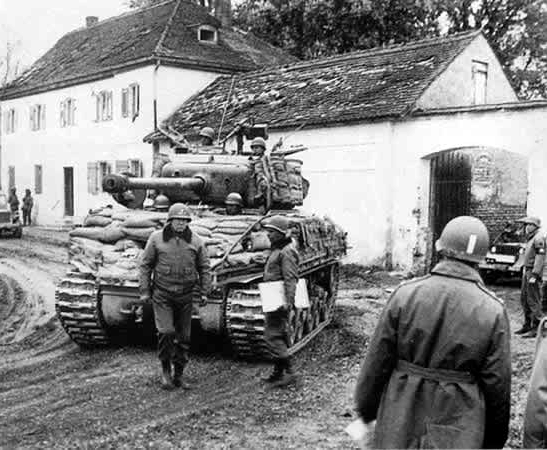
The images for this effort are pretty common in the books detailing Shermans in the late ETO campaign. The image of a sandbagged Easy 8 with the crew on the turret fixing the radio I have seen on the web and and in books for years and it the vehicle I have based all my work of of. The unit marking was transferred to the gun tube as all other surfaces were covered. Another common picture is of an M4A3(w)76 with VVSS being field applied with black bands from a sprayer. This is the direction I want to go and the point of my survey. The paint is being applied over everything, tools, stowage, bags, mud... My favorite is the notorious photo of Patton chewing out a Sherman crew with the sandbags applied as he personally took umbrage with the alleged suspension issues. Looking at the tank it doesn't appear the bands are there but I see a different shade across the right hand side of the mantlet....
My models origins.

Field paint application.
The man has no love...
My models origins.
Field paint application.
The man has no love...
 12-06-2019, 01:08 PM
#25
Looks good!